Haunted Castle Halloween Cake Recipe

Happy Halloween!

Today I’m sharing the Haunted Castle Halloween Cake we made this year.

The mold is from the princess party I threw the girls years ago. It’s the Nordic Ware Pro Cast Castle Bundt Pan. I’d kind of forgotten about it and we recently discovered it in the back of a cabinet.

Well, it’s October, right? So now it’s officially no longer a castle cake pan, but a HAUNTED castle cake pan!

But how should we go about it?

I had a hard time covering it with icing last time I used it, and besides, I wanted it spooky this time.

So I did some research and put together a pourable icing with a fudge-like consistency. AND I used Hershey’s Special Dark Cocoa Powder. The dark chocolate adds a great flavor, plus it makes it a darker color – almost black.

For the cake itself, I went with chocolate.

A regular box mix, ’cause hey – I don’t have time to make everything from scratch, amiright?

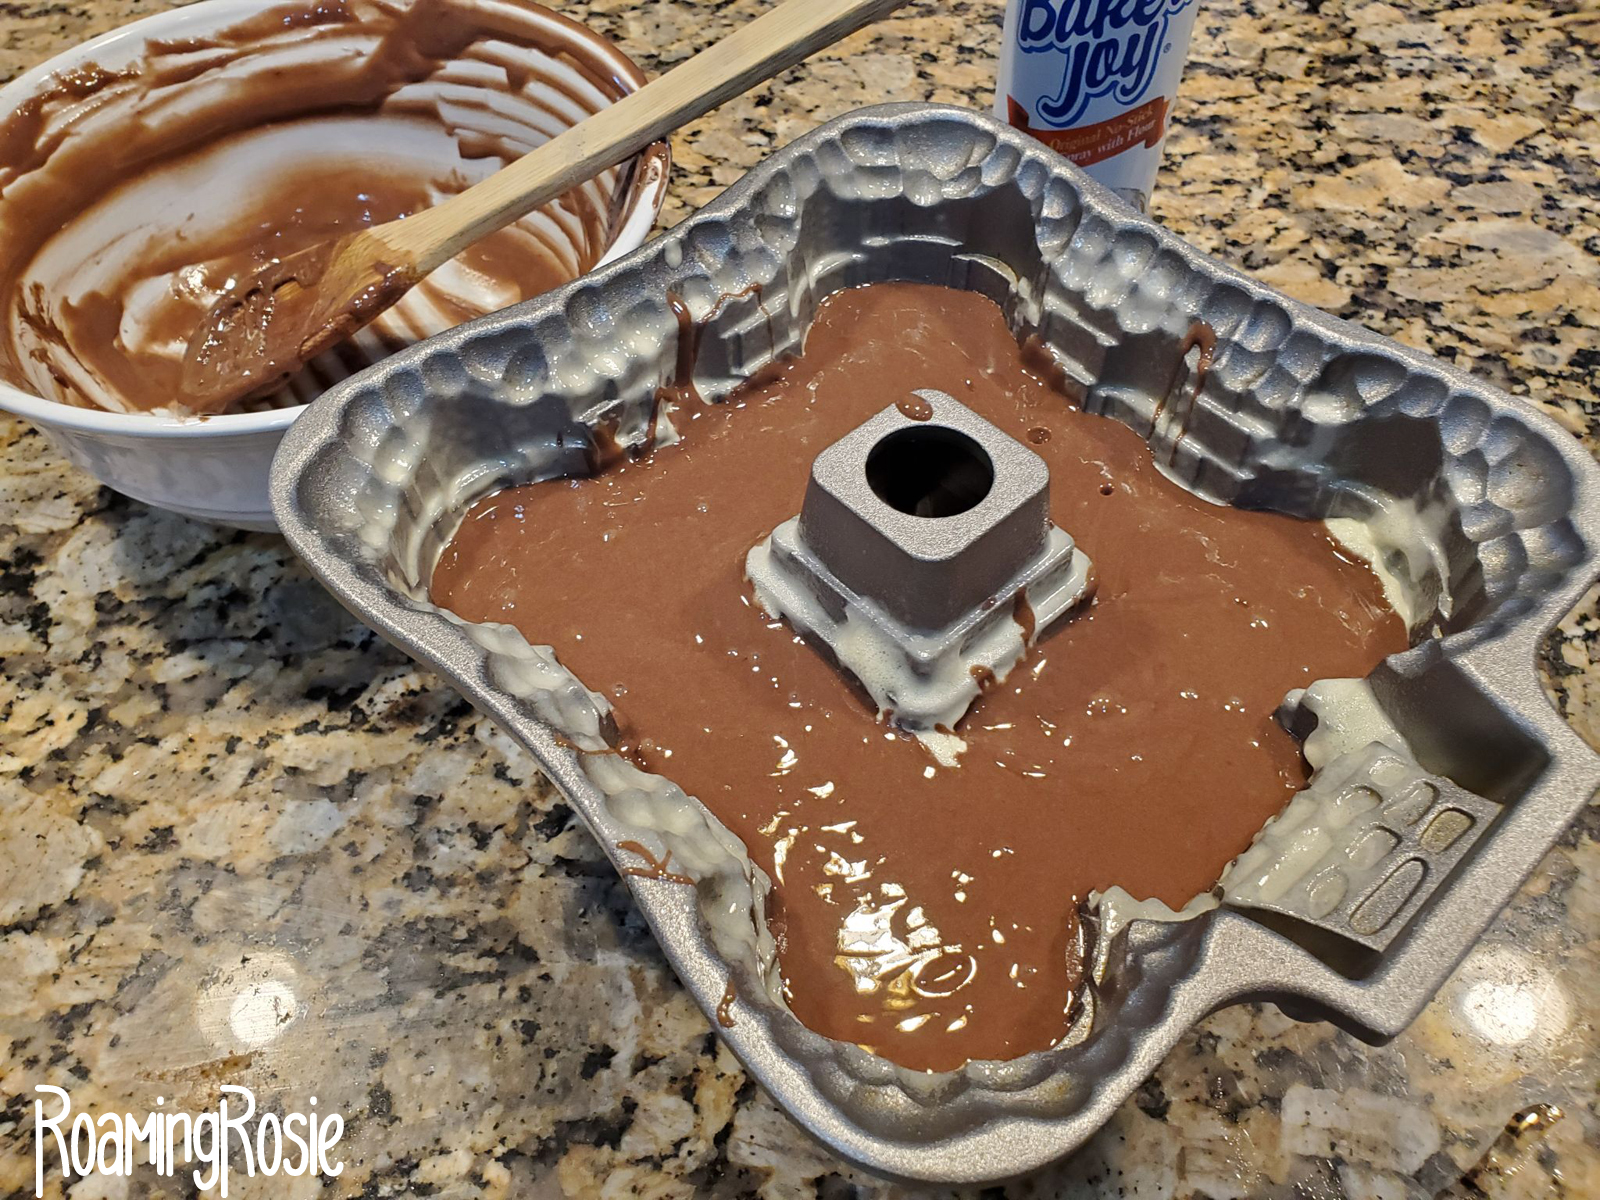
Just make sure you spray down the cake pan with a non-stick spray first.

Preferably one with flour already in it, like Baker’s Joy.

Following the directions on the box, we wound up with just enough from one box to almost fill the mold. Two boxes would have been way too much.

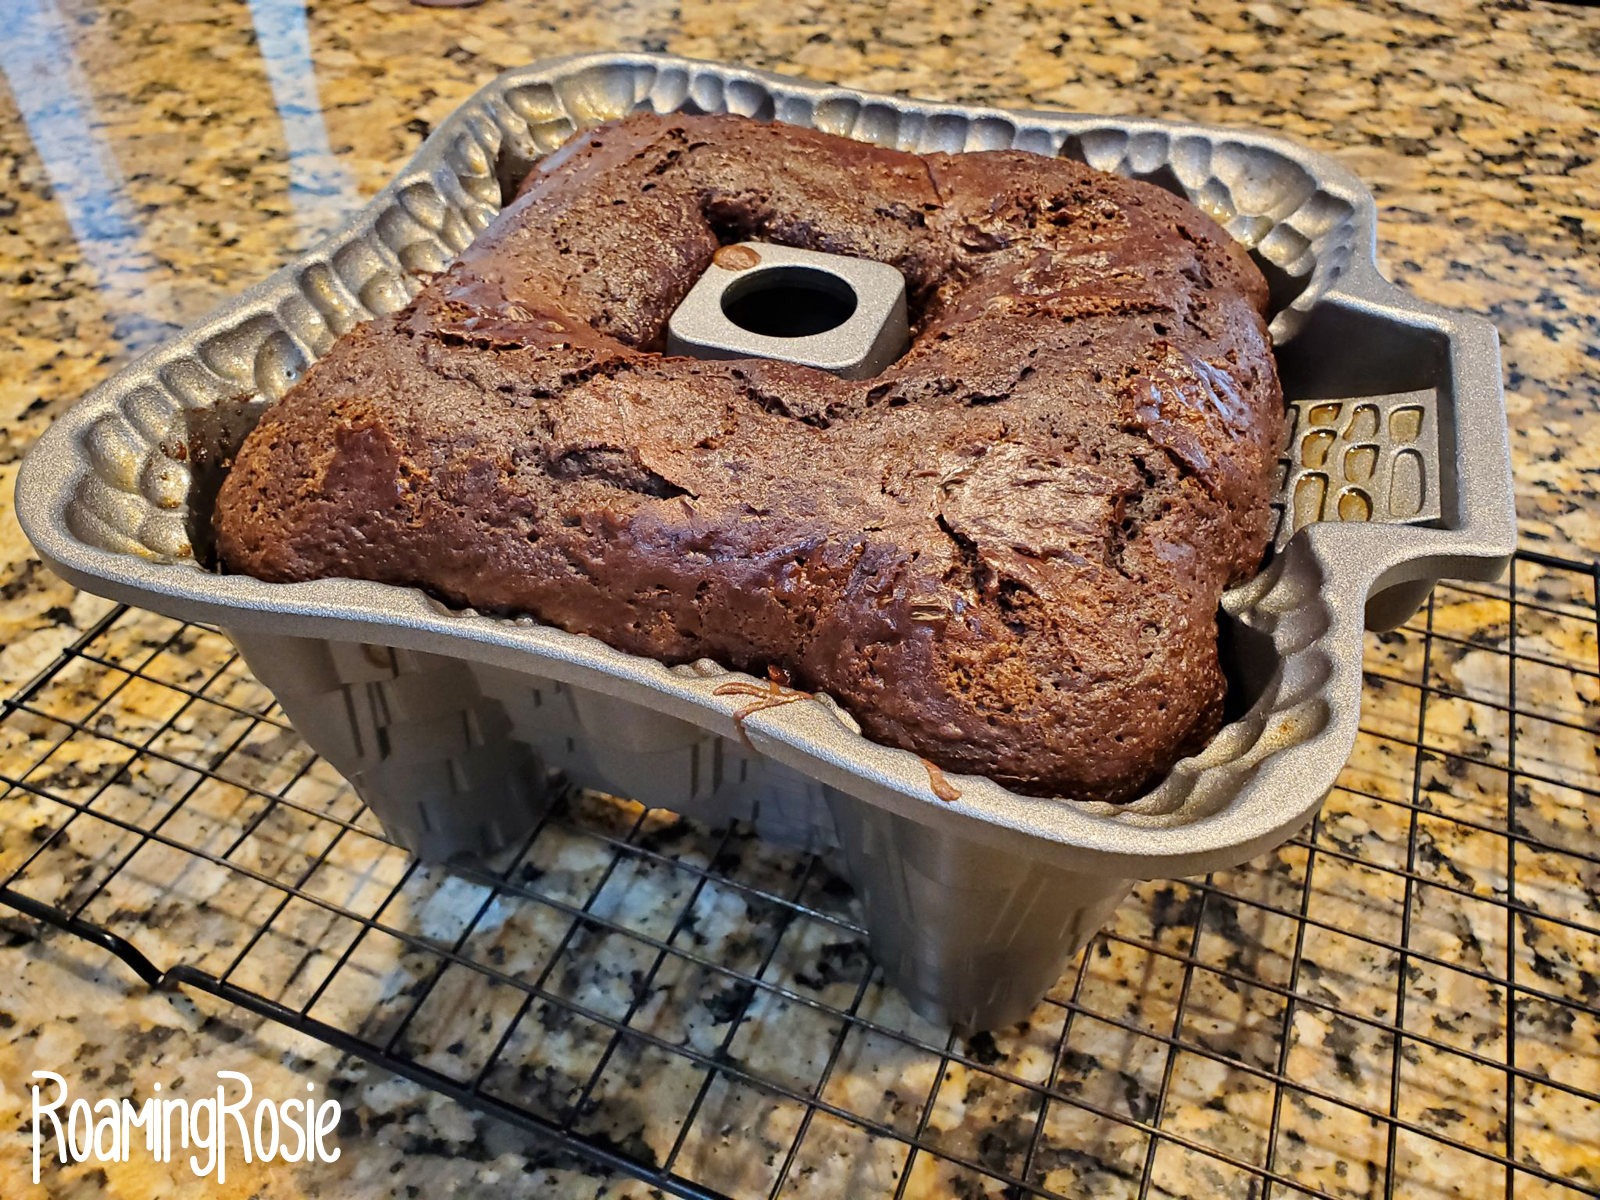
You can see that the cake batter rose plenty high enough.

True, we didn’t get the detail around the bottom, like that ramp up to the gate, but it was honestly not noticeable once the cake was turned upright.

After cooling in the pan for about 5 minutes, if you sprayed it well, it should pop out with minimal effort.

A bit of tapping and poof! Cake.

Sure, a few turrets suffered some damage, but overall it looks pretty darned nice to me.

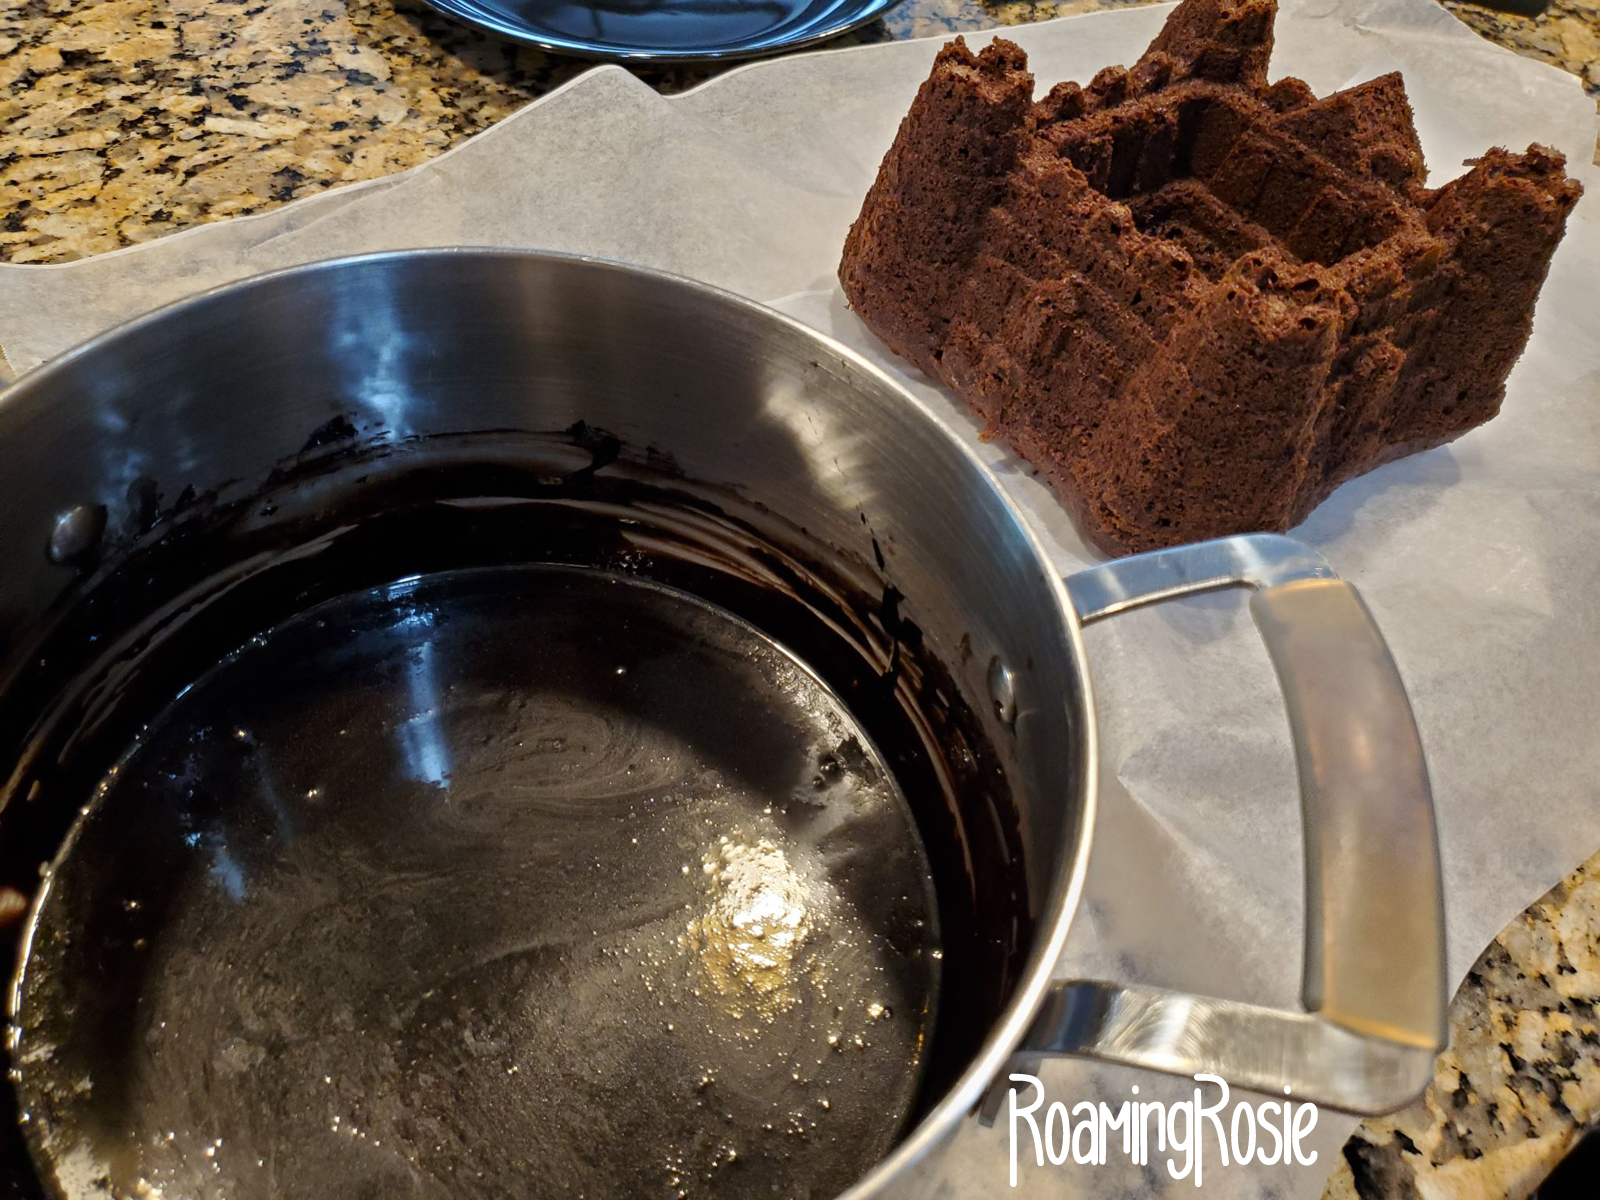
For the icing, we went with a pourable fudge sauce.

And like I mentioned above, the dark chocolate makes the most amazingly spooky color!

And my pot is pretty big. I made extra so we would have it, but there was a LOT left over. You can just follow the recipe and you’ll have plenty.

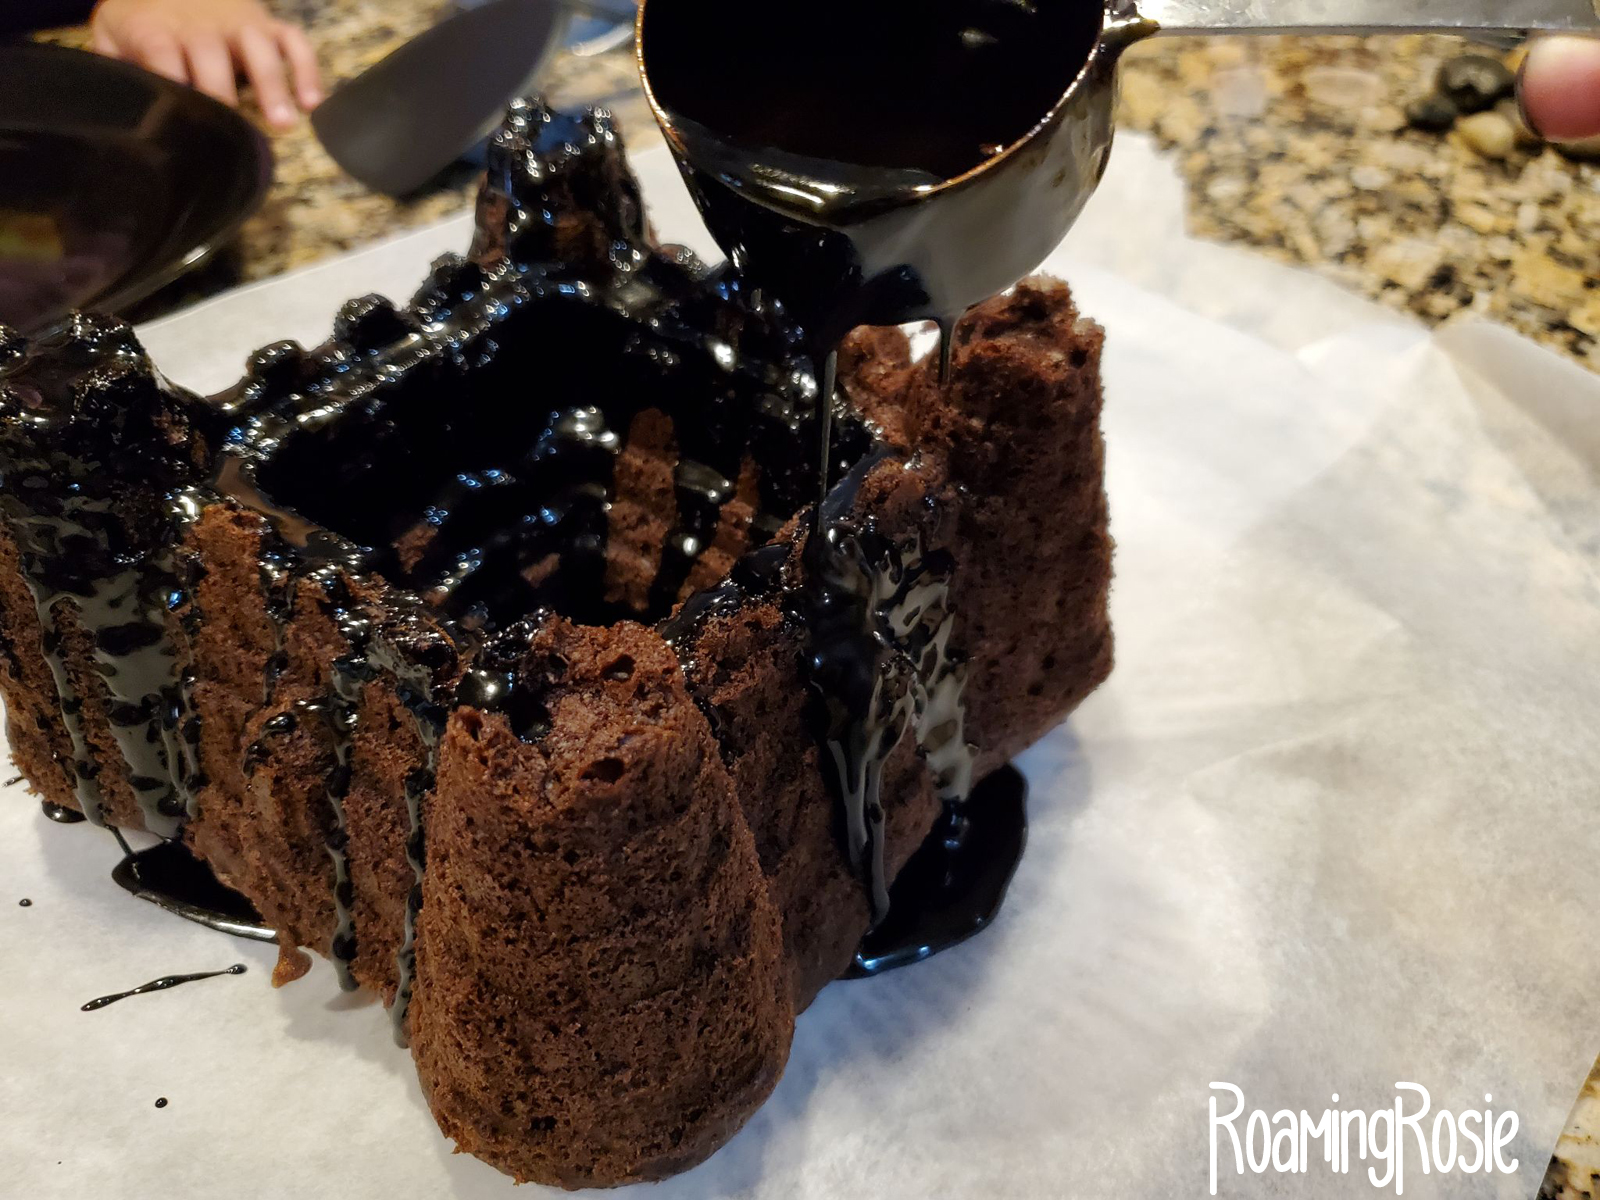
Use a small measuring cup or a spoon to drizzle the icing slowly over your dessert, stirring the icing from time to time. It does harden fairly quickly.

As you go, be sure to scoop the icing out of the center. It will pool there.

It’s best to drizzle it over waxed paper. Then, once the cake is fully coated, you can move it with two spatulas onto your serving platter.

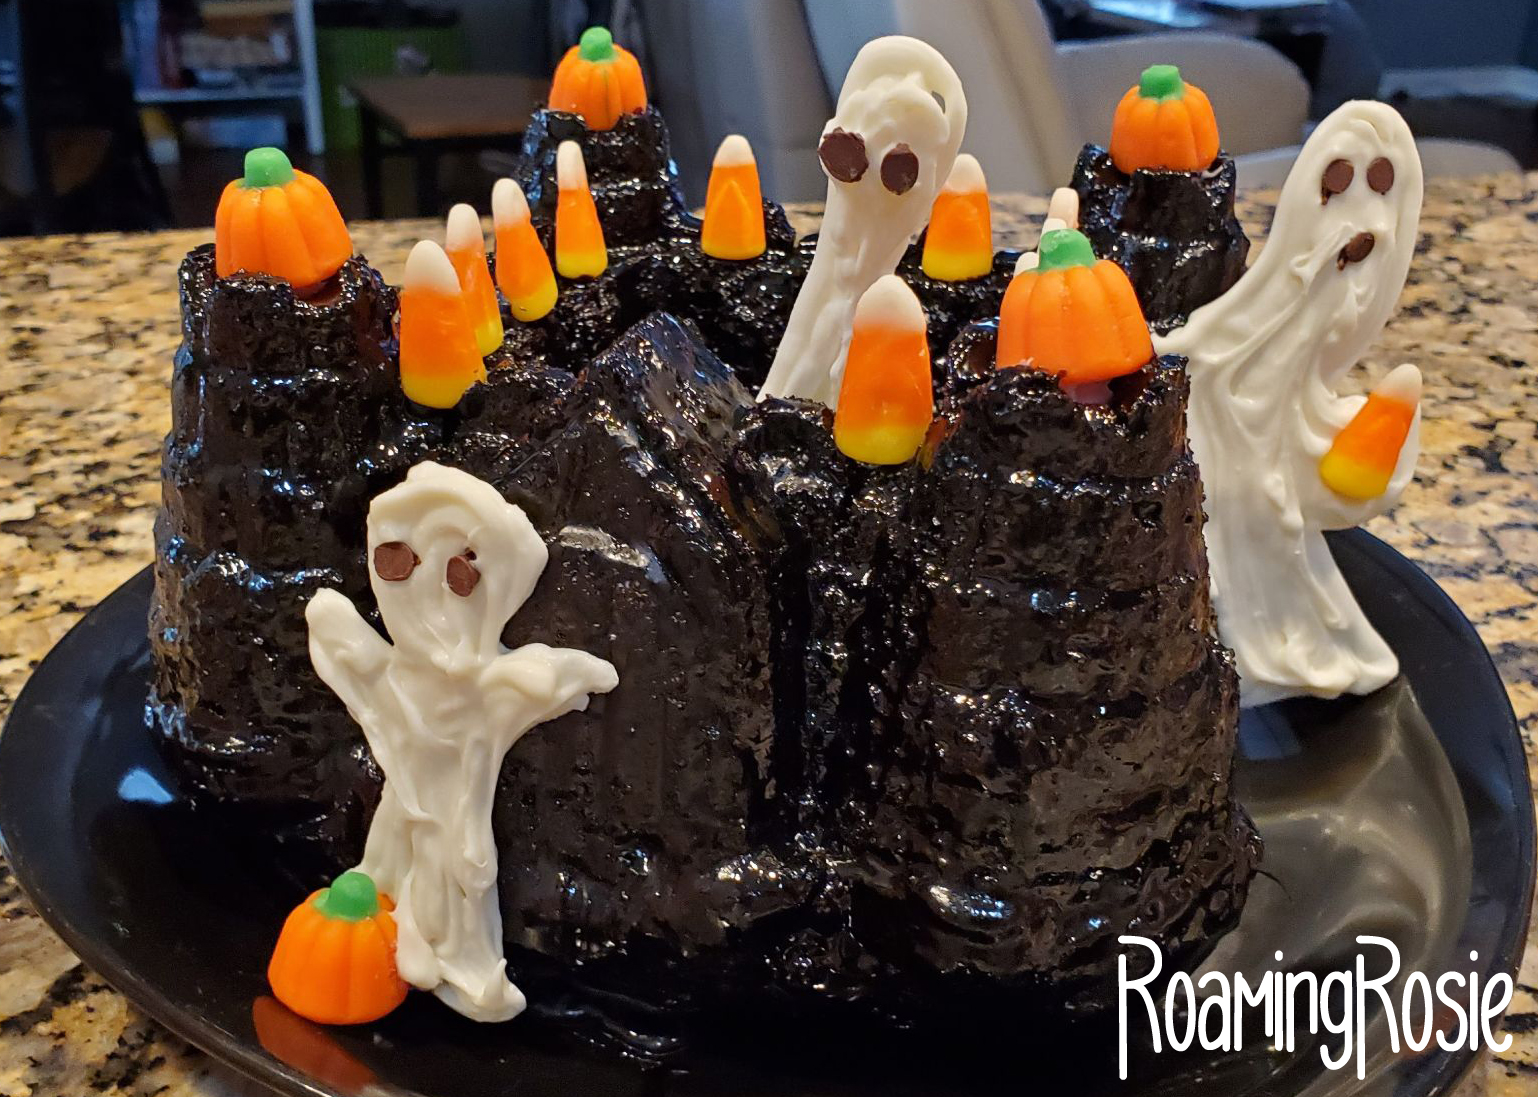
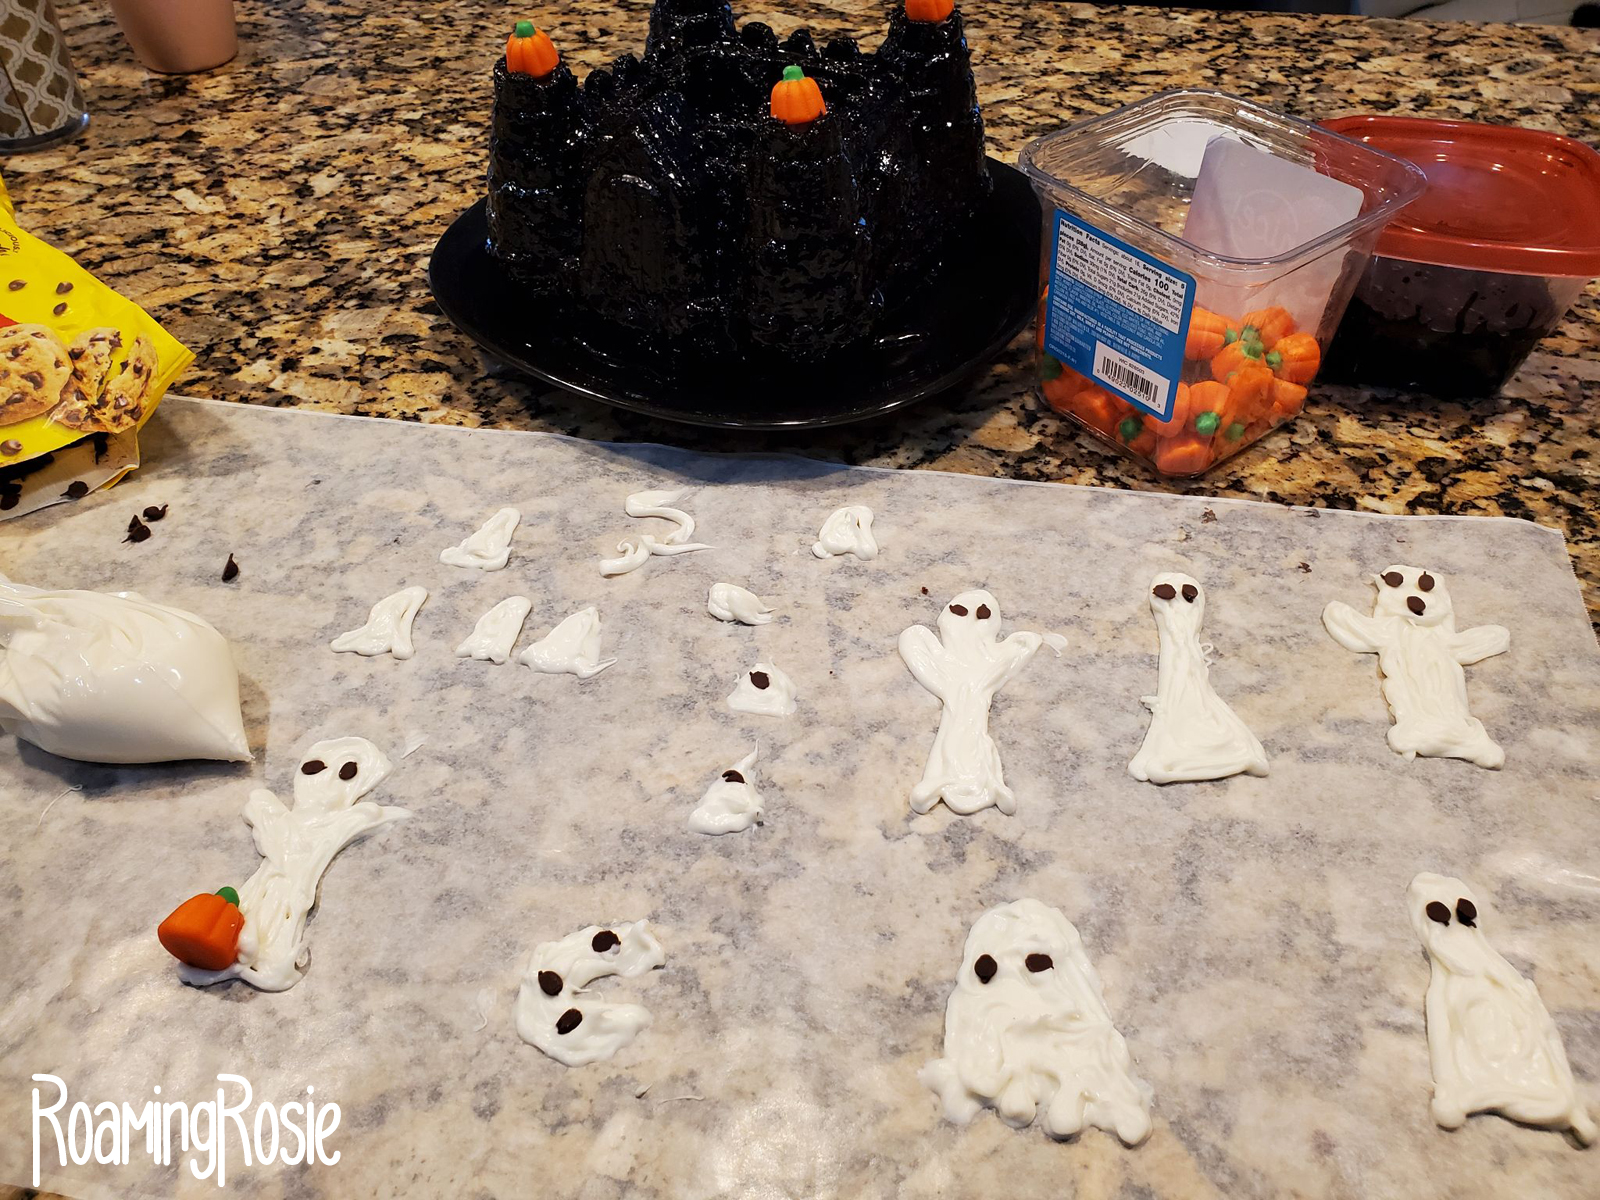
Our final step was decorating!

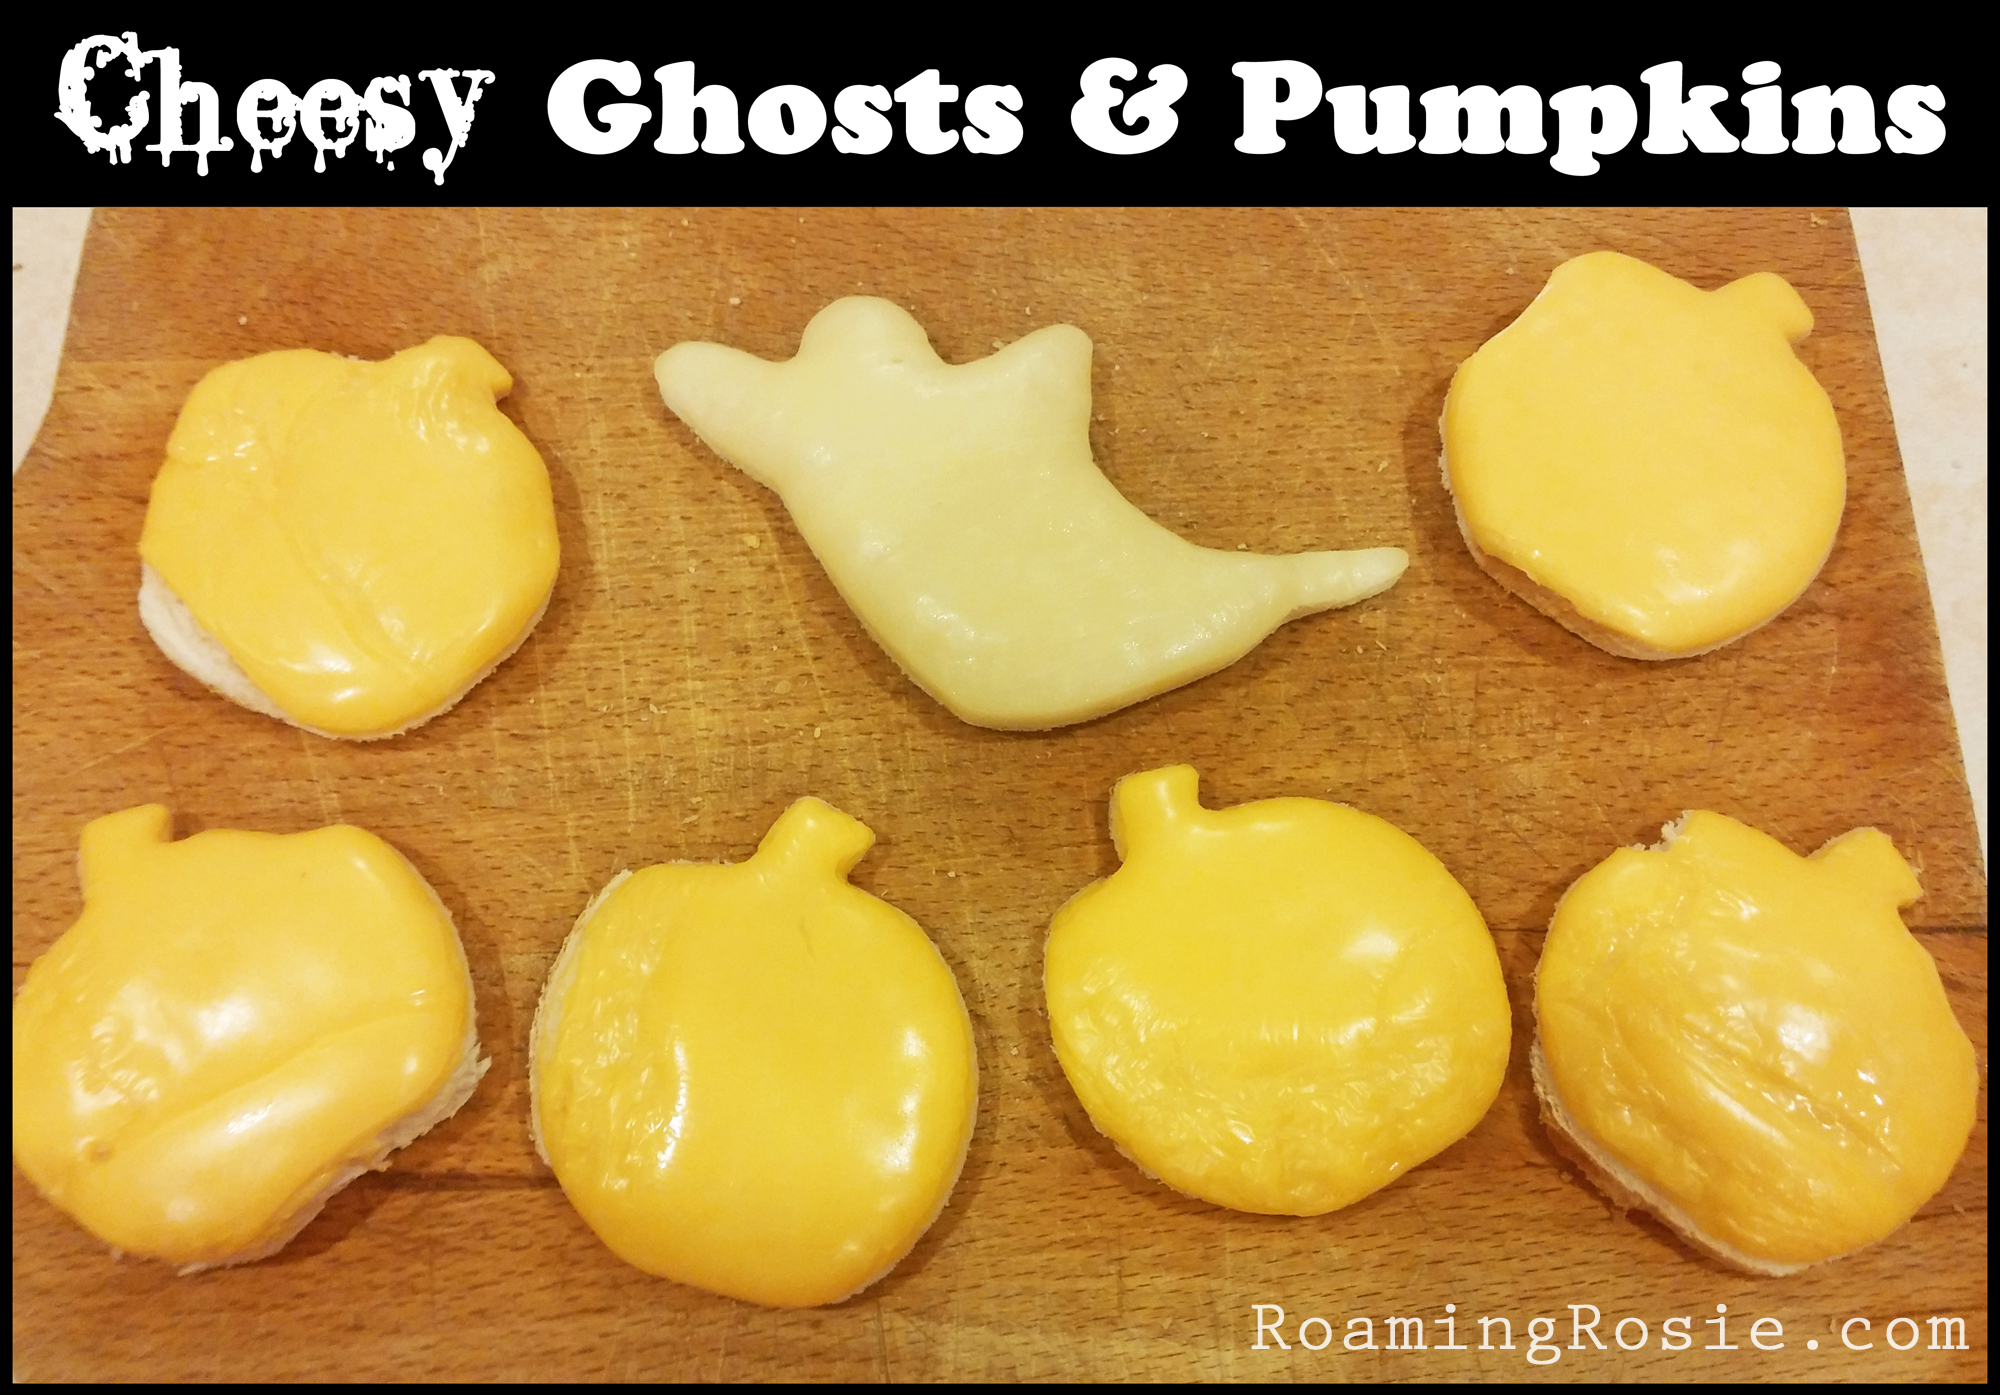
We drew some ghosts by hand with melted white candy melts and added miniature chocolate chips for eyes and mouths.

Those only take a few minutes to harden, then you can add them to the cake by squeezing some of the melted chocolate onto the cake to act as glue.

We also added some candy corn and Mellocreme pumpkins.

Here are the instructions for making the icing.

Make sure your cake is fully cooled before you try and decorate it.

Chocolate Fudge Pourable Icing

Ingredients:

1/4 cup butter

1/3 cup dark unsweetened cocoa powder

2 teaspoons vanilla extract

2 tablespoons butter

1/2 cup whole milk

3-1/2 cup powdered sugar

Directions:

Melt butter in pot on stove top. 

Once melted, whisk in cocoa, vanilla, and milk. 

Add in a small scoop of powdered sugar at a time, until you’ve added it all.  Be sure to whisk while adding the sugar.

Remove pot from heat.  Keep whisking until smooth. 

Slowly pour icing over cake or other dessert with a spoon or small measuring cup. 

You can download the PDF of the recipe here:

(The arrows on the top right will offer you more options if you don’t see the “print” button. There is also a “download” button beneath the document.)

Store the cake covered. It will taste best if eaten within a few days. The extra icing will keep in the refrigerator for a couple weeks.

If you make a Haunted Castle cake of your own, please share with me on my Facebook page!

Happy Baking!

Halloween Spider’s Eggs Brownies

Roaming Rosie Halloween Spiders Eggs Brownies

This is the type of Halloween dessert I love – satisfyingly spooky but quick to put together. Because let’s face it, I make a lot of Halloween-themed meals all month long, and I can’t spend hours and hours on each one!

These Spider’s Eggs Brownies were constructed with an easy shopping list and can be made ahead of time. In this case, I brought these brownies to a potluck. They’re really easy to travel with (don’t forget something to cut them!) but you could always make them in a more permanent pan just as easily.

Here’s the shopping list:

1 box brownie mix (plus ingredients listed on box)
1 cup white chocolate chips
1 tube white cookie icing
1/4 cup sugar pearls
1 package Halloween toy spider rings
1 disposable foil cake pan (optional)

(These items should be readily available in your local grocery/big box/dollar store around Halloween, but if they’re not, try the links posted above.)

As you can see from the photos above, I wanted to fill these brownies full of delicious spider eggs! Mixing in those white chocolate chips really helps to highlight this.

Instructions:

  1. Make the brownies according to the instructions on the box.
  2. Mix the white chocolate chips into the batter.
  3. Pour batter into pan of choice and bake according to instructions on the box.
  4. Allow cooked brownies to cool completely.
  5. Draw a spider web on top of cooled brownies with cookie icing.
  6. Before icing dries, sprinkle sugar pearls over the icing so they stick.
  7. Add in a few spider rings by pressing them into the top.
  8. Freak out your friends and coworkers!

I’ve found brownies to be a pretty safe bet for satisfying the greatest amount of people at a party. I do have a tried-and-true homemade brownie recipe, but if I’m in a rush, I mix a few chocolate chips into a box mix.

And, if it’s Halloween, I spookify it.

Share some of your brownie creations with me on Facebook!

Happy Baking!

Spiderweb Cinnamon Rolls

spiderweb cinnamon rolls

This is one of those recipes that’s so stinkin’ cute but also super easy.

Halloween is a time of year when we eat a lot of “fun” foods.

(Yeah I said “time of year.”  It ain’t just a single day in this family – we celebrate for at least a month … but I’m always up for something spooky.)

So I like to spruce up meals and snacks when I can.  Which means some are quite elaborate and others… well, are like this!

This dish that has essentially two ingredients:  a can of cinnamon rolls and a bag of chocolate chips.

spiderweb cinnamon rolls 2

To get this platter of spookiness, bake the cinnamon rolls according to package directions and place the finished rolls in a circle on a plate.

Melt some candy melts or chocolate chips.  Candy melts are smoother but I didn’t have any on hand.  If you melt the chocolate chips in the microwave, do it at half power 30 seconds at a time.

Put the melted chocolate into a piping bag or a baggie with the corner cut off, and squeeeze out the chocolate into a big and little circle for a spider’s body, along with eight legs, onto one of the rolls.

Then draw a web over the rest.  I did this with the straight lines first and then spiraled around to make it look like a web. And don’t worry if it doesn’t look perfect – it’ll be gobbled up soon anyway!

Happy Early Halloween!

Roaming Rosie Signature

Jack Skellington Rice Krispies Treats

I love me some Nightmare Before Christmas.

So Jack Skellington recipes are kind of a given.  This Halloween treat is made with a Rice Krispies base and decorated with candy melts.  The pattern in black and white is striking and it really pops on a platter.

It’s a fun project to make, with (or even without) kids.

To start, make a batch of Original Rice Krispies Treats (links to recipe from Kellogg’s site). I often throw in a splash of vanilla extract to the melted marshmallow mixture for a nice touch of extra flavor.

Once you have your pile of sticky cereal, spread it out on a large pan or cookie sheet that’s been prepped with non-stick spray.  Flatten it with your fingers (spraying them with non-stick as well) until it’s as smooth as you can get it.

Then cut out circles with round cookie cutters like these or these, or whatever else you have lying around.

Dip the circles in a shallow bowl of melted white candy melts, and shake them a bit to make sure the candy isn’t too thick before you set it back down to set.  I recommend doing all this on top of waxed or parchment paper.

Instead of the white candy melts, you could also use an icing like this one that I made for my Chocolate Almond Mummy Cookies.

Next, melt some black (or dark chocolate) candy melts in a piping bag (or a baggie with the corner snipped) and draw on those smiling faces.

It’s great because the faces are easy to make.  A couple of large eyes, small nose dots, and a string with lines for teeth and voila!

jack skellington rice krispie treats 3

This was the display I brought into work.  I loved the way the Jack Skellington faces stood out.  Actually all of the treats pop – even in the recycled take out containers!

Yummy AND cute!

The spiderwebs on the right are tiny Peppermint Patties.  You can see the larger version of them that I did on this post.  Another super simple recipe that makes a big visual impact – my fave.

And for the pumpkins in the middle, I tried out something new for my kids.  Specifically the youngest who is obsessed with Nutella.

I took some silicone pumpkin molds (not really sure which store I picked them up at) and coated the inside of the mold with some melted orange candy melts.  Once that set, I put a tiny scoop of Nutella into the center of the mold, then drizzed more of the orange candy melts over to cover the Nutella.

The pumpkins took a little more time and effort to get right, but were definitely worth a try.  Plus, they’re filling so a few go far in a party setting.

jack skellington rice krispie treats 2

Sooo much sweetness in this post!

I love it though.

Of course, this is also why I make so many savory Halloween dishes – to balance out the sugar!

I’m not sure what Halloween is going to look like this year, when it comes to trick-or-treating or parties, but I sure know one thing:  we’ll have some eerily festive food.  ;)

Follow me on Pinterest for more recipes!

Happy Early Halloween!

Roaming Rosie Signature

Cheesy Ghosts and Pumpkins … aaand I’m Back!

Halloween Cheesy Ghosts and Pumpkins open faced sandwiches

So I took a look at when I last published a post on this blog and … *gasp* it’s been HOW long?

Well, my attempt at balancing work and kids and going back to school for my masters and planning a wedding all at the same time did not work out as planned.  And things got even more complicated this past spring when we all went into lock down and I was both working from home and home schooling my girls.

I still access this blog all the time, especially for recipes.  And heaven knows I’ve never stopped taking pictures of what my girls and I get up to.

But with the craziness that’s surrounding us all right now, I’ve decided to start writing again.  There aren’t suddenly more hours in the day, but I miss doing this.  Plus, it calms my anxiety (extra important in these stressful times!) and, hey, I love sharing food with you guys.

Halloween is practically around the corner – it IS August after all.  So I’m going to start by sharing Halloween recipes and ideas.

https://static.catsoncatnip.co/images/rwXkWuJxaqSj_700.jpg

This recipe here is for an age-old favorite of mine:  open faced cheese sandwiches.

These are so much fun.  And in the fall especially, my girls wind up getting some variation of these for lunch quite a bit.

Cheese and bread make a great base for a lunch since they go with so many different sides.  I can throw these on a plate with pretty much whatever fruit is on hand and it works.

Halloween Cheesy Ghosts and Pumpkins open faced sandwiches


For the pumpkins and ghosts pictured above, I used yellow American cheese and white Provolone.  You could also substitute another white cheese like Swiss, Mozzarella, white Cheddar or Monterey Jack, depending on your family’s favorites.

I placed the cheese slices on the bread and microwaved it for about 8 or 10 seconds, just until the cheese started to melt.  This makes sure it doesn’t fall apart in their lunchboxes.  You could also try warming it in a toaster oven instead – just keep an eye on them so they don’t burn.

I personally like mine with crispy half-burnt cheese, but well, these aren’t for me…

Once the cheese is melted to the bread, simply use cookie cutters to cut out the shapes.  I can’t remember the brand of cutters I have, but they are similar to these and these.

I was able to get two pumpkins out of one slice with the size cookie cutters I have.  And, really, I often just save the scraps to eat as part of my own lunches.  Or, you know, midnight snack.  If they make it till midnight.

You could also use them as cheesy croutons in tomato soup.  If yours last longer than mine…

Here is a similar way I like to change it up:  Jack O Lantern Cheesy Bread

Follow my Halloween Pinterest Board for more ideas!

Happy Early Halloween :)

Roaming Rosie Signature

Graveyard Brownie Halloween Cupcakes

Graveyard Brownie Halloween Cupcakes

These Graveyard Brownie Cupcakes are SO MUCH FUN to make (and eat!) and very, very rich.

If you’re a chocolate lover, then you need to try these!

To make them a little less decadent, you could make regular cupcakes in place of the brownie base, and even try a milder flavor like yellow cake dyed orange.

But I was in need of some heavy-duty chocolate.  This hit the spot.

graveyard-brownie-halloween-cupcakes-2

The first thing I did was make some of my Chocolate Covered Marshmallow Pumpkins with my girls.  We made them the day before.

Then we melted some white candy melts to make the chocolate bones using this skeleton mold from Wilton.

We crushed up a handful of Oreo cookies in a plastic bag for our graveyard “dirt,” and we baked up some box brownies according to the package directions.

I’d thought about making the brownies in a big pan to construct a large graveyard scene, but then switched to the cupcake idea.

I was going to use regular cupcake lines and write RIP in icing on some Milano cookies for the gravestones, but then I found these cute graveyard cupcake liners that come with their own paper gravestones on toothpicks.  I happened upon them at Walmart, but there are similar products online and at other stores, too.

graveyard-brownie-halloween-cupcakes-3

We let the brownies cool completely, then iced them with chocolate icing.

We pressed in the graveyard picks and some pumpkins and bones into the icing, before sprinkling over a little of the Oreo dirt.  (If you sprinkle the cookie crumbs first, the chocolate pieces won’t stick into the icing.)

Then we savored the festively decedent chocolate culinary celebrations.

I recommend you share them, and not attempt to eat 18 thick piles of chocolate all by yourself.  Because:  wow.  ;)

Graveyard Brownie Halloween Cupcakes

Happy Halloween Baking!

Roaming Rosie Signature

Save

Spider Web Peppermint Patties

spider-web-halloween-peppermint-patties-1

I am enchanted by these Spider Web Peppermint Patties!

Seriously easy and super cute Halloween treats are my favorite.  Like my Vampire Donuts or Oreo Ghosts or Jack O’ Lantern Cinnamon Buns.

And these are in that vein.  (Is that a Halloween pun??)

Candy plus icing, and done.

I used peppermint extract to flavor the icing, which was nice with the peppermint candy, but you could also use vanilla.

Spider Web Halloween Peppermint Patties

I made icing with a scoop of powdered sugar, a sprinkle of meringue powder, a dash of peppermint extract, and a splash of water.

(You can see the actual recipe on my Chocolate Almond Mummy Cookies, but here I used peppermint extract instead of almond.)

I put the icing in a baggy, snipped off the end, and drew the webs with the icing on top of the York Peppermint Patties.  I drew an asterisk, then made a swishy circle in the shape of a spider web.

I lost the plastic spider-shaped rings I thought I had, which would have looked cute in the photos, but the candy still looked good.  And the kids were super happy!

Happy Halloween Snacking!

Roaming Rosie Signature

Glitter Glue Pumpkins

Glitter Glue Pumpkins 1

Last Fall, my daughters and I bought a variety of pumpkins and went at them armed with glue, glitter glue, and lots and lots of glitter!

(And one of these years, since it IS spring as I write this, I’ll maybe actually remember to try this with Easter eggs…)

The pumpkins in the background resemble some of our past pumpkin decorating efforts.

But this year I changed it up just a little and decorated a couple of the mini pumpkins with nothing but silver and gold glitter glue.

I started at the center of the top of the pumpkin, slowly pouring out the glitter glue in a tight circle around the stem.  I did a gold circle, then a silver one, then gold, et cetera, keeping the circles tight and touching each other until I had the entire top of the pumpkin covered in a thick layer of glitter glue and it was just barely starting to drip down the sides in the creases.

Glitter Glue Pumpkins 2

That’s it!  Just drew circles with the glue.

And look how pretty!

Please share your pumpkin photos with me on my Facebook page!

Happy Crafting!

Roaming Rosie Signature

Construction Paper Mummies Halloween Craft

Halloween Construction Paper Mummy 1

Another project we had some fun with around Halloween was making some Construction Paper Mummies.

These were great for letting the girls get creative with patterns.

Halloween Construction Paper Mummy 2

While they were in school I cut out some basic body shapes out of black paper and some strips of white paper that were only about as wide as the body.

You could also let your kids do this part, if you prefer.

Halloween Construction Paper Mummy 3

Then I just handed over some glue and some googly eyes and let them go to town.

We did it on an opened Whole Foods bag, to keep the extra glue off the floor.  And they used their scissors to trim down some of the white strips too.

Halloween Construction Paper Mummy 4

My girls also decided they’d like to color the mummies, so we pulled out some colored pencils.

Ignore the golf ball, tho.  I don’t know how that ended up there.  :)

Happy Crafting!

Roaming Rosie Signature

Vampire /Monster Teeth Doughnuts for Halloween

Vampire Monster Donuts.jpg

These Vampire Donuts were the biggest hit of our last Halloween season.

I always do a lot of crafts and recipes with my girls during Halloween, as it’s my second fave holiday (following quite closely on the heels of Christmas).  But these right here?  Totally made it to the top of the list of awesomeness.

And how incredibly ridiculously EASY???

Seriously.  I went and picked up a dollar bag full of vampire teeth and stuck them in some glazed donuts from Publix.

I had to push open the holes a little to make the teeth fit, but that was no big deal.

You could mix it up with some chocolate or autumn-flavored (apple or pumpkin spice anybody??) donuts instead, and you could dress it up by adding a little red gel icing to look like blood dripping from the fangs too.

But I’m a big fan of sweet and simple.  :)

Share some pics if you try it!

Roaming Rosie Signature