A Collection of Christmas Crafts!

Welcome to my blog!

Here is a list of different crafts my kids and I have done during the winter holidays. Some are just for fun, and some make great homemade gifts!

Plus I snuck in a couple of edible ones…

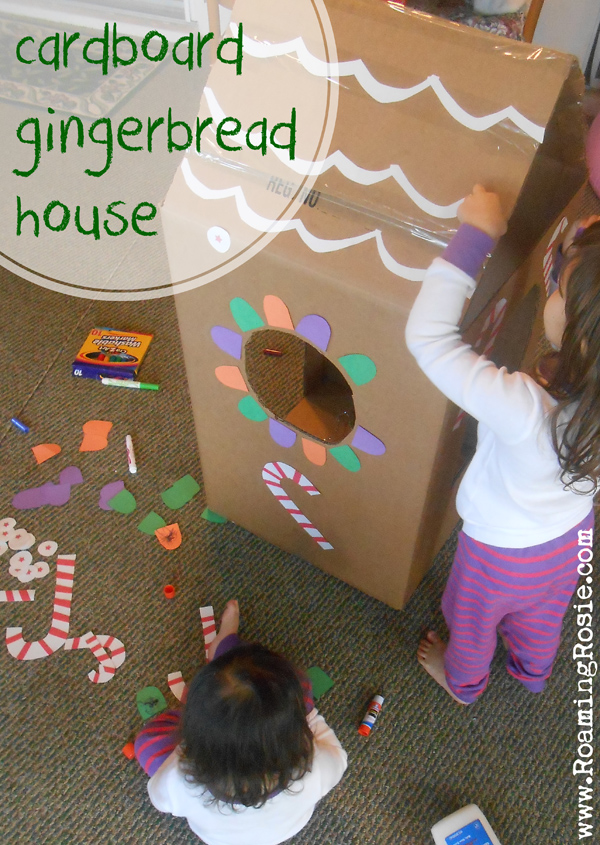
This Life-sized Cardboard Gingerbread House will always be one of my favorites!

This Felt Fashion Christmas Tree was surprising easy to make and had such a big impact!

These Birdseed Christmas Ornaments are bird-friendly and look so lovely in the yard.

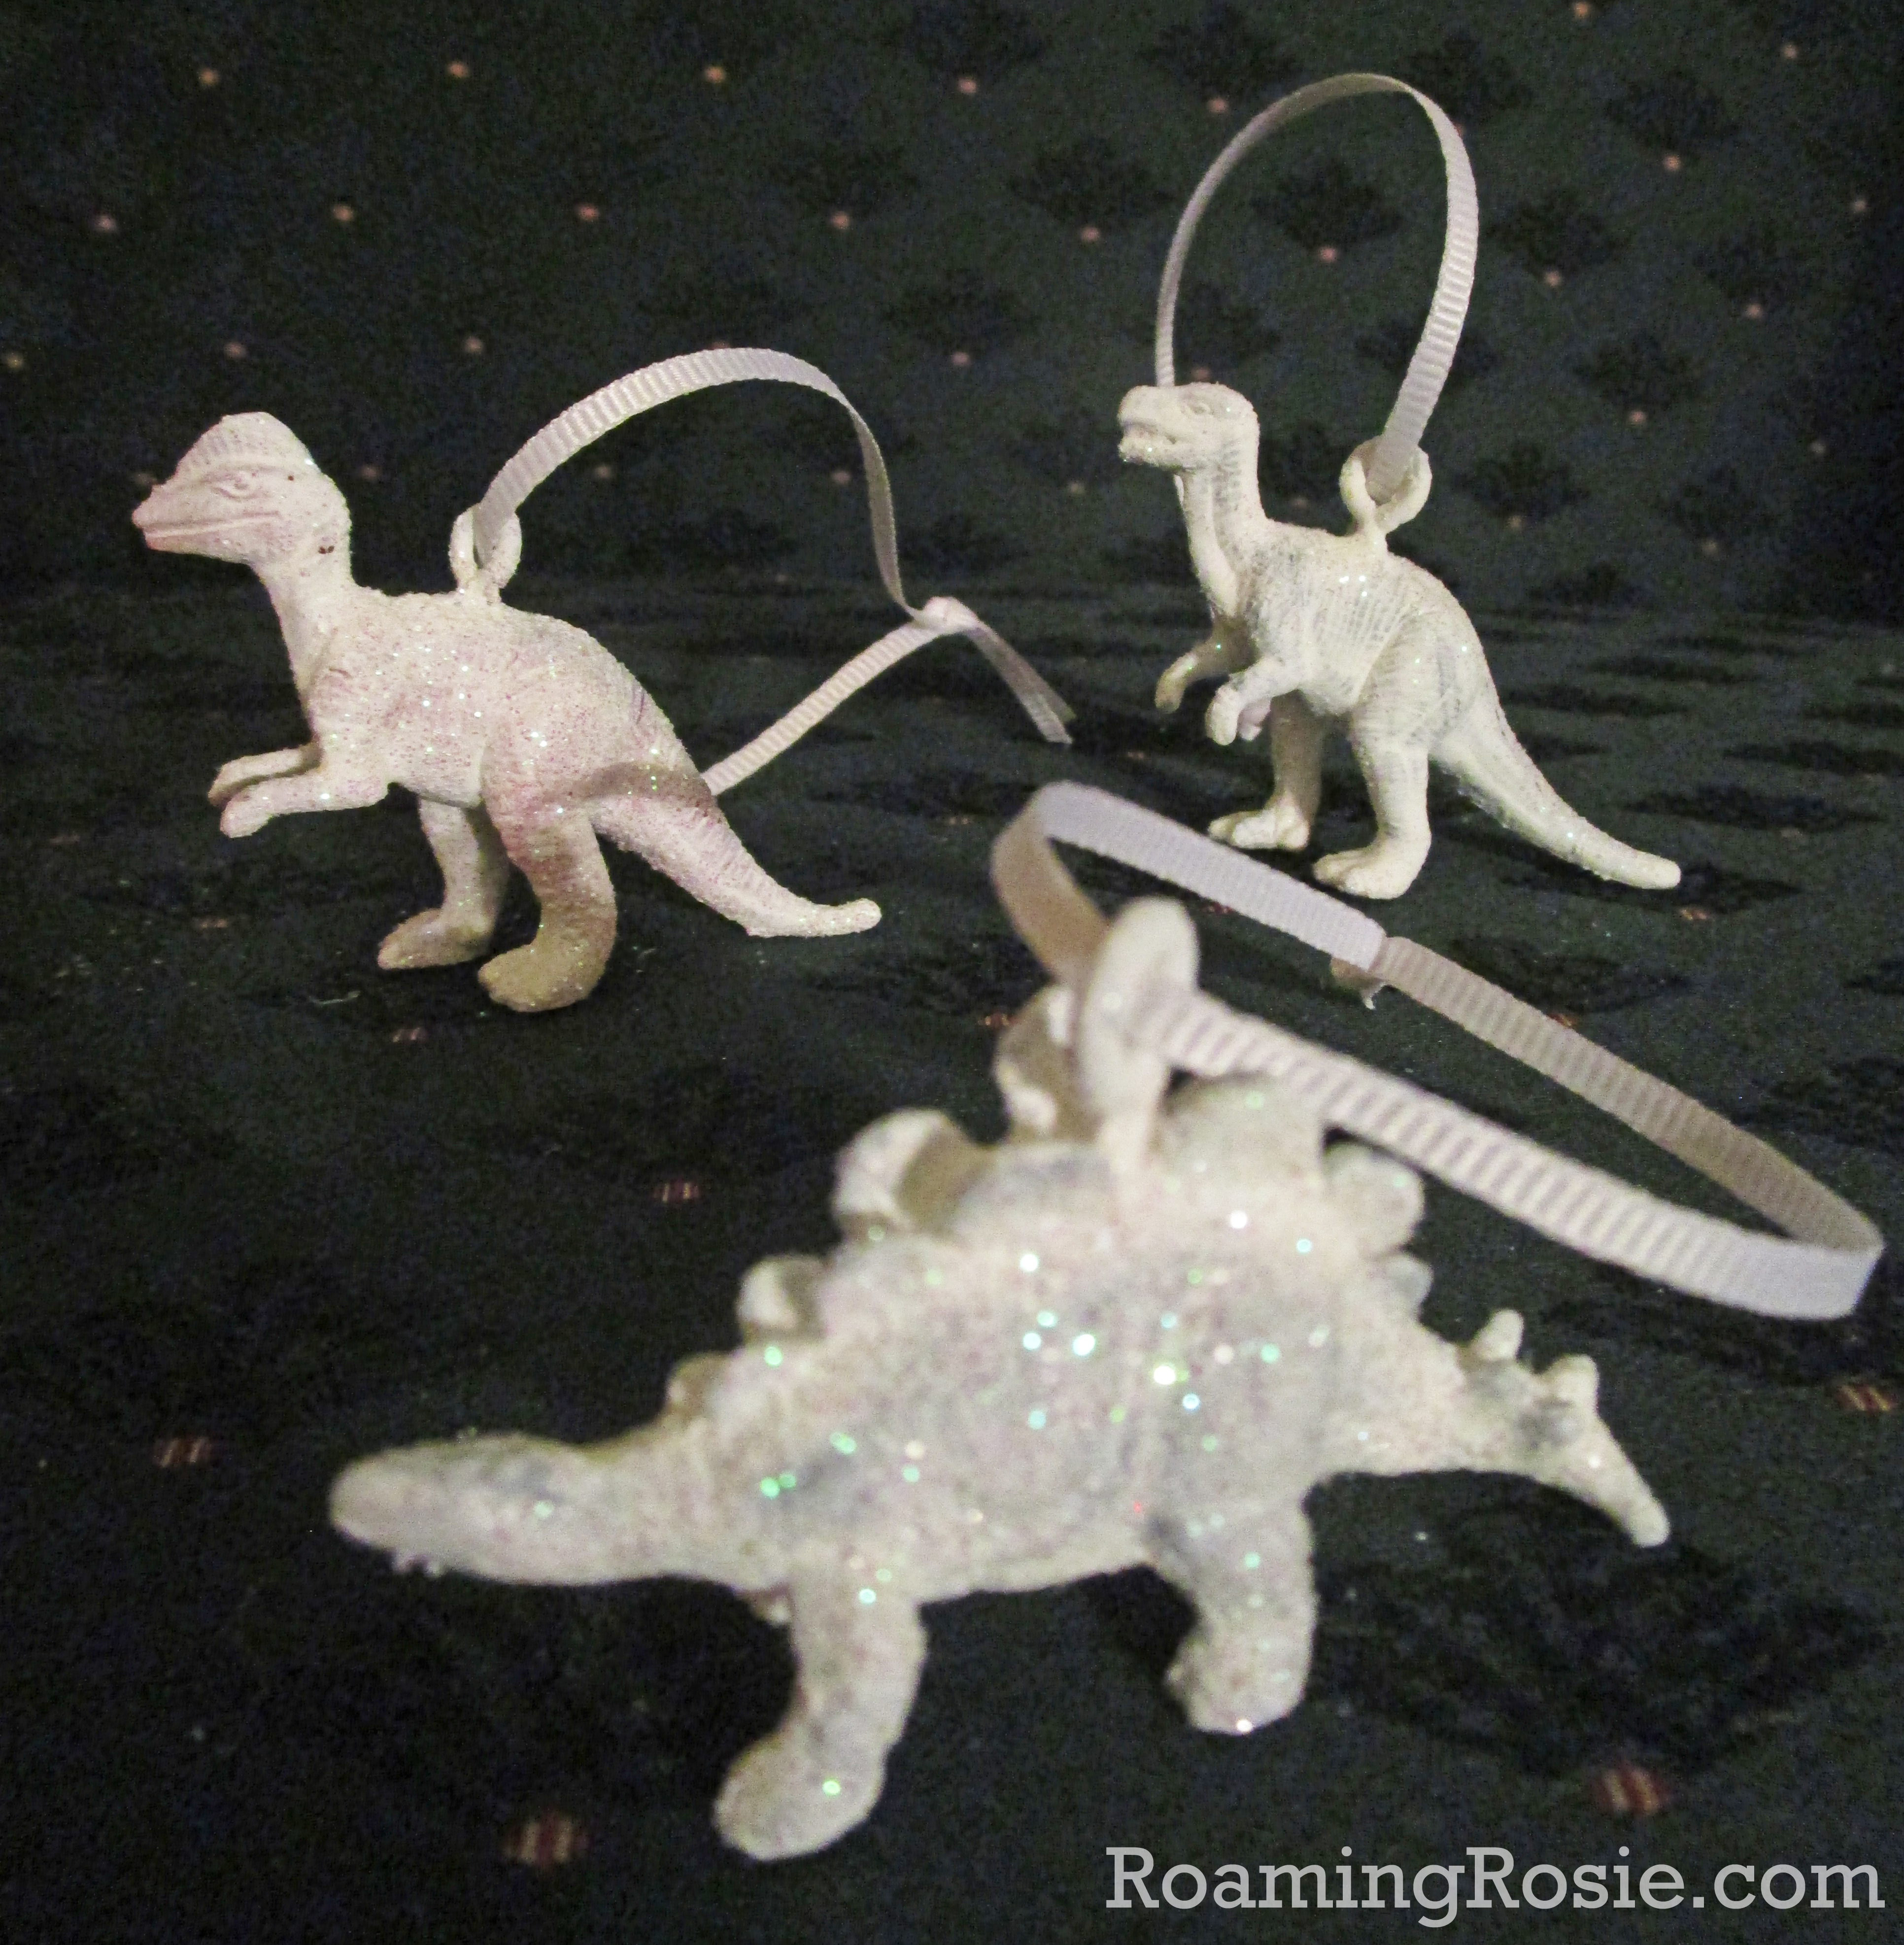
These Glitter Dinosaur Ornaments are flexible (pick any animal you like!) and add pizazz to the tree.

We make a new batch of these Cinnamon Christmas Ornaments every few years. They last quite a while, but I love the way the house smells when they’re baking! Plus, we try out new shapes each time.

These Paper Cone Christmas Trees are perfect for little hands to keep busy with something you can proudly display!

You could also make snowflakes instead of Crystal Snowmen – or sparkly circular ornaments.

For littles who love paint, these Toilet Paper Roll Christmas Ornaments are about the easiest craft to set up. Hand them markers for

Strictly speaking, this is something that I do for my kids as a surprise, but if you prefer, you could involve your littles in making their own Snowy Reindeer Feet.

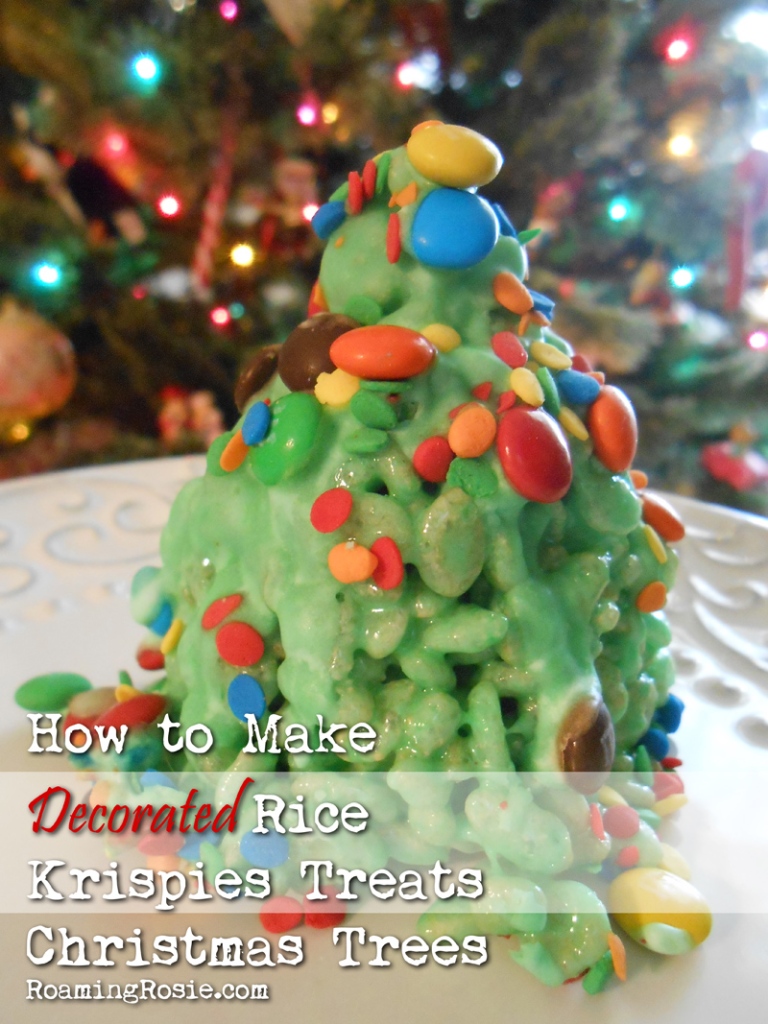
The great thing about Rice Krispies treats are that they are so malleable. Which makes them perfect for these Decorated Rice Kirspies Treats Christmas Trees!

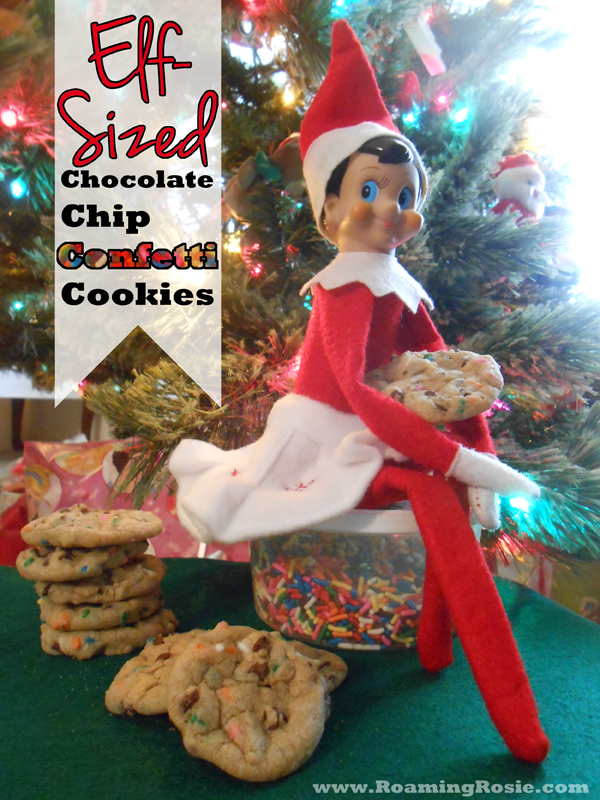
Add some sparkle to your winter baking with these Elf-Sized Chocolate Chip Confetti Cookies!

I hope you’ve enjoyed this list! Let me know in the comments if you’ve tried any of them – or share with me on my Facebook page.

Happy crafting!

Glitter Dinosaur Ornaments

Glitter Dinosaur Ornaments 1

This has always been one of my favorite Christmas crafts.

I mean, who doesn’t love dinosaurs covered in glitter??

Seriously, though, hanging these Glitter Dinosaur Ornaments on my tree each year is always a joy!

Glitter Dinosaur Ornaments

Of course, I didn’t realize until afterwards that most of my photos were blurry, but you get the idea.

Essentially I picked up a tube of dinosaurs, my kids painted them, and we dumped glitter on top.

It was so much fun to do with them.

Mostly here, you’ll see the photos of the ones we painted all white – that was my preference for ultimate sparkle. But my kids did decide to paint a couple blue as well. You can really do whatever suits you.

Glitter Dinosaur Ornaments 3

Before you decorate them, you’ll want to attach tiny hooks.

I used eye hooks like these. The screw right into the toys with just a little elbow grease.

Then paint them with acrylic paint and sprinkle on glitter before the paint dries.

Last, attach any type of thin ribbon or string and you’re done!

Glitter Dinosaur Ornaments 4

I even decorated the lid of the tube.

It’s like a T-rex bust. Pretty fancy, if you ask me.

Glitter Dinosaur Ornaments

Let me know if you try it out! Or even if you grab a tube of unicorns or something else instead.

Happy Crafting :)

Roaming Rosie Signature

Mystery Map & Backyard Treasure Hunt

Mystery Map Treasure Hunt 1

Our Mystery Map and Backyard Treasure Hunt was so much fun!

This is a great outdoor activity, and while it’s still quite hot outside as I write this, fall is coming. (Please hurry!!)

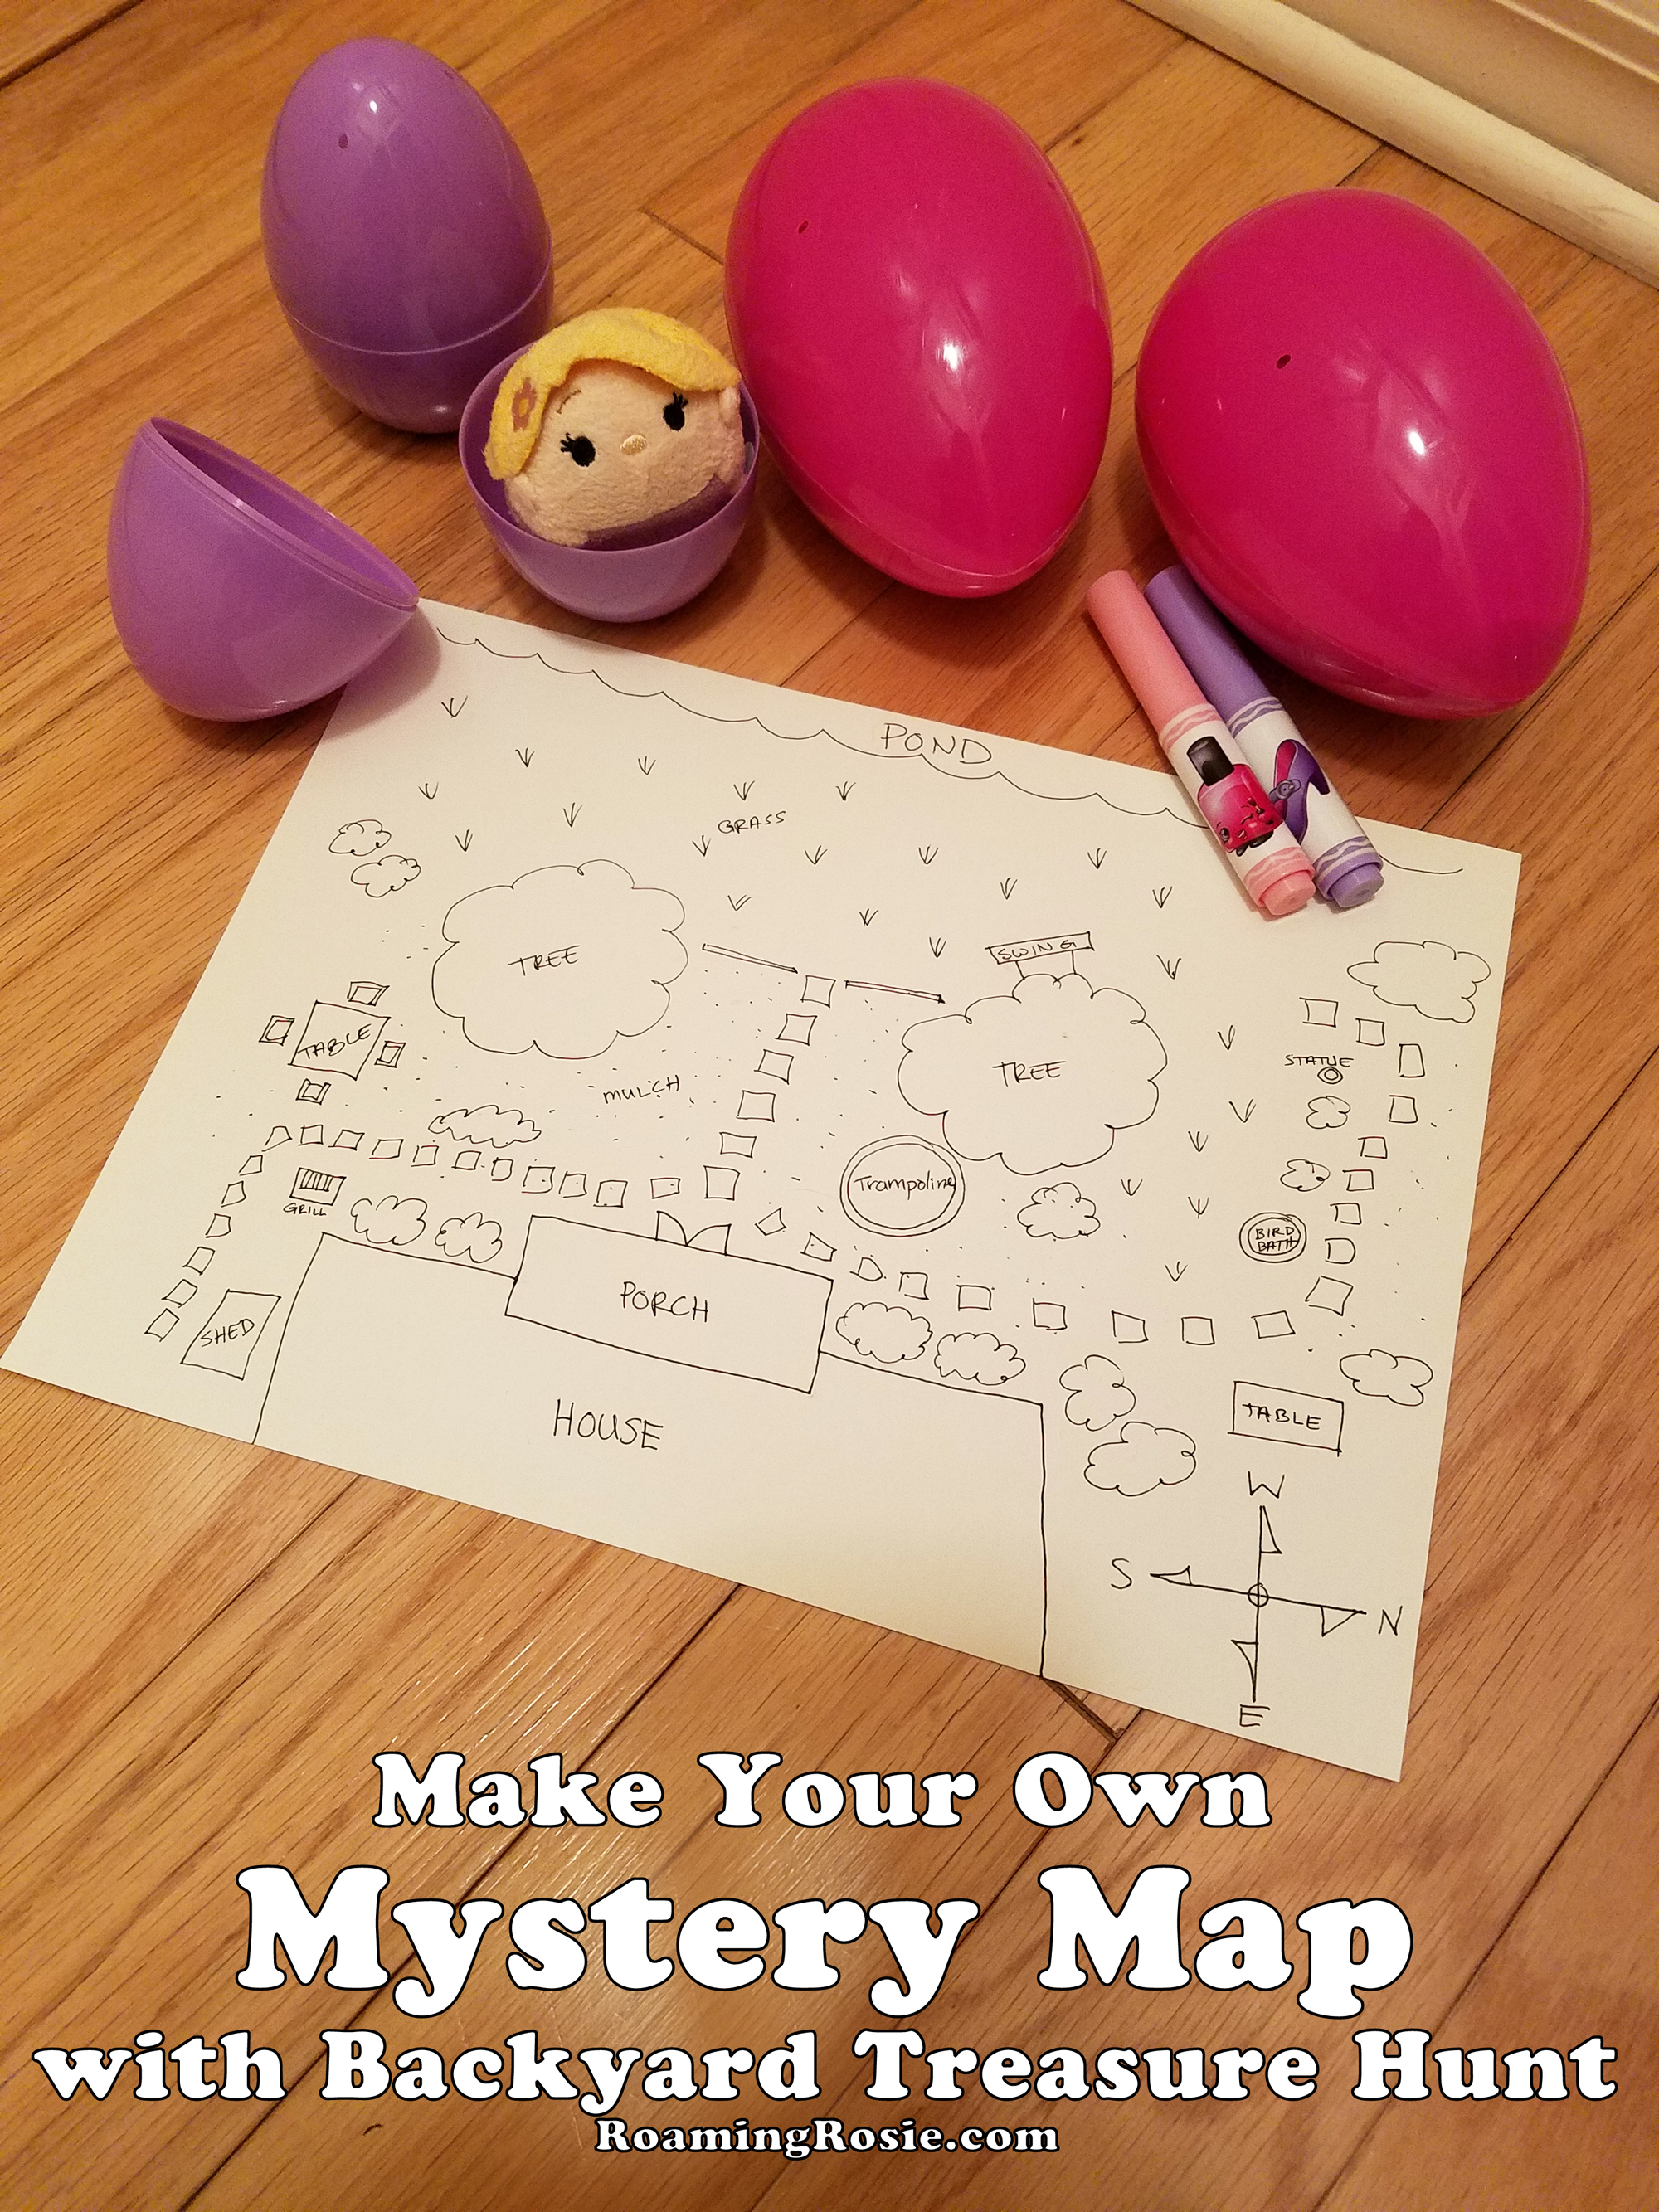
When I did this with my girls, I actually drew the map. I love maps, and I love floor plans, so for me it was astounding fun to create a layout of the backyard. Another option, however, is letting your kids make the map. Or make it a collaborate effort. It really depend on the ages of your children.

My main goal here, however, was the treasure hunt, as opposed to the map making. The latter, of course, is a great activity too, but instead of making the map, I had my kids navigate the one I made. With the goal of finding treasure!

I got some new small toys (in this case, Tsum Tsums mini plush) and hid them inside some large-sized Easter eggs. Then I hid the eggs outside, handed the kids the map, and let them loose.

Mystery Map Treasure Hunt 2

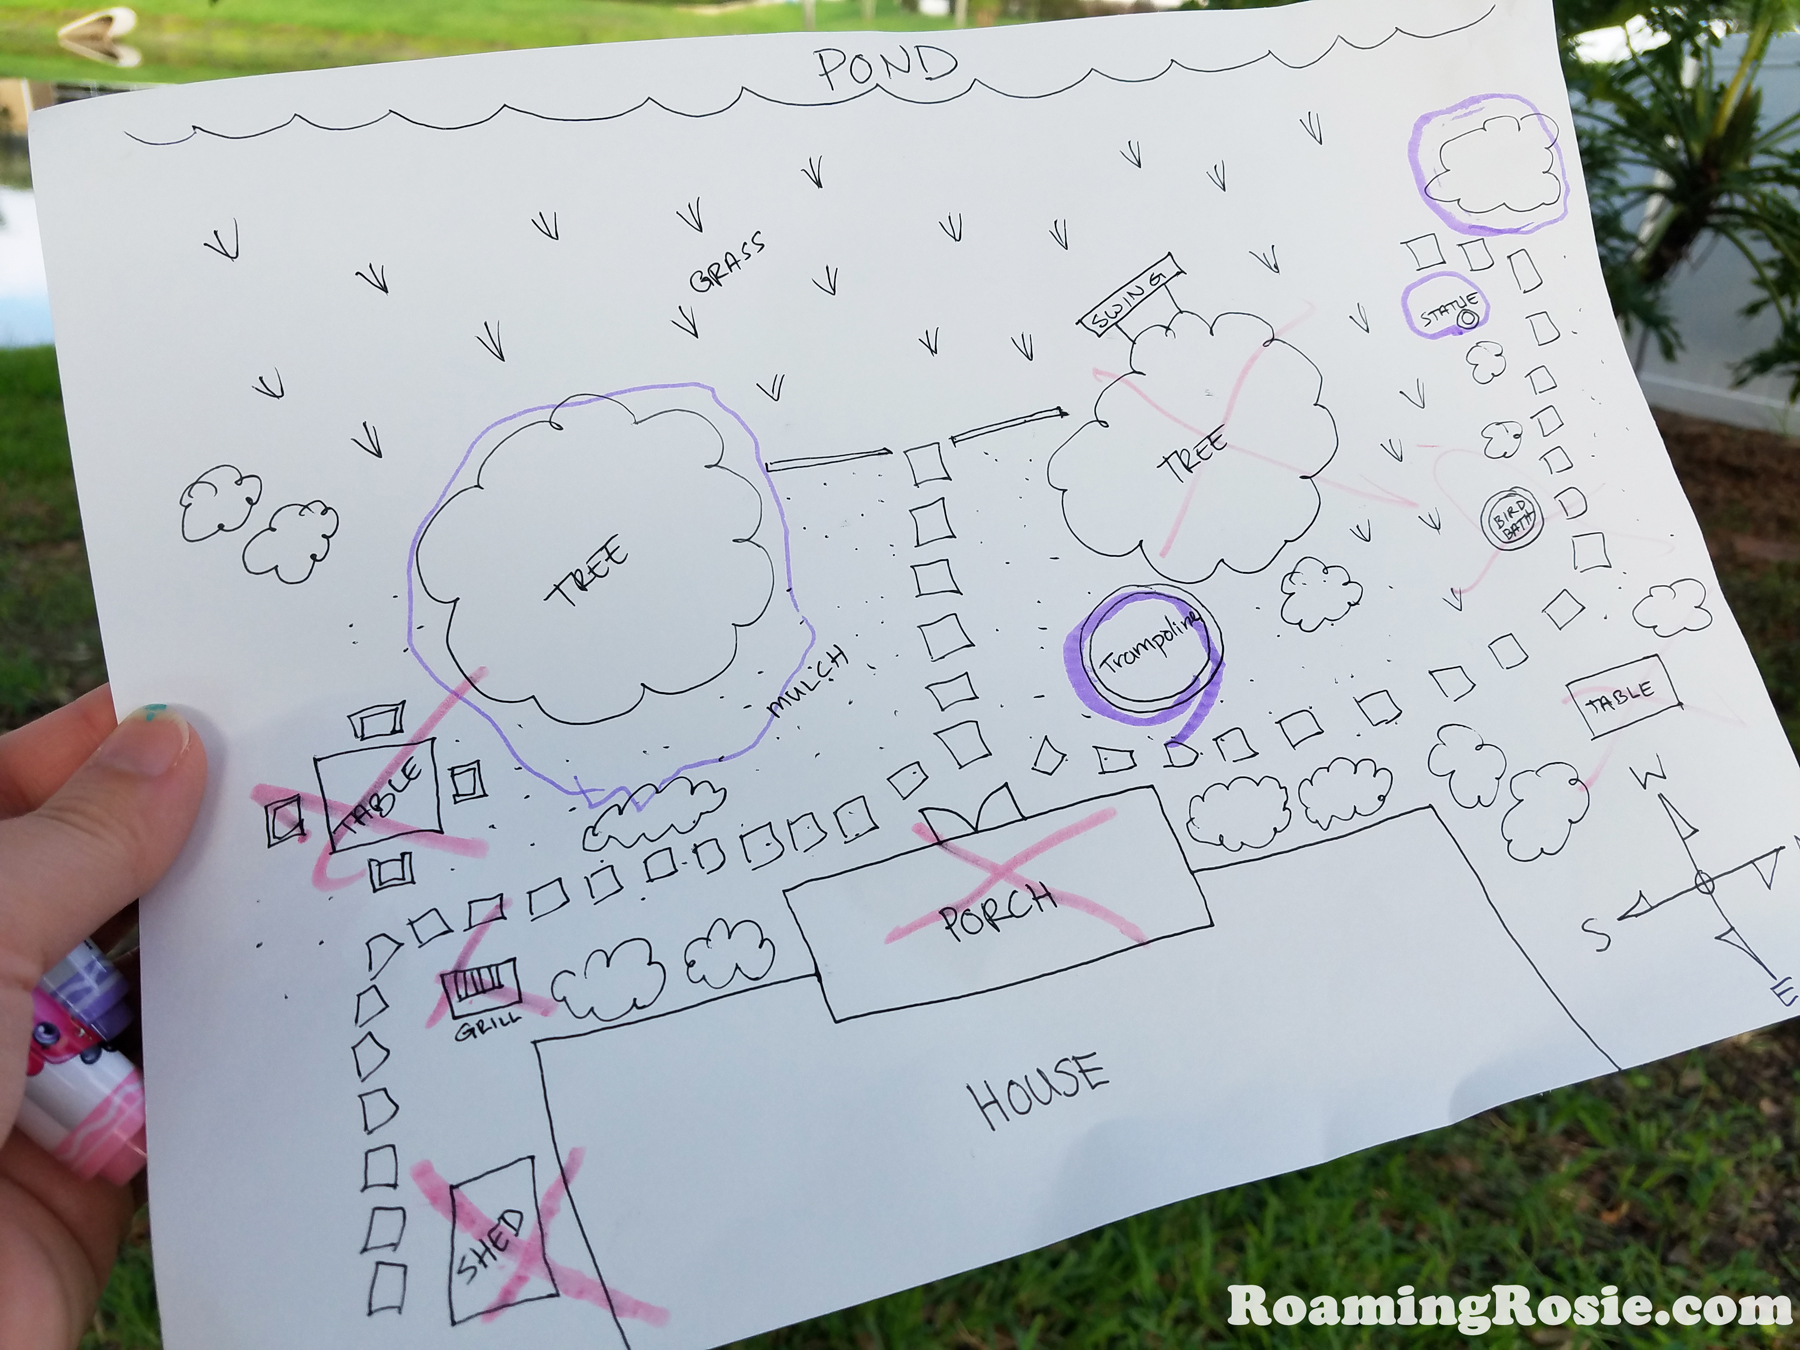
The instructions I had given them were to search the yard and make marks on the map to assist in the search.

Essentially, their mission was to mark off on the map each time they found an egg, and to cross off sections they searched which did not contain eggs.

Mystery Map Treasure Hunt 3

As you can see below, I included everything from a bird bath to the tree swing on my map, but it doesn’t have to be that detailed. Unless you’re obsessive like me – then go all out!

My kids decided to use the two colors of markers for different purposes. They chose purple to circle the places where they found eggs, and pink to cross off the places they looked that were egg-less. I’d let them know there were four eggs, so they also knew when to stop.

Then they got to open their treasure eggs. So the hunt was fun, the treasure was exciting, and I was happy because they were outside in the fresh air. Wins all around.

Mystery Map Treasure Hunt 4

No backyard? No worries! This can also be done inside (drawing couches and tables instead of trees), or you can head to your local park. If you’re planning a treasure hunt in a public place, however, you may want to hide vouchers of a sort that they can trade in for eggs, so that your kid can still find something but you don’t have to worry about someone else walking off with the treasure.

And, of course, y’all know I’m gonna talk about books if I get the change, right??

This was a project we did awhile ago (what can I say – it’s been a weird few years *shrugs*), but I got excited when I found a recent picture book that goes along with nicely with this type of activity. 

Publisher: Anne Schwartz Books (2022)

The Boy Who Loved Maps by Kari Allen and G. Brian Karas is such a fun exploration of map making!  It follows two children through the process of making a map of their neighborhood – and also exploring different places around the neighborhood – so if you’re already making a map of your backyard like we did here, this book makes a great visual for kids. 

It has some educational backmatter to help you describe map making to kids, and it can give them ideas for drawing their own. Plus, it’s also an adorable story! The language used to describe their environment is nothing short of magical. I definitely recommend reading it.

You can get it at your local library or here:

The Boy Who Loved Maps on Amazon

The Boy Who Loved Maps on IndieBound

I’d love to hear about any similar activities that your family has done!

Happy Treasure Hunting!

Roaming Rosie Signature

Nature Art

Nature Art

I suppose it’s a bit of a swing to go from Halloween projects to something completely different … or is it?

Today I wanted to highlight the glory of Nature Art.  Or, in general, making art with things found in nature.

These pictures are from a couple years ago but we have done this project many times.

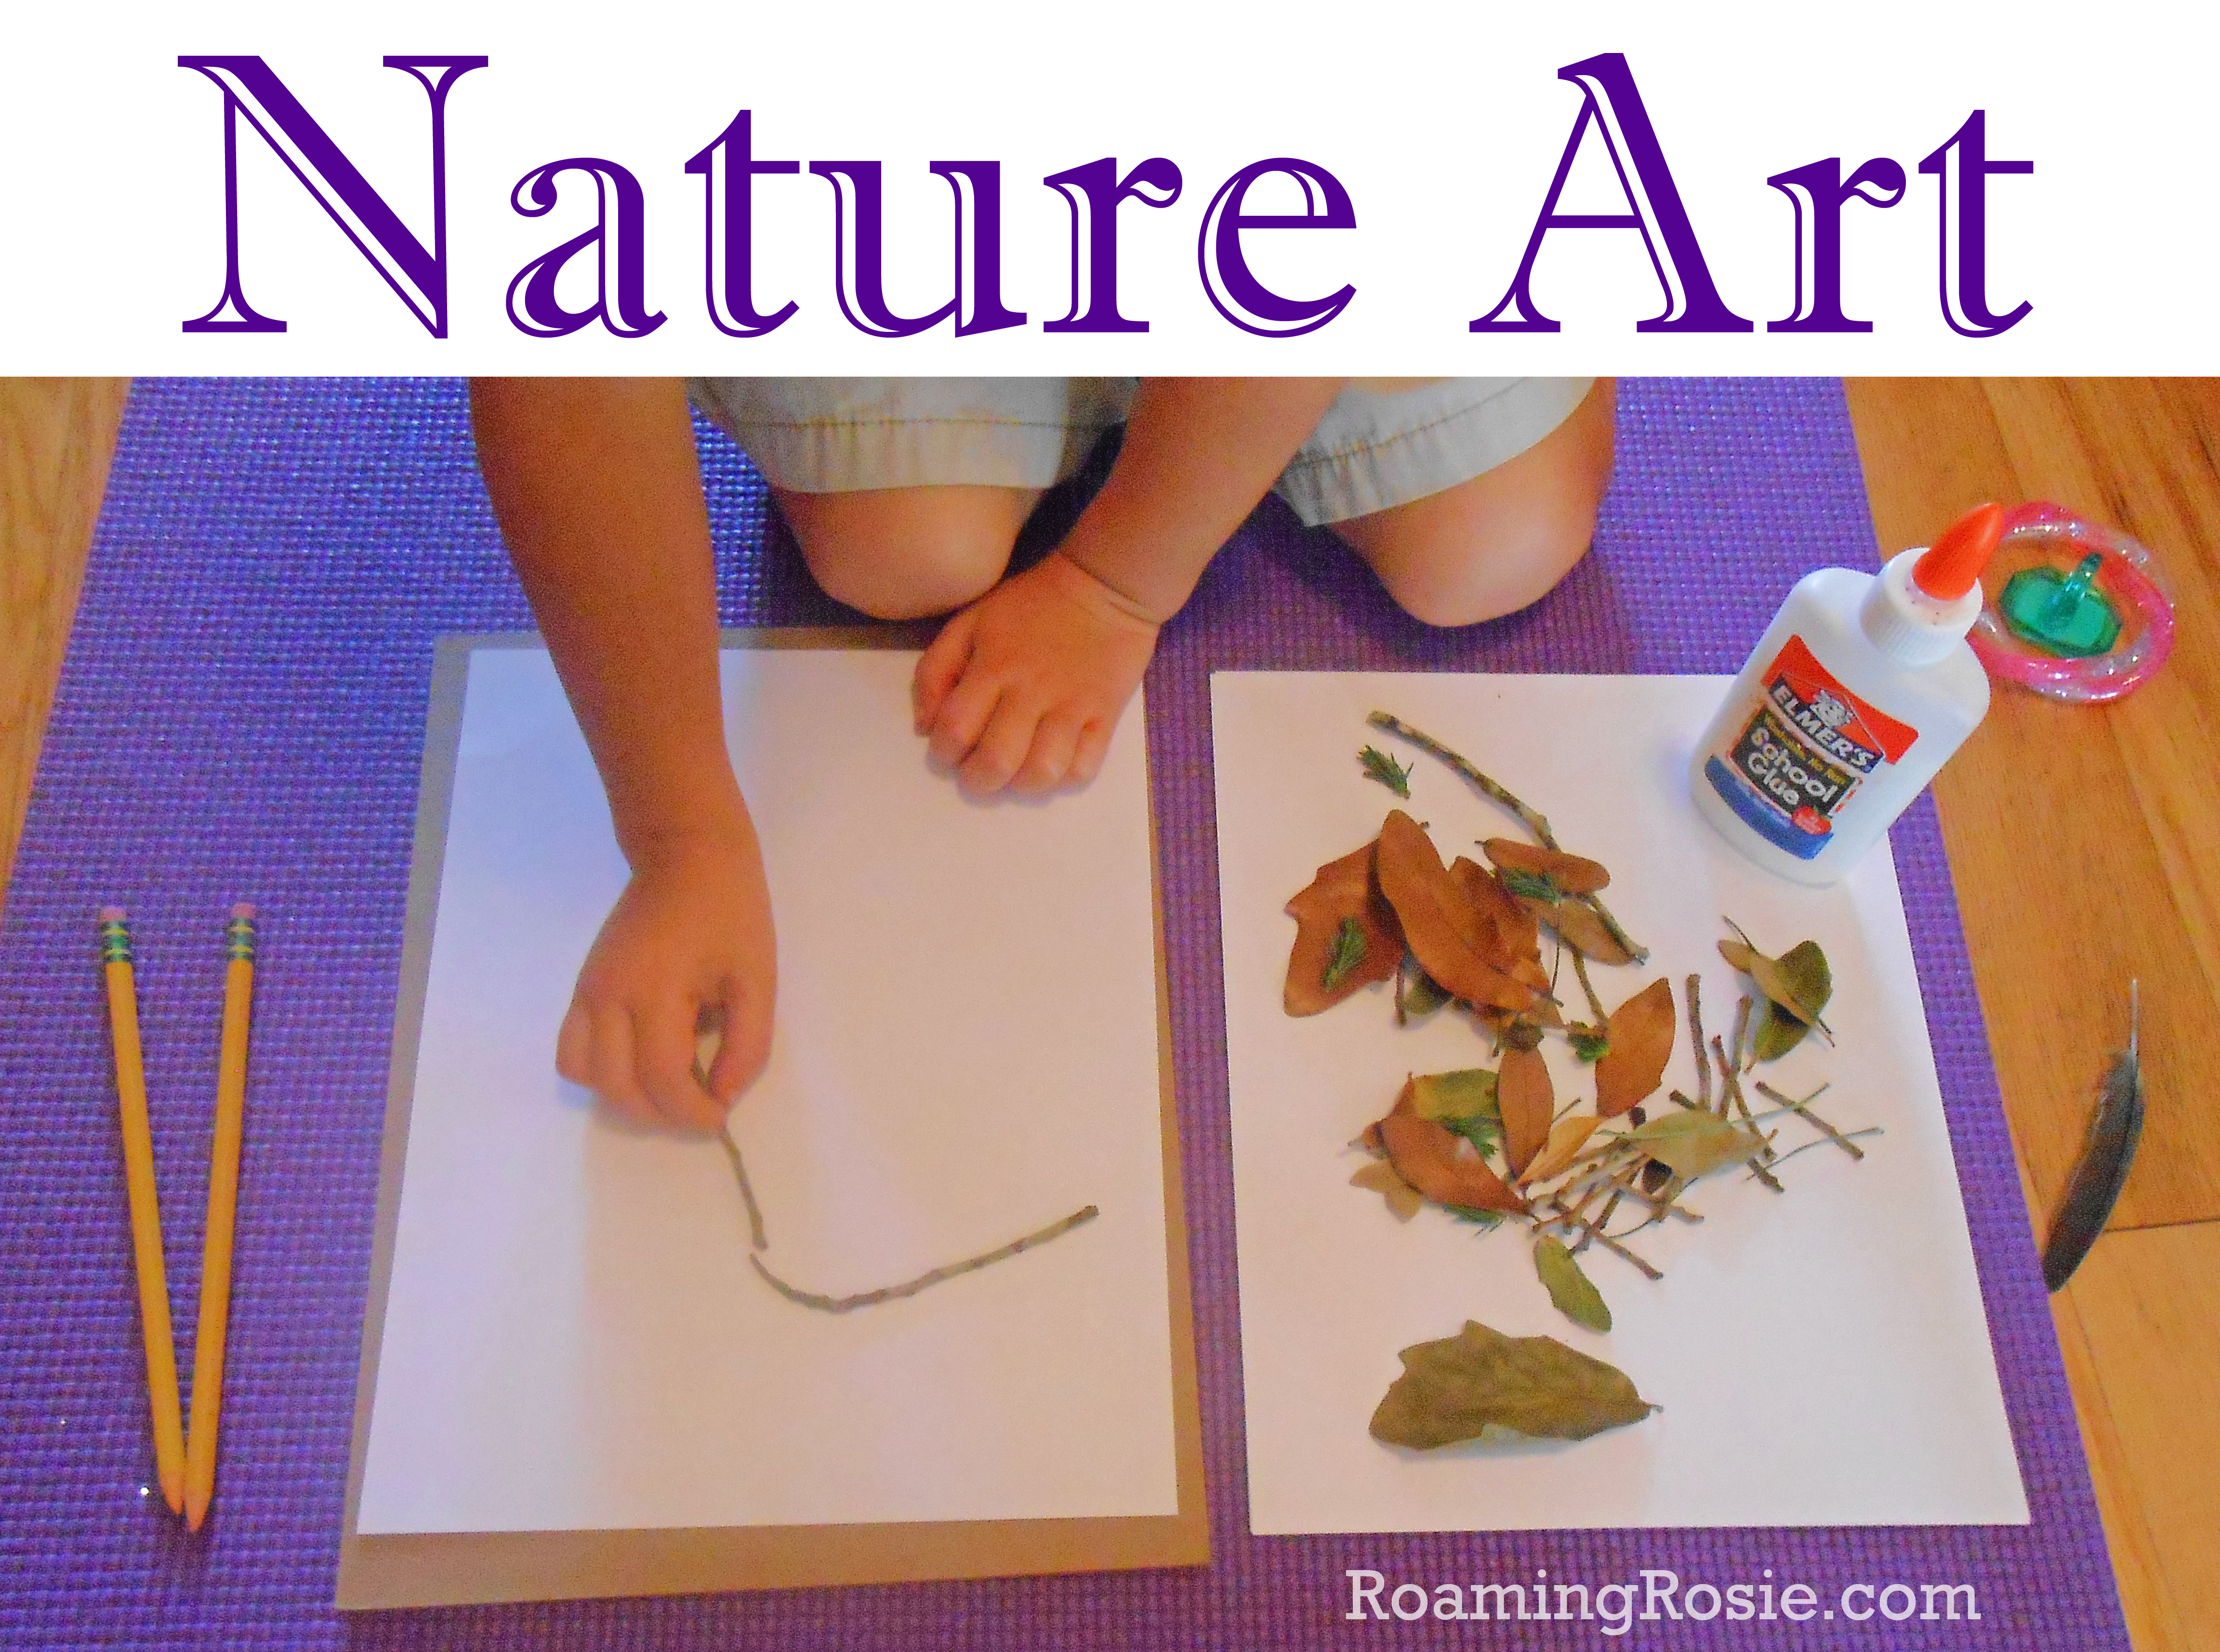
Basic supplies you’ll need:

  • paper
  • pencil
  • glue
  • leaves, flowers, sticks, grass, feathers, tiny stones, etc.

Nature Art 2

I like doing this project on plain white printer paper because the things we collect really pop against the bright background, but it can easily be done on any color construction paper.

We don’t have the giant colorful leaves that you find up north, but this craft is really about exploring your own space and using what you have where you are.

Though I may point out a few suggestions, I let my kids pick whatever they find inspiring.

We also use it as a learning experience to look up a plant when we’re not sure what it is.

Nature Art 3

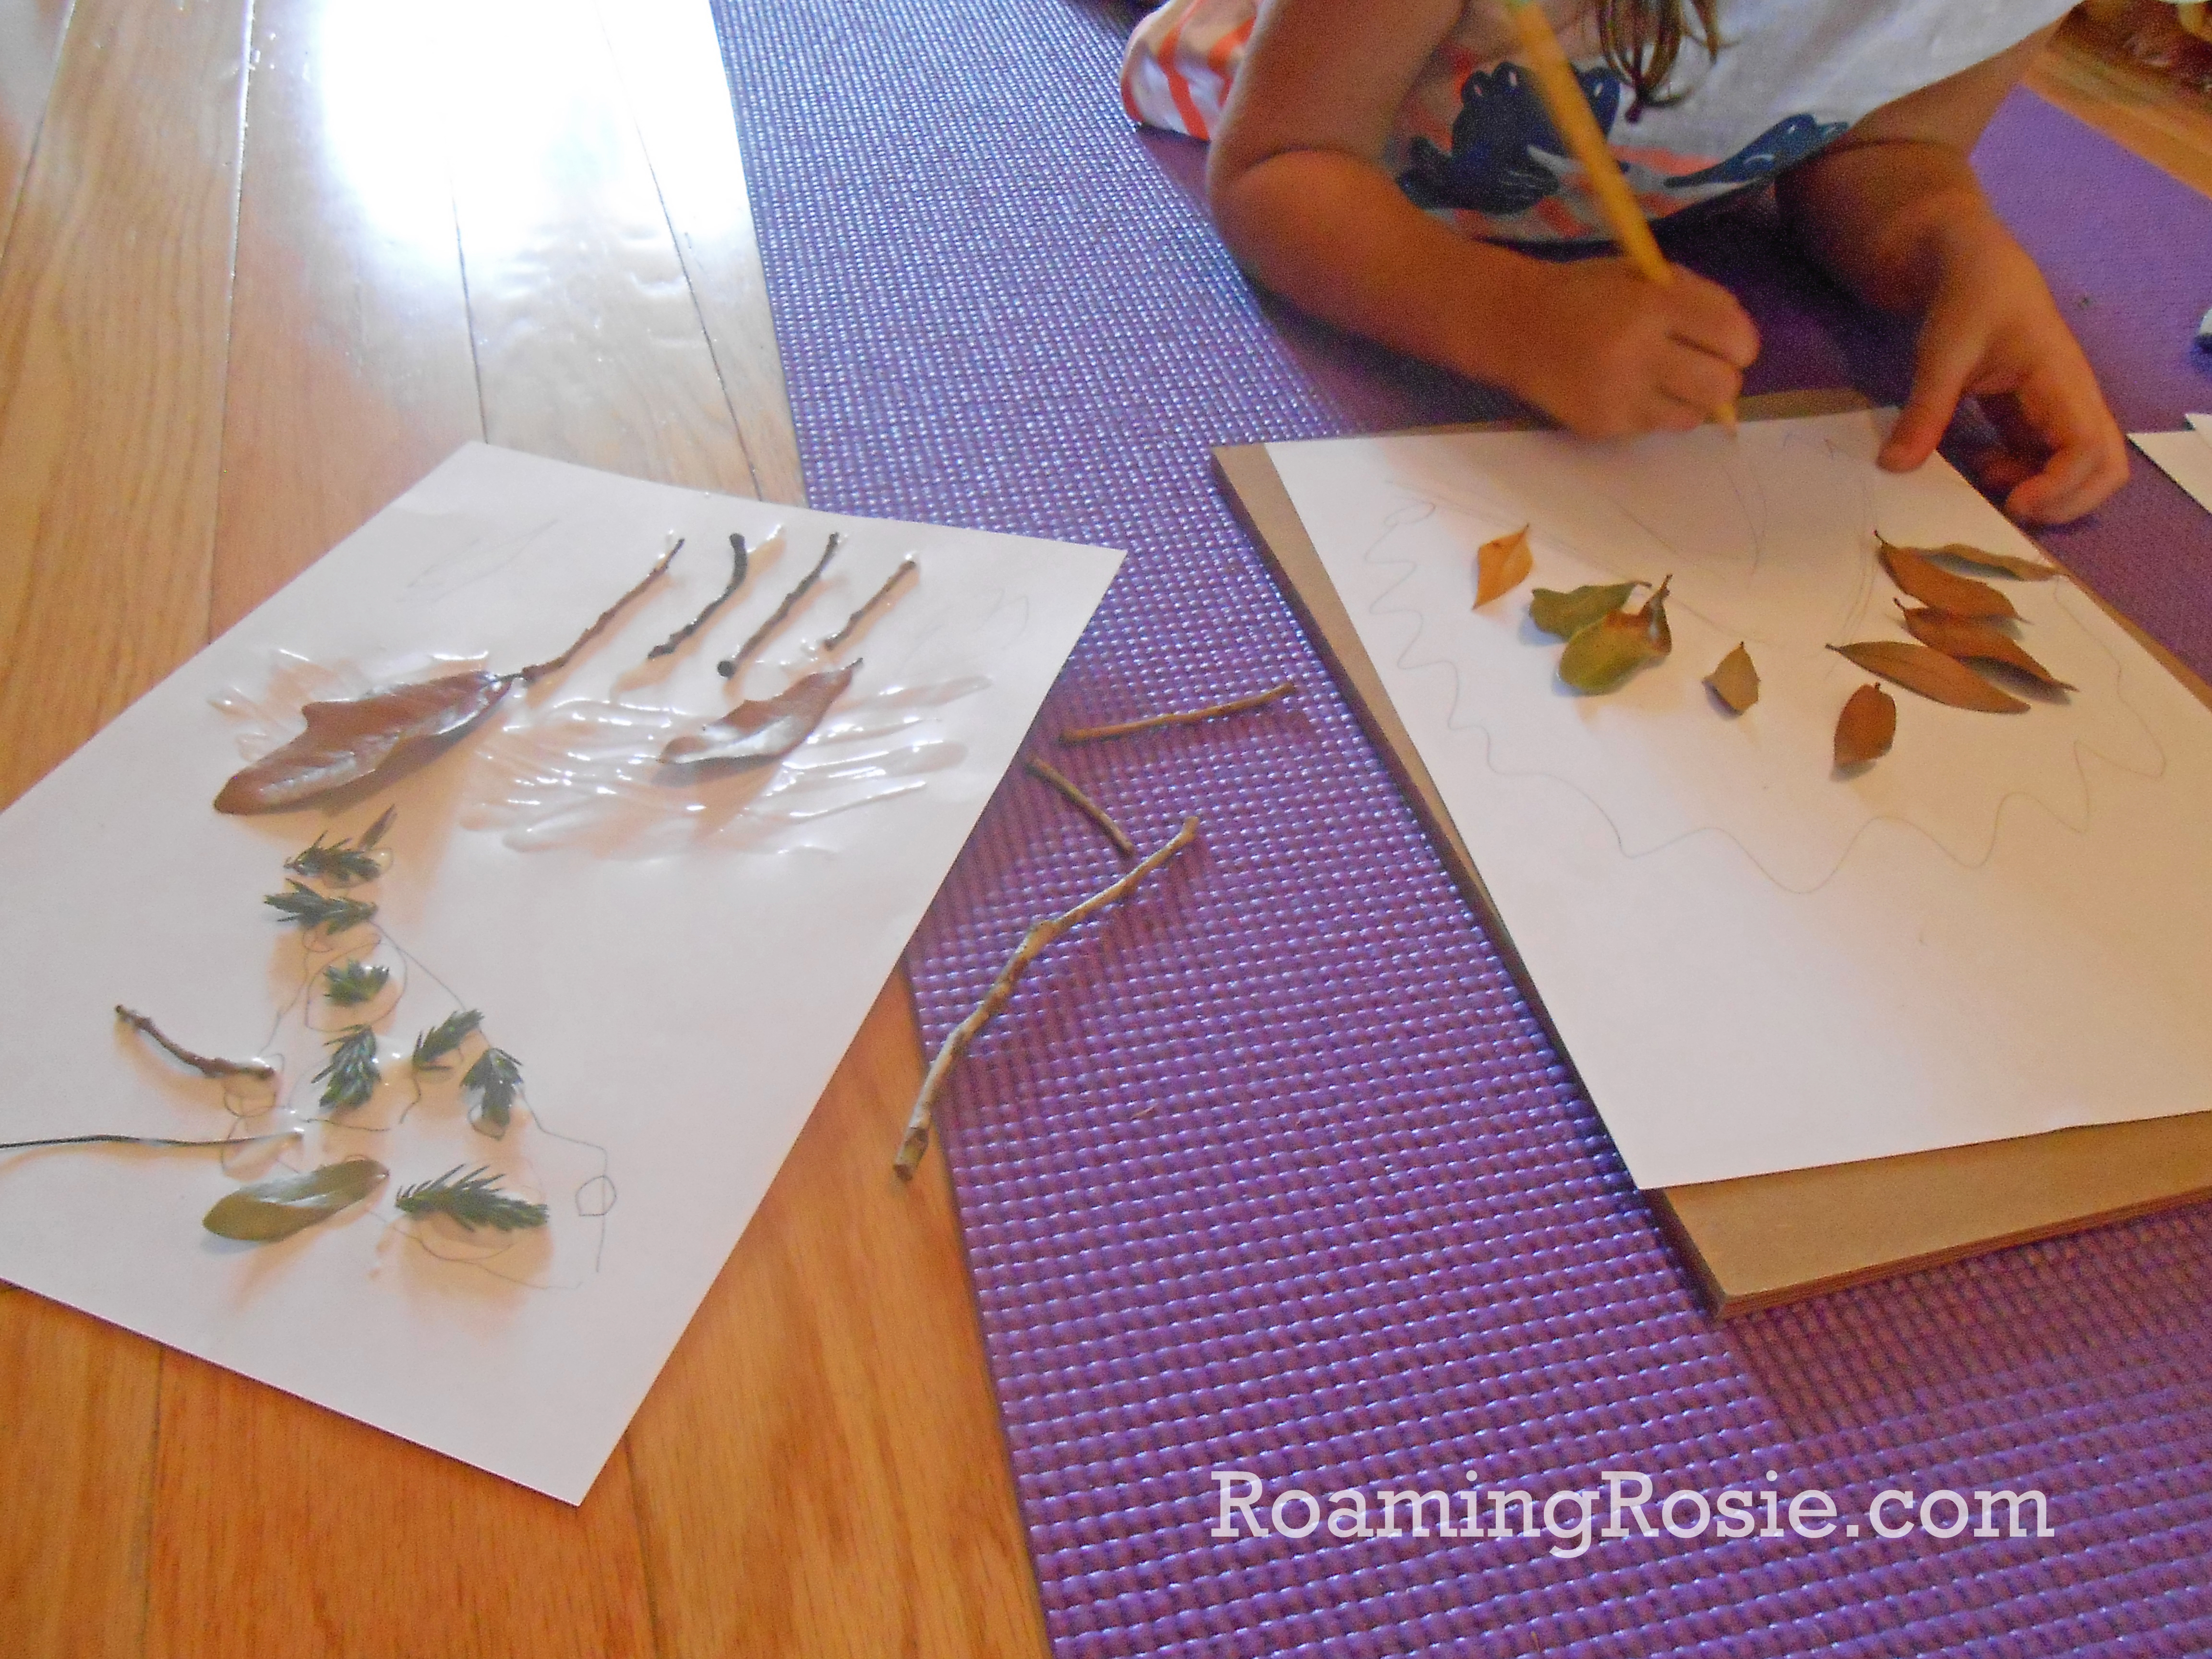
You can draw something very specific, like a house or tree, and recreate those items with the things you’ve collected, or you can go more abstract.

This particular day, my daughter was making random patterns.

This was her favorite finished piece:

Nature Art

And, like I said, what’s so great about this is allowing kids the creative space to explore their local environment and then utilize simple supplies to create anything they can imagine, all while experimenting on how things fit together.

It’s a great way to spend an afternoon, especially since we’re finally heading into autumn, and we’re still not able to socialize like we used to.  This year has had us doing a lot of stuff at home – so we try to add in art where ever we can!

More outdoor ideas to try:

Birdseed Christmas Ornaments 1

Birdseed Ornaments 

Power Word Hopscotch

Sight Word Hopscotch

How to Make Pom Pom Acrons 1

Pom Pom Acorns

Painting with Chalk 1

Painting with Chalk

Happy Crafting and Creating :)

Roaming Rosie Signature

Painting with Crayons & Water Colors

Painting with Crayons and Water Colors 1

This was one of those super-simple craft projects that’s nearly free.  You may already have all of the supplies on hand, but this changes things up from a normal painting or coloring project because it mixes the mediums.

It’s also a lot of fun.

What we did was create a drawing with crayons, and then color it in with watercolor paints.  We did some regular pictures (butterflies and flowers) and some that were patterns of lines and shapes.

And don’t mind the ancient crayon box full of mixed crayon types…. this is a “rediscovered” conglomerate of art supplies from my own youth. We use what we can here… it’s part of what makes this craft free, or nearly-free (the water colors are new).   We keep a craft drawer of leftover supplies from other projects, too, and sometimes we have a free-for-all craft with whatever we can find.

The kids love it.

Painting with Crayons and Water Colors 2

We discovered that the crayon looks much better if you draw thicker lines to help it stand out against the paint.  It also creates a neat, smooth texture.

And we experimented with the paint as well.

My older daughter tried painting with her fingers, instead of the brush, and she also would tilt the paper in different directions to see what happened when the excess paint dripped across her picture.

Painting with Crayons and Water Colors 3

My youngest daughter tried different things, like using multiple paintbrushes at one time.  This project gave them both the freedom to be creative in their own ways.

This project was cheap (free if you already have the crayons, paint, and paper) and easy to set up.  It gave them a creative outlet, and it kept them busy for a long time.  It had a lot of benefits on top of the fun-factor.

Plus, I had some beautiful fridge-worthy artwork at the end of it.

Here are a few of the finished products, including one of mine:

Painting with Crayons and Water Colors 4

Happy Crafting!

Roaming Rosie Signature

Nutella Chocolate Birds Nests

Nutella Chocolate Birds Nests Recipe

We’ve made Chocolate Birds Nests in the past, but this year we changed it up…. by adding Nutella!

These Nutella Chocolate Birds Nests were a lot of fun to make with my girls.  It gets them in the kitchen with a combination of cooking and crafting.

And we also picked up a little Edible Grass this time around.  It’s easy to snip into bite-sized pieces with kitchen shears and adds a nice visual touch, but it isn’t necessary if you’re having a tough time finding it.  (And I picked mine up for half off after Easter – since these can be a fun treat all season long.)

Nutella Chocolate Birds Nests 2

All our ingredients gathered and ready to go….

Since there is no actually baking involved, it’s mostly mixing and shaping and decorating, once the chocolate chips are melted.

Nutella Chocolate Birds Nests 3

Melt the chocolate at half power, stirring every 30 seconds until smooth.

Then stir in the Nutella.

(And, yes, my kids are wearing superhero costumes while we cook.  That’s how we roll at our place.)

Nutella Chocolate Birds Nests 4

I slowly poured in the noodles while they stirred.

Make sure all the noodles get covered in the chocolate mixture, because that is the glue that holds everything together.

Nutella Chocolate Birds Nests 5

Spray some nonstick baking spray in the muffin tins and scoop in some of the chocolate noodles.

You want to be able to shape them into nests with your fingers, so with a small indention in the center, or at least flat as opposed to hill-shaped.  If it’s too bumpy and you’re having trouble flattening it, just take some out.

Nutella Chocolate Birds Nests 6

Put three eggs in the center of the nest and sprinkle a little edible grass over top, if you like.

You can see that my kids also added a few of the confetti-like bunnies that came with the edible grass.

This recipe makes 24 nests, but if that’s just too much for you, you could half the recipe.  Or share with all the neighbors.

When you first make them, the nests will be gooey and will fall apart if you try to pick them up.  They are still okay to eat, especially for anxious kids who want to try their creations, but they’re much easier to eat if you let the chocolate set first.

Put the pans in the fridge for an hour or so to help the chocolate set (because if you live in a humid place like me, that would take forever at room temperature), and then scoop them out with a spoon.  Preferably a plastic spoon so you don’t scratch the metal.

Store them in covered containers, using waxed paper to separate stacked layers.

Nutella Chocolate Birds Nests 7

Chocolate Nutella Birds Nests

Ingredients:

1 cup milk chocolate chips
1 cup Nutella
12 oz. chow mein noodles
72 candy-coated malted milk chocolate eggs (I used Whoppers Robin Eggs)
Edible Grass, cut into 1-inch pieces (optional)

Melt the chocolate chips in a large microwave-safe bowl at half power, stirring every 30 seconds until smooth.  Stir in the Nutella.

Pour the noodles into the chocolate mixture and stir gently until they are all fully coated.

Spray 24 muffin tins with nonstick baking spray and scoop a spoonful of the noodle mix into each tin.  Move the noodles with a spoon or your fingers so that they are shaped like a nest.

Place 3 chocolate eggs in the center of your nest while the chocolate is still slightly melted.  Sprinkle a little edible grass over the top, if desired.

Put the nests in the refrigerator for at least an hour to allow the chocolate to set.  Remove from the muffin tins with the help of a spoon.

Store in a closed container in the fridge, using waxed or parchment paper to separate stacked layers.

**********

And here’s the free printable PDF of the recipe:

Nutella Chocolate Birds Nests

Happy Eating!

Roaming Rosie Signature

Save

July 4th Fireworks Painting and Cookies

July 4th Fireworks Painting Activity and Iced Cookies with Roaming Rosie

Happy Fourth of July!

This year, my kids and I did a painting activity and a cookie project that mimicked fireworks.  First, we stamped fireworks with toilet paper rolls, and then we baked some chocolate cookies and iced them in patterns to represent bursts of color.

Both of these things were done on dark backgrounds to make it look like our paint and sugar fireworks were exploding against a nighttime sky.

Even threw in some glitter (edible and not-so-much) for a little extra spark!

Fireworks Painting with Toilet Paper Rolls and Glitter 1

First up:  the painting project.

We reused some toilet paper rolls by transforming them into stamps.

To make the firework-shaped stamps, cut slits around one side of the cardboard roll, making the incisions about a quarter-inch wide (my kids made a few slivers; don’t aim for uniformity here), and then bend back the strips against the palm of your hand to make the pieces stick out.

I put some red, white, and blue (washable) paint into three small paper plates, and we dipped the stamps into the plates and then pressed them into the paper to make our fireworks.

To get a neat effect, overlap your stamps.

Fireworks Painting with Toilet Paper Rolls and Glitter 2

After you’ve covered your paper in fireworks, sprinkle with glitter for a fun sparkly touch!

Allow the paint to dry before shaking off the excess glitter and displaying your art.

Fireworks Chocolate Iced Cookies from Roaming Rosie 1

These cookies were not only fun to make – they were delicious too!

Just like the painting activity, we used the red, white, and blue colors against a dark background (in this case chocolate) to represent the fireworks bursting against a night sky.

We used the recipe that I made for my Chocolate Almond Mummy Cookies, but I made double the batch of icing.

You don’t actually NEED to double the icing – the recipe already makes plenty – but I wanted to make extra, double, totally sure that we’d still have enough icing if my girls ended up squirting most of it onto the counter instead of the cookies.

It turned out, one batch probably would have been more than enough . . . except that one of my containers burst and half of the blue icing spilled out onto a couple of cookies.

But that’s an anomaly.  (Hopefully.)

Fireworks Chocolate Iced Cookies from Roaming Rosie 2

When you make the icing, be sure to stir it well until there are no lumps and it drips easily from the fork or spoon in thin ribbons.

Not watery – just thin.  If it’s too thick or clumpy it will clog your spout.

I used my Wilton Candy Making Decorating Bottles.  Mine are quite old but they usually work fine only sometimes explode.  (But seriously, this is the first time I’ve had a problem.)  I’ve been meaning to pick up some new ones anyway.  They’re pretty easy to clean and my girls just love using them.

But if you don’t have bottles like these, you could just as easily put the icing into three separate plastic baggies and snip off the ends to squeeze out the patterns.

If you’re using the bottles, I poured the white icing into them and then mixed in the food coloring with a wooden skewer, the kind used for making shish kabobs.  You could do the same with the baggies, or, if you’re not lazy like me, you could put the icing into three bowls and add the red and blue food coloring to two of them, and mix them before pouring them into the containers.

I made the icing while the cookies were in the oven.  You could make it much earlier in the day, but the longer it sits, the more likely to thicken and then you’ll have to worry about mixing in more water or stirring it to thin it again.

Fireworks Chocolate Iced Cookies from Roaming Rosie 3

As you can see, we took the easy way out with these “cut out” cookies:  no cookie cutters.  We just sliced them up with a pizza cutter.  Easy Peasy.  Re-roll and slice again.

(If you’re wondering, that’s cocoa powder sprinkled over the counter to keep the dough from sticking, which you can use instead of flour when making chocolate cookies.)

We made the cookies into rectangles or large squares, all slightly different.  Once baked and fully cooled, I spread some waxed paper to catch the drippings and we all drizzled the icing onto the cookies, overlapping the colors, in a bit of a star burst pattern so that they would kind of look like fireworks exploding.

And, before the icing could harden, we added some white sparkling sugar to add a little extra spark to our cookies and to match the glitter on our paintings.

Again, you can find the cookie recipe on my post for Chocolate Almond Mummy Cookies.

Happy Fourth!

Roaming Rosie Signature

Grobswitchy Cake: a BFG Recipe from Roald Dahl

Roald Dahl's The BFG Grobswitchy Cake

We read The BFG by Roald Dahl recently and my kids LOVED it.

It may have been a bit of a trogglehumper to gobblefunk around with some of those propsposterous words – especially at bedtime when my coffee has long worn off – but it was SO worth it!  It was totally whoopsey-splunkers to see my girls burst into fits of laughter worthy of a big friendly giant.

And then, after reading the novel, we took a look at Roald Dahl’s Even More Revolting Recipes (which is a sequel to Roald Dahl’s Revolting Recipes), and decided to make the Grobswitchy Cake featured in the book, with just a few small changes.

We wound up using walnuts, because my oldest daughter loves them, and we traded out the amber crystals they suggested to use as grobswitches for Cake Mate’s Gold Sugar Cupcake Gems. 

Roald Dahl's The BFG Grobswitchy Cake 2

Now, I don’t know exactly what we did wrong, since baking with two kids can be … distracting … but somehow we had too much batter for our little pan.  I put it in the oven like that anyway, but with some foil below it to catch the drippings.

(And – just FYI – dripped cake is actually kinda fabulous.)

It’s a pretty typical coffee cake recipe, but with a really beautiful sentiment, since it references how the BFG mixes up dreams:

“It is a little bit like mixing a cake,”the BFG said. “If you is putting the right amounts of all the different things into it, you is making the cake come out any way you want, sugary, splongy curranty, Christmassy or grobswitchy. It is the same with dreams.”

And to explore the story a little more, I suggest stopping by Roald Dahl’s official website.

Happy Baking!

Roaming Rosie Signature

Usborne Fashion Coloring Books Review

Usborne Fashion Coloring Books

So, we love to color in our house. Happens all the time. We will draw and color on just about anything, but high quality (sorry dollar store) coloring books are my fave way to go. And, just so we’re clear, high quality does NOT mean high prices.

Which is why I wanted to share some books with you, all of which feature nice thick pages and beautiful illustrations for around 6 or 7 bucks.  Can’t beat that.

The other reason these books are so amazing is that people of all ages can enjoy them.  I’ve purchased these books for both kids and adults, and my daughters and I often color them together.

Usborne Vintage Fashion Coloring Book

First, I wanted to introduce the Vintage Fashion Coloring Book:

As you can see from the video, this is a pretty awesome book.  It’s great for kids (and adults) interested in fashion design, but also for anyone looking to just relax and have some fun coloring.

You can head over to my website to see the Vintage Fashion Coloring Book.  It has 32 pages of gorgeous illustrations to color, and is suggested for ages 6 and up.

Another similar book we own is the Clothes and Fashion to Color book that I got for my daughter, seen here:

Clothes and Fashion to Color

It also has 32 thick pages and tons of historical fashion to color.  It’s rated for ages 6+ but is, of course, great for any age.  It features different decades on different pages.  Here’s one I was recently working on:

fashion coloring book victorian 1850

Plus, there’s the mini sized Pocket Fashion Drawing Book that we usually keep in the car.  ‘Cause, like I mentioned, my daughter is pretty much always drawing.

Pocket Fashion Drawing Book

Isn’t that just too cute?  We love it.

The pocket book is a smaller size – easier to store in a purse or something, but it has many more pages.  At 128 pages, it’ll keep you entertained for a long time.

Plus, it features mostly modern styles, if that’s your thing.

If you’d prefer something different, here are some examples of different coloring books available on my site:

Patterns to Color Usborne Coloring Books

And they are seriously awesome.  There are more in the series too, which means tons of PATTERNS TO COLOR!  I’ll make some videos for them too, (and some newer fashion coloring books as well!) but if you have any questions about them, please comment or message me anytime!

Happy Coloring!

Roaming Rosie Signature

Save

Sight Words Ball Toss (Feed the Shark)

Feed the Shark Sight Word Ball Toss

We’ve been working on our Sight Words lately, which we sometimes call Power Words (Power Word Hopscotch and Power Word Heart Pom Pom Toss).

This “Feed the Shark” game was intended to teach my daughter her sight words vocabulary, but can easily be adapted to be used to teach the alphabet to preschoolers, too.

I wanted to try something a little different, but still very tactile and involving movement, so I wrote some of my daughter’s words on ping pong balls that I picked up at our local dollar store.

Feed the Shark Sight Word Ball Toss

I wrote the words with a paint pen.  Not a permanent marker since I’ve found that those sometimes rub off.

Then I put the balls in a little bucket.  We took turns pulling out a ball, saying the words, and then tossing it into the shark’s mouth if we got it right.

My kindergartner helped her younger sister with the words, of course, and even though she wanted to make a rule about only getting a certain number of guesses to read the word, we didn’t worry about missing the shark’s mouth.  We just kept throwing until we got it.

Feed the Shark Sight Word Ball Toss

And I happened to have made that shark (Glut from The Little Mermaid) about two years ago and I have all the photos from the birthday party I threw for my girls for which the shark was one of our featured games and I’ve been meaning to write a blog post about it… but I guess I’m running a little behind.  Oops.  #Momlife.

Anyway, you can obviously throw the balls into anything – it doesn’t HAVE to be a shark’s mouth.  We keep Glut around and play with him from time to time, but you could toss the ping pong balls into any basket, laundry basket, bucket, box, or boots that you happen to have lying around.

If it’s winter, try tossing them into a Christmas wreath lying flat on the floor.  If it’s Halloween, try tossing them into a plastic jack o’ lantern.  If it’s spring, try tossing them into a watering can from the garden.  Or flower pots.  Whatever you have handy.

Have fun!

Roaming Rosie Signature