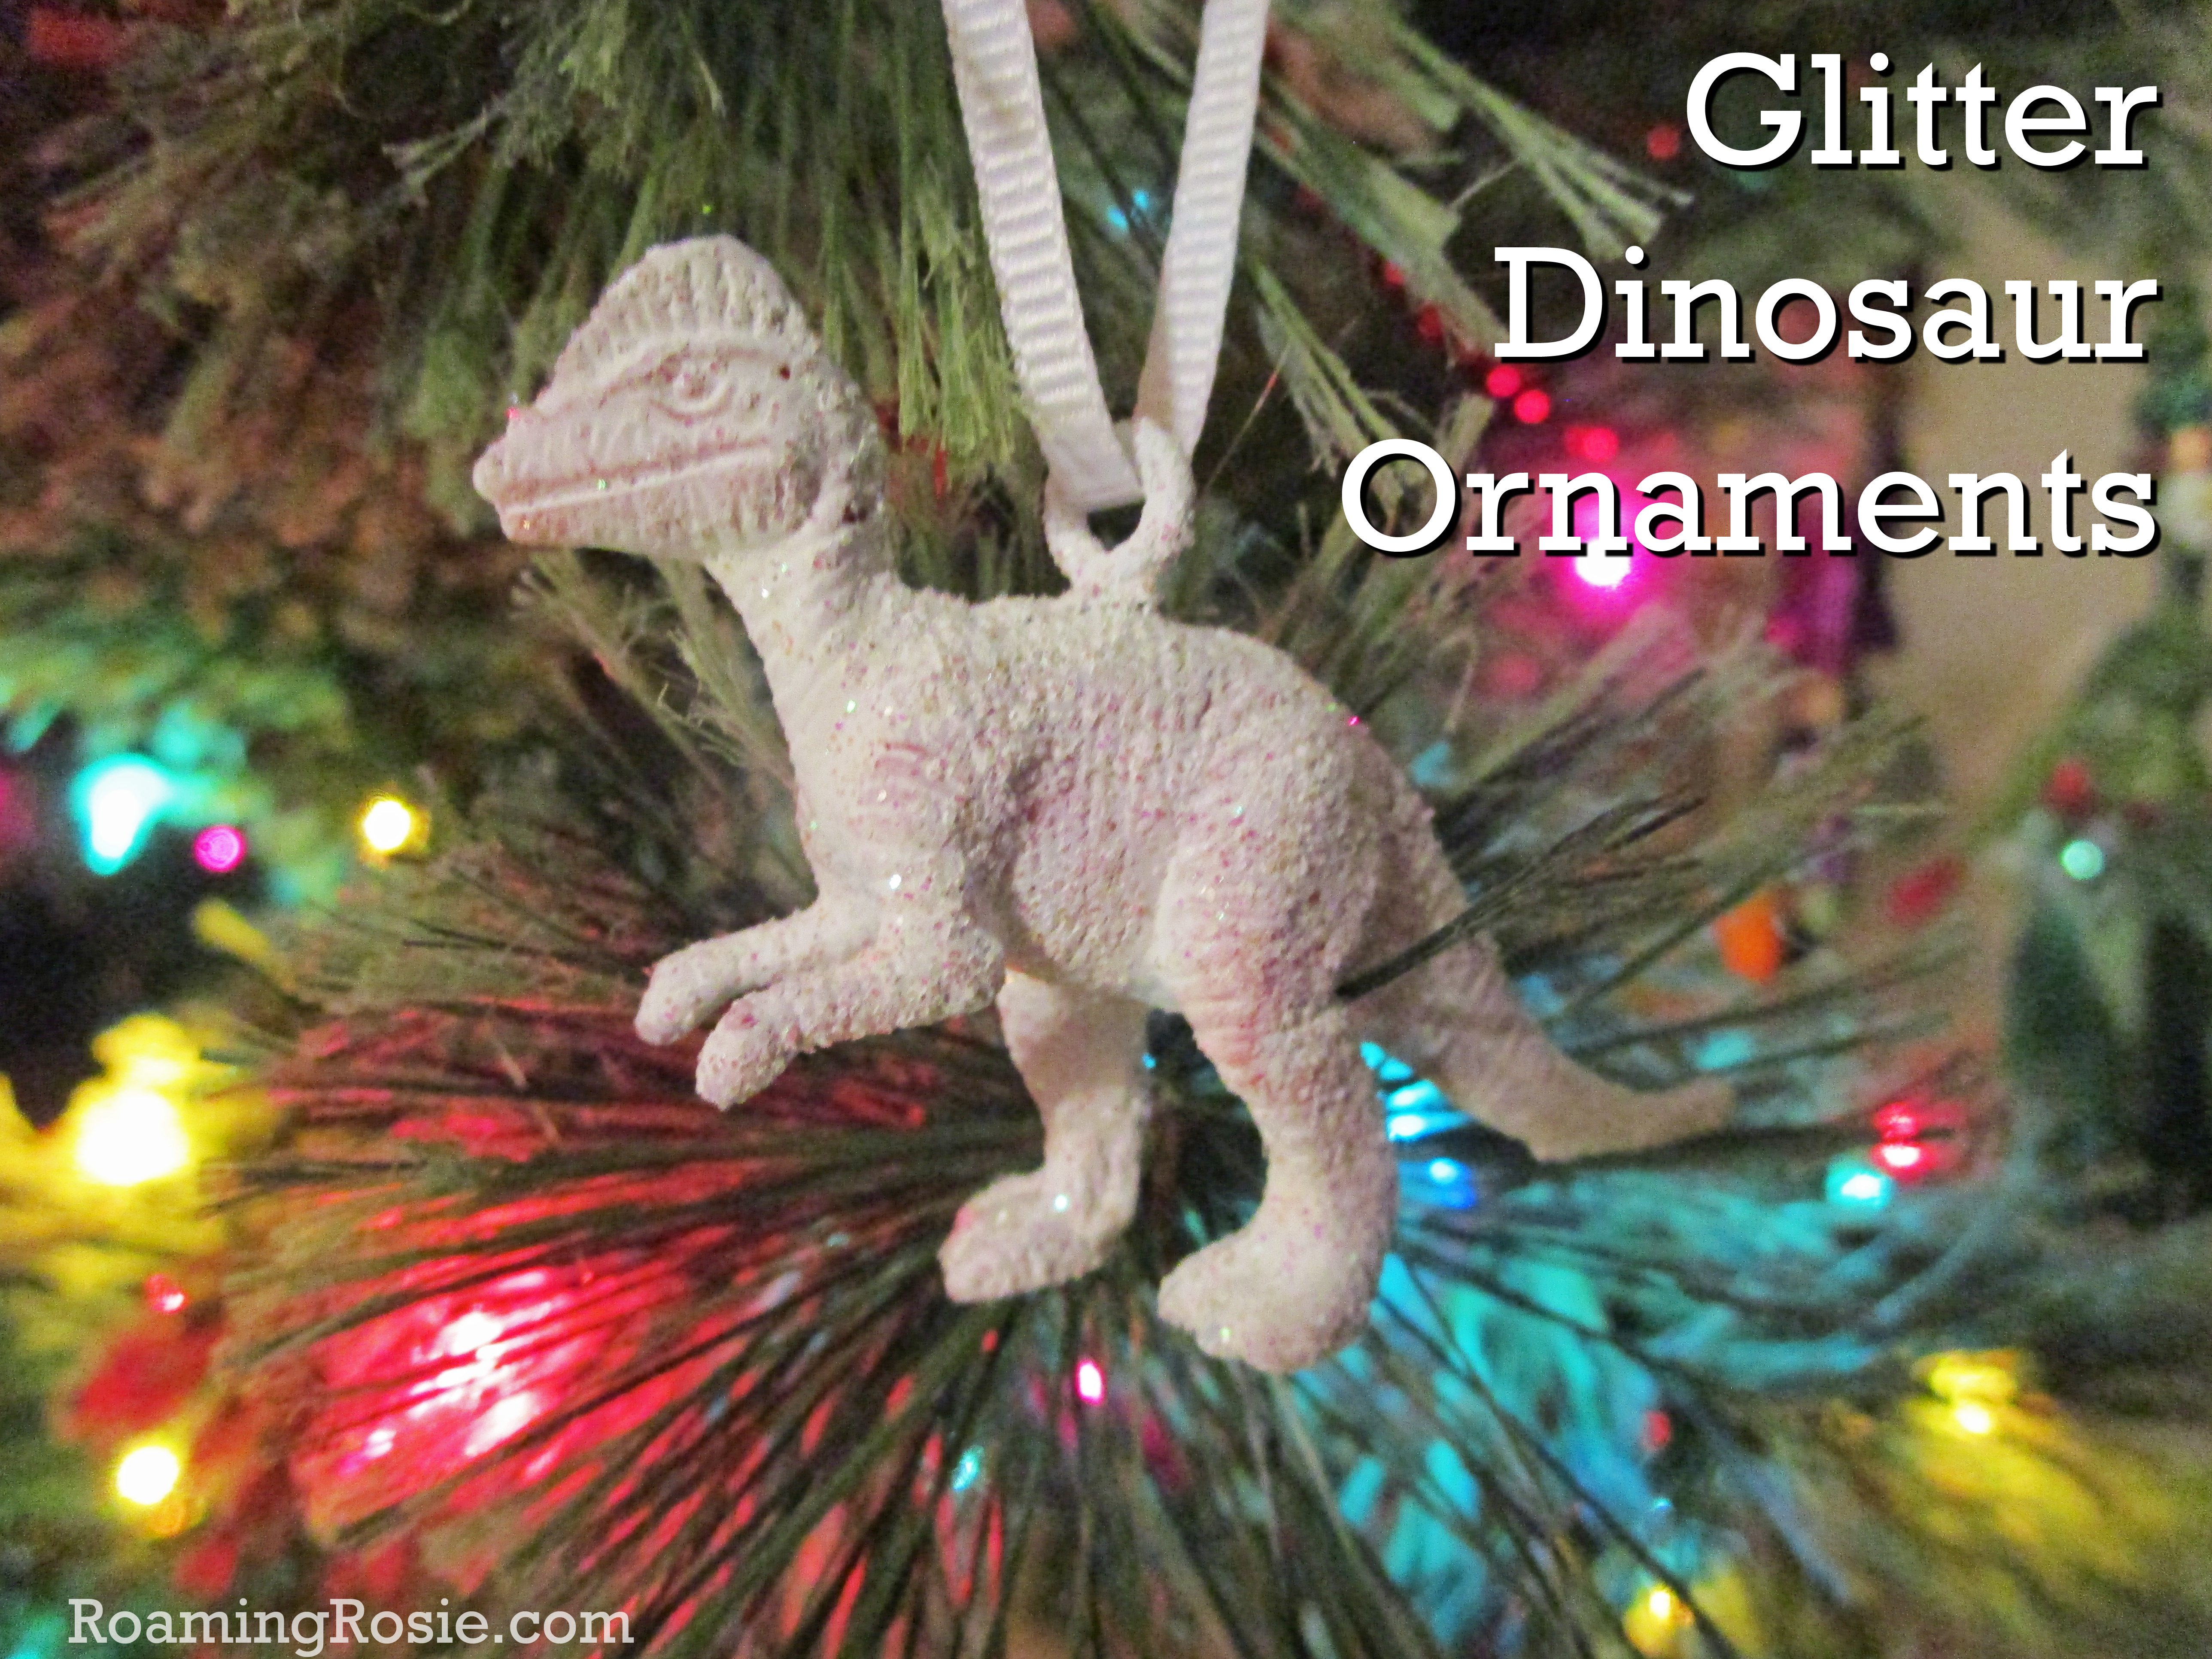
This has always been one of my favorite Christmas crafts.
I mean, who doesn’t love dinosaurs covered in glitter??
Seriously, though, hanging these Glitter Dinosaur Ornaments on my tree each year is always a joy!
Of course, I didn’t realize until afterwards that most of my photos were blurry, but you get the idea.
Essentially I picked up a tube of dinosaurs, my kids painted them, and we dumped glitter on top.
It was so much fun to do with them.
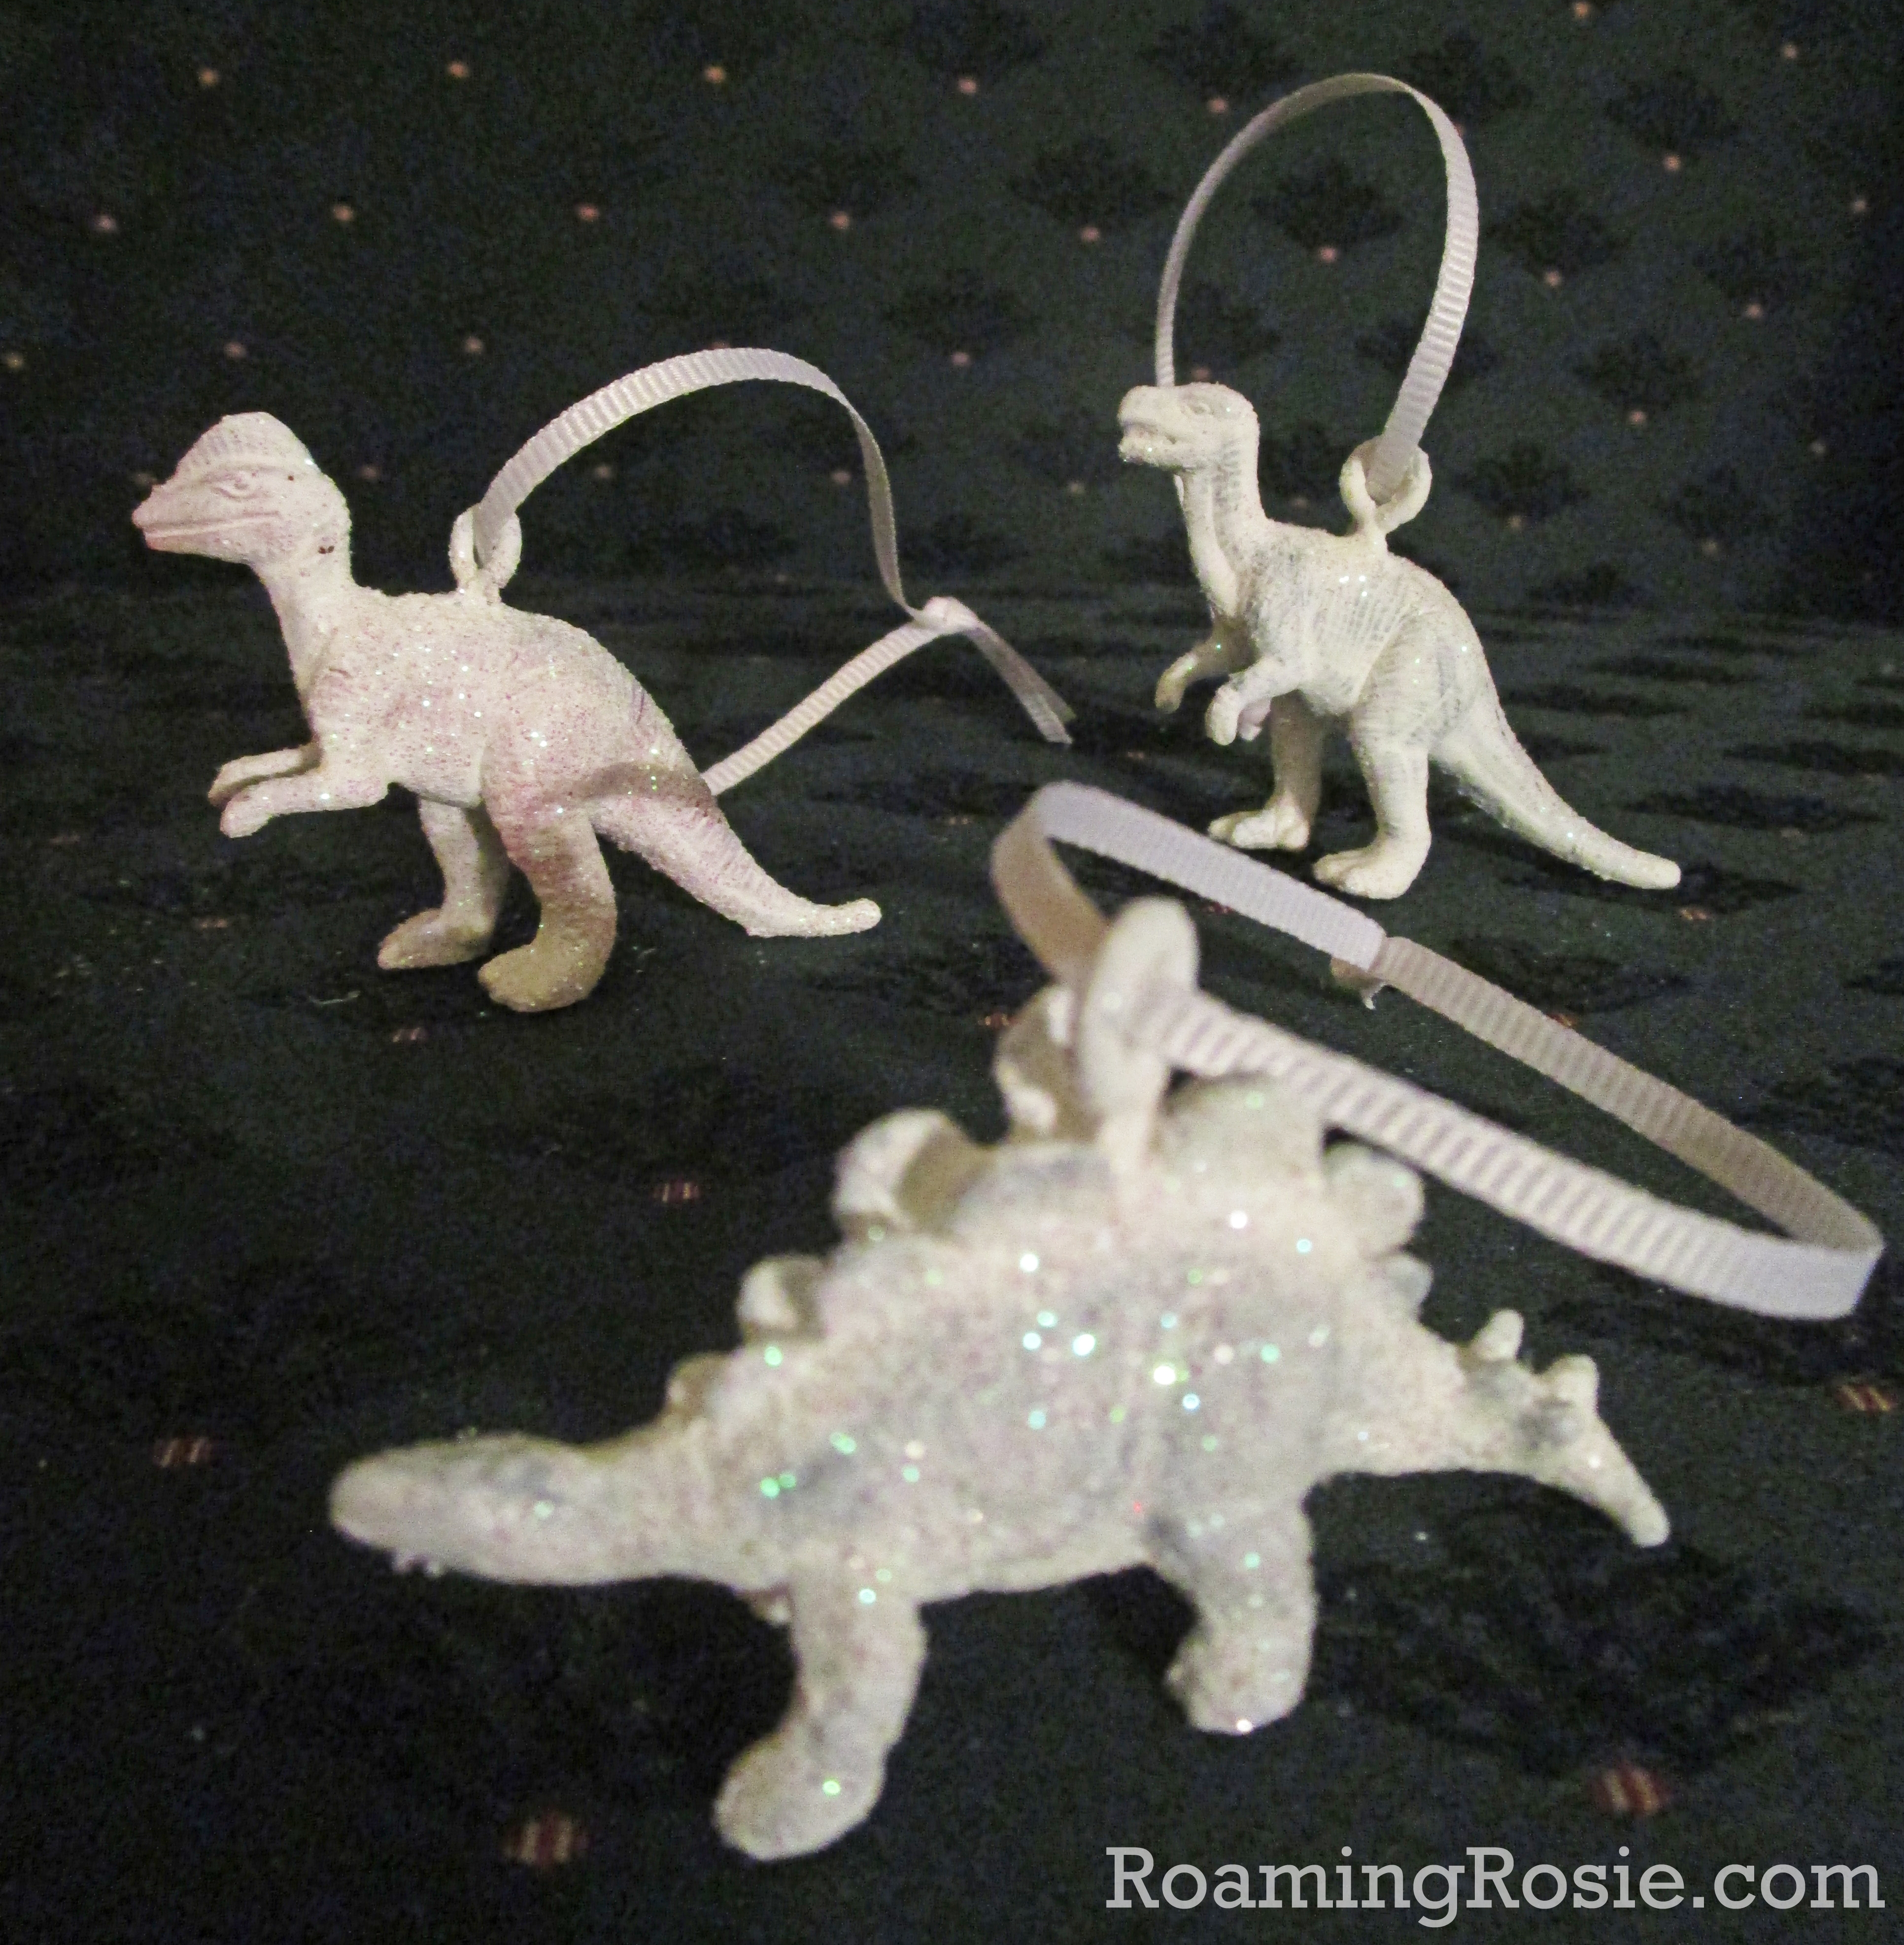
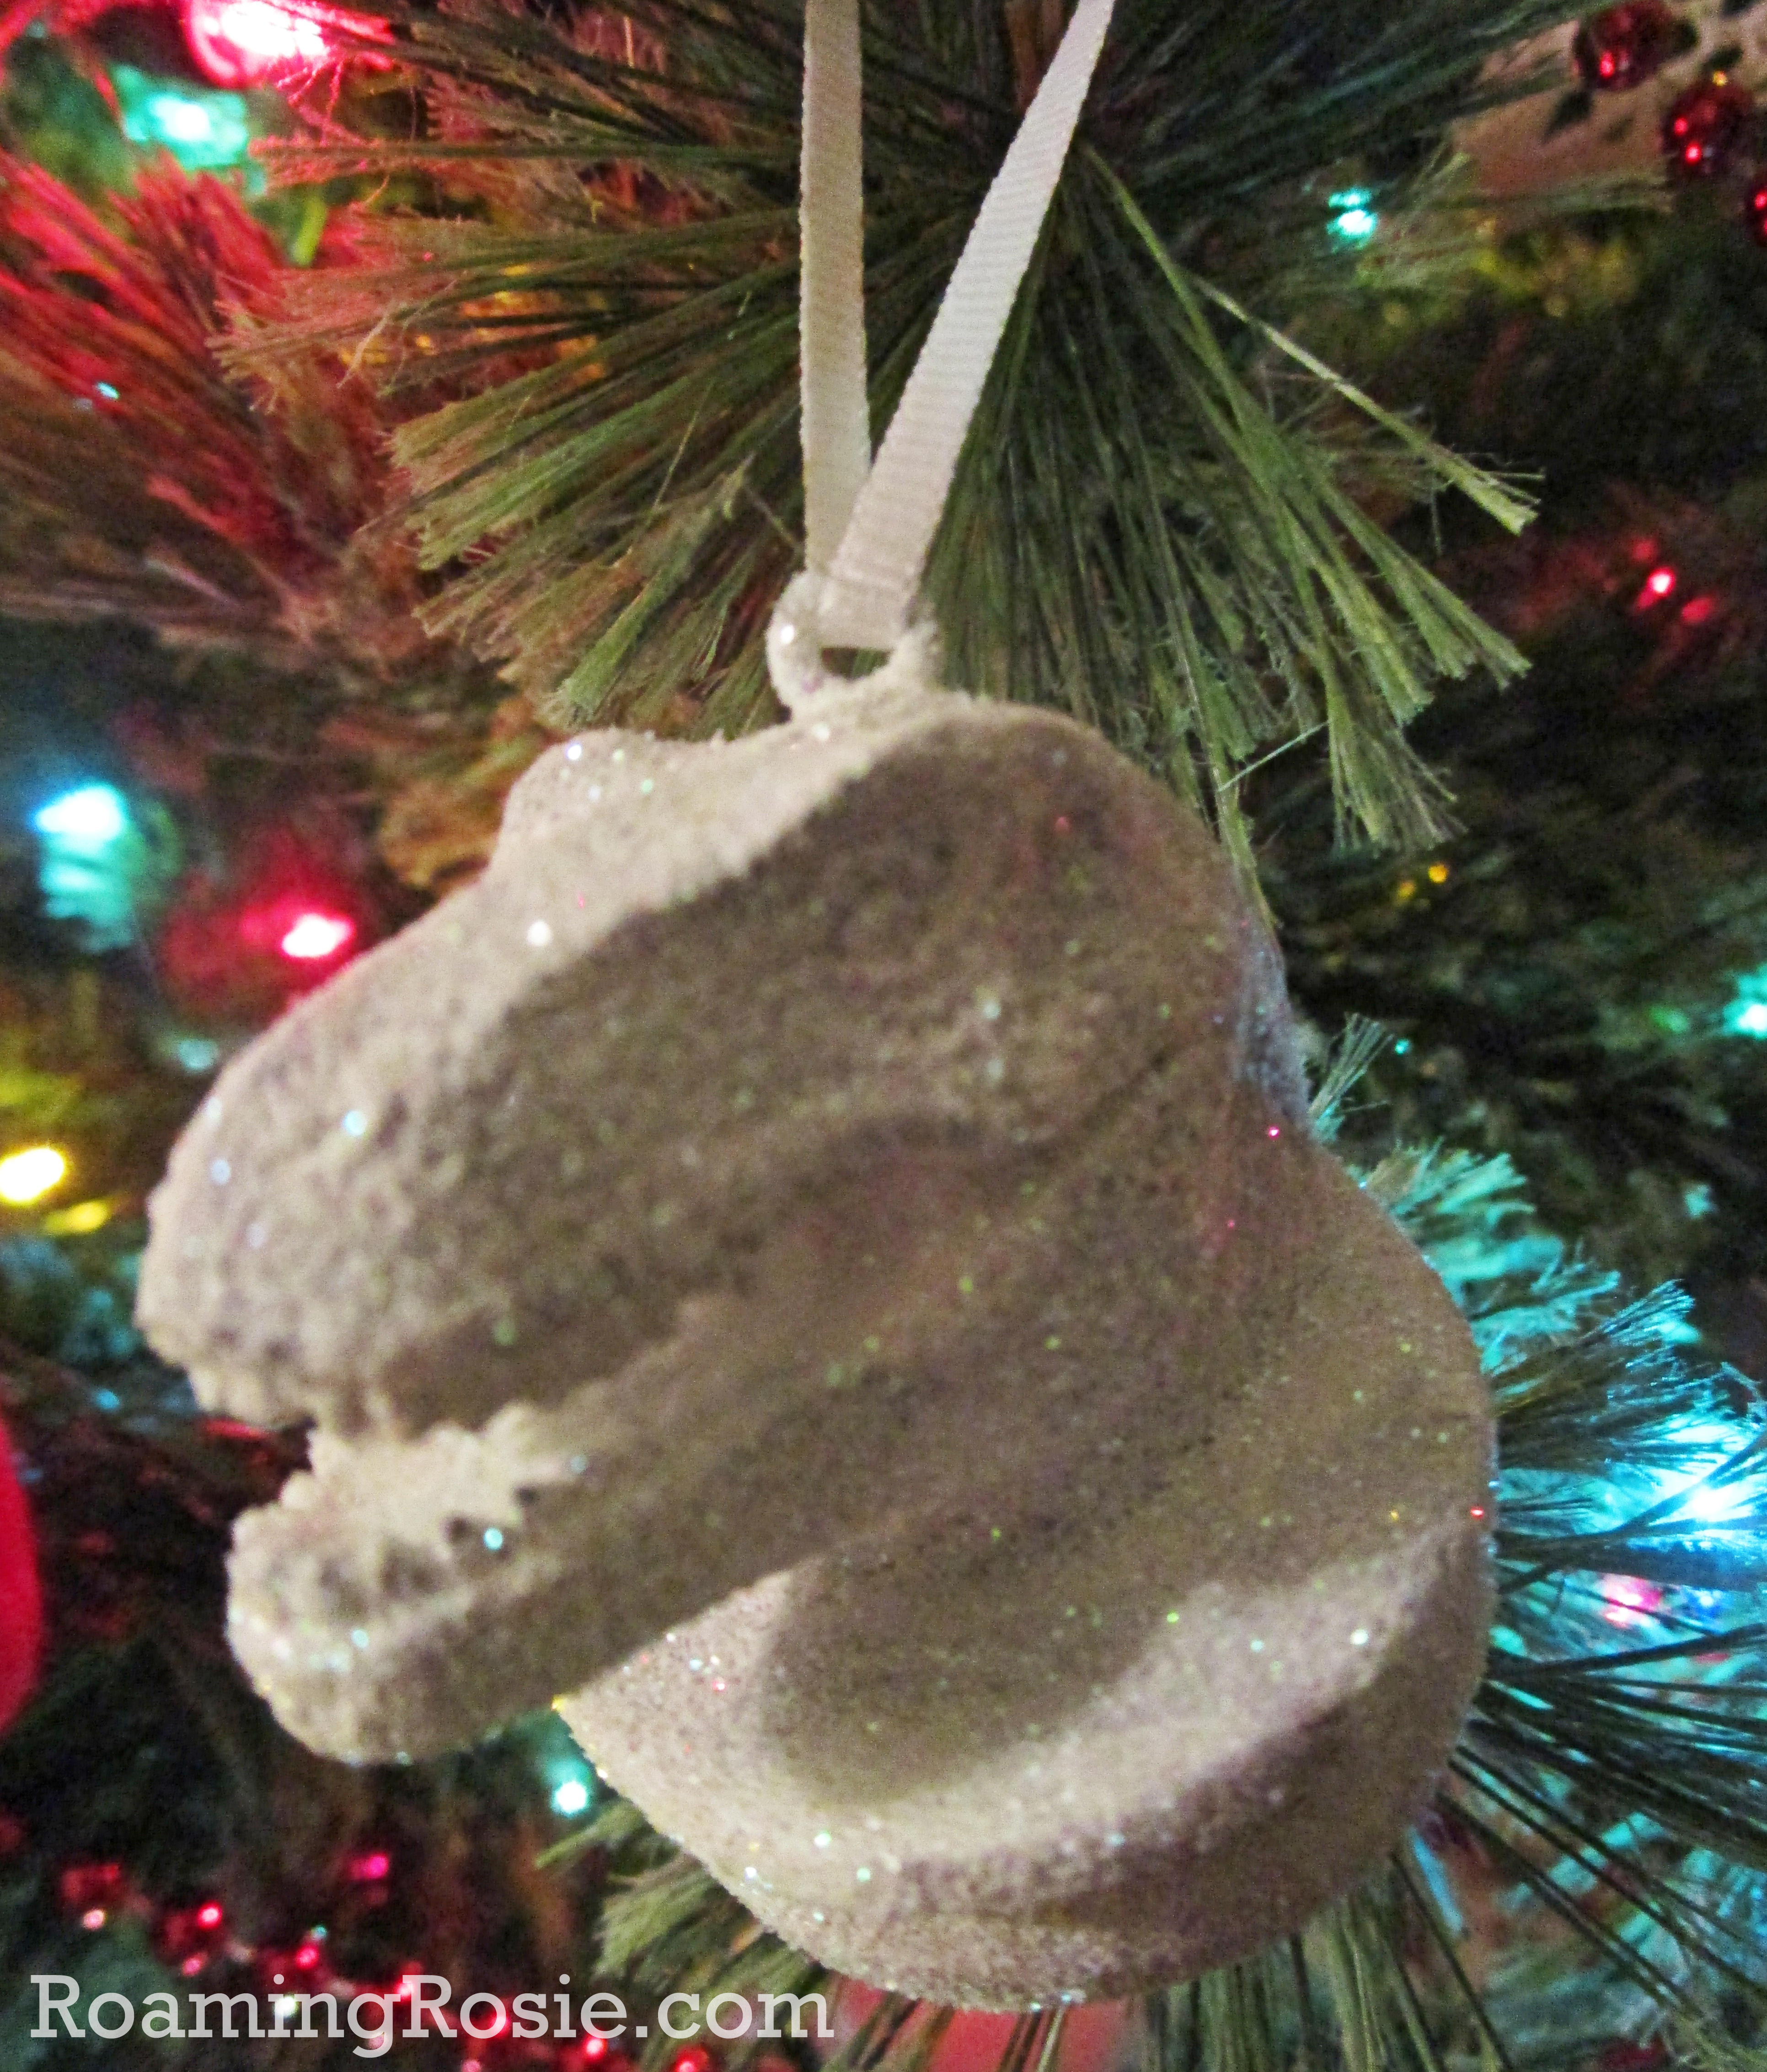
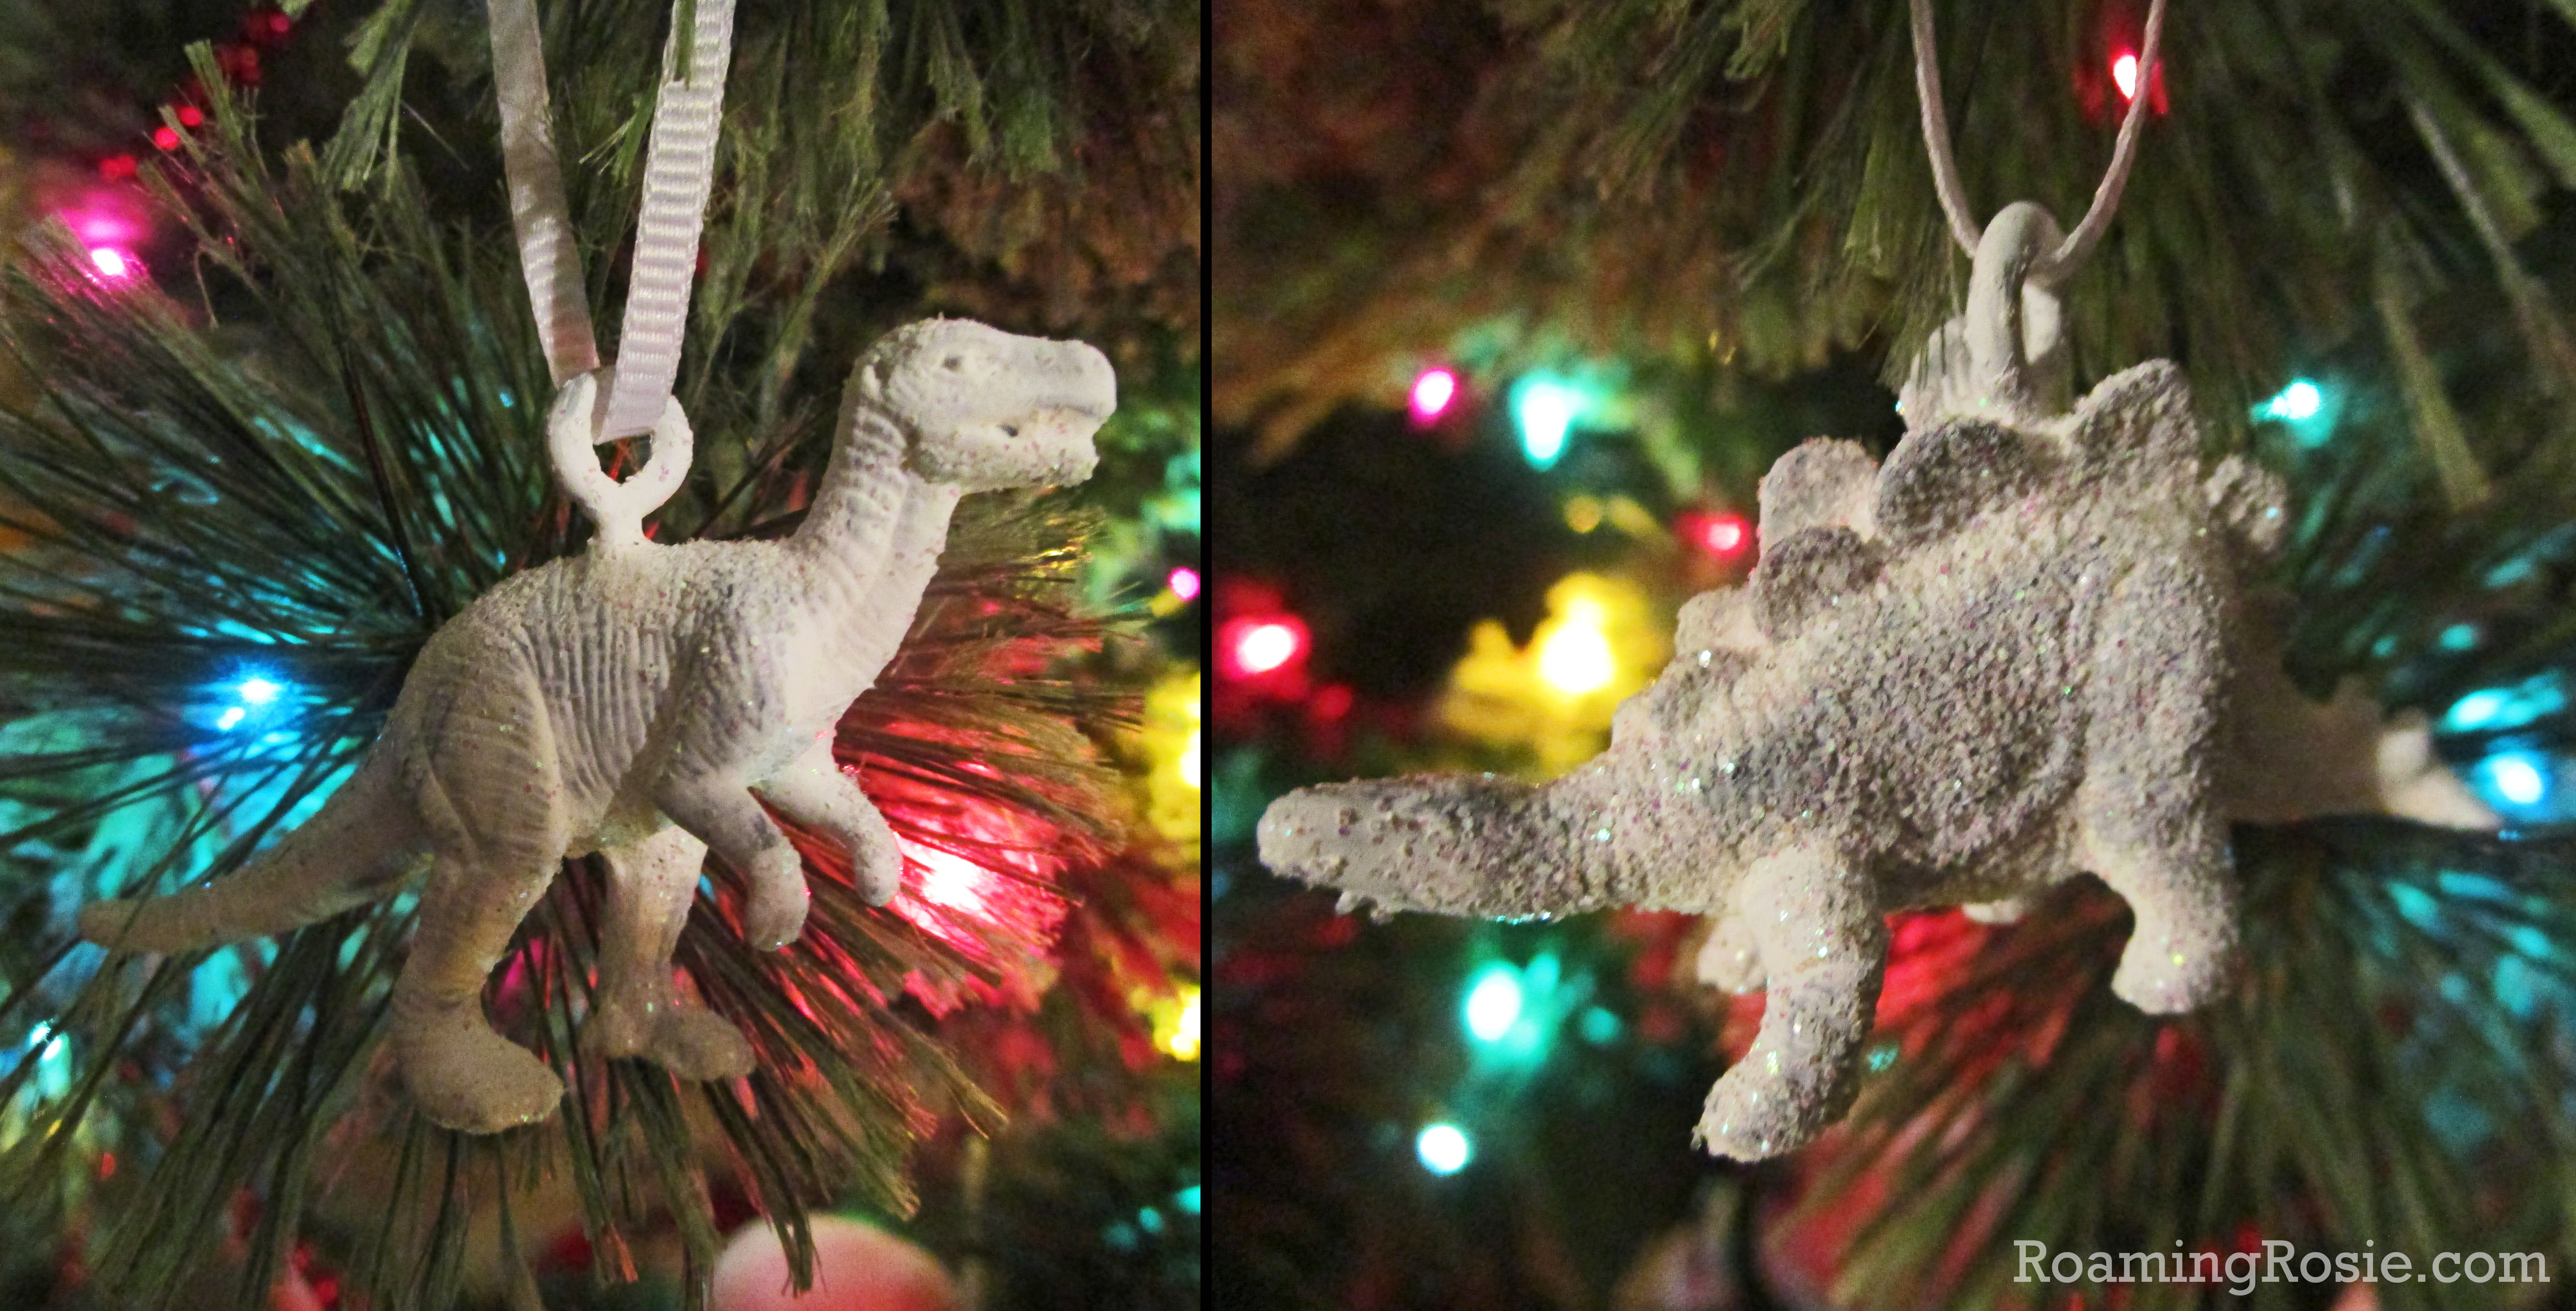
Mostly here, you’ll see the photos of the ones we painted all white – that was my preference for ultimate sparkle. But my kids did decide to paint a couple blue as well. You can really do whatever suits you.
Before you decorate them, you’ll want to attach tiny hooks.
I used eye hooks like these. The screw right into the toys with just a little elbow grease.
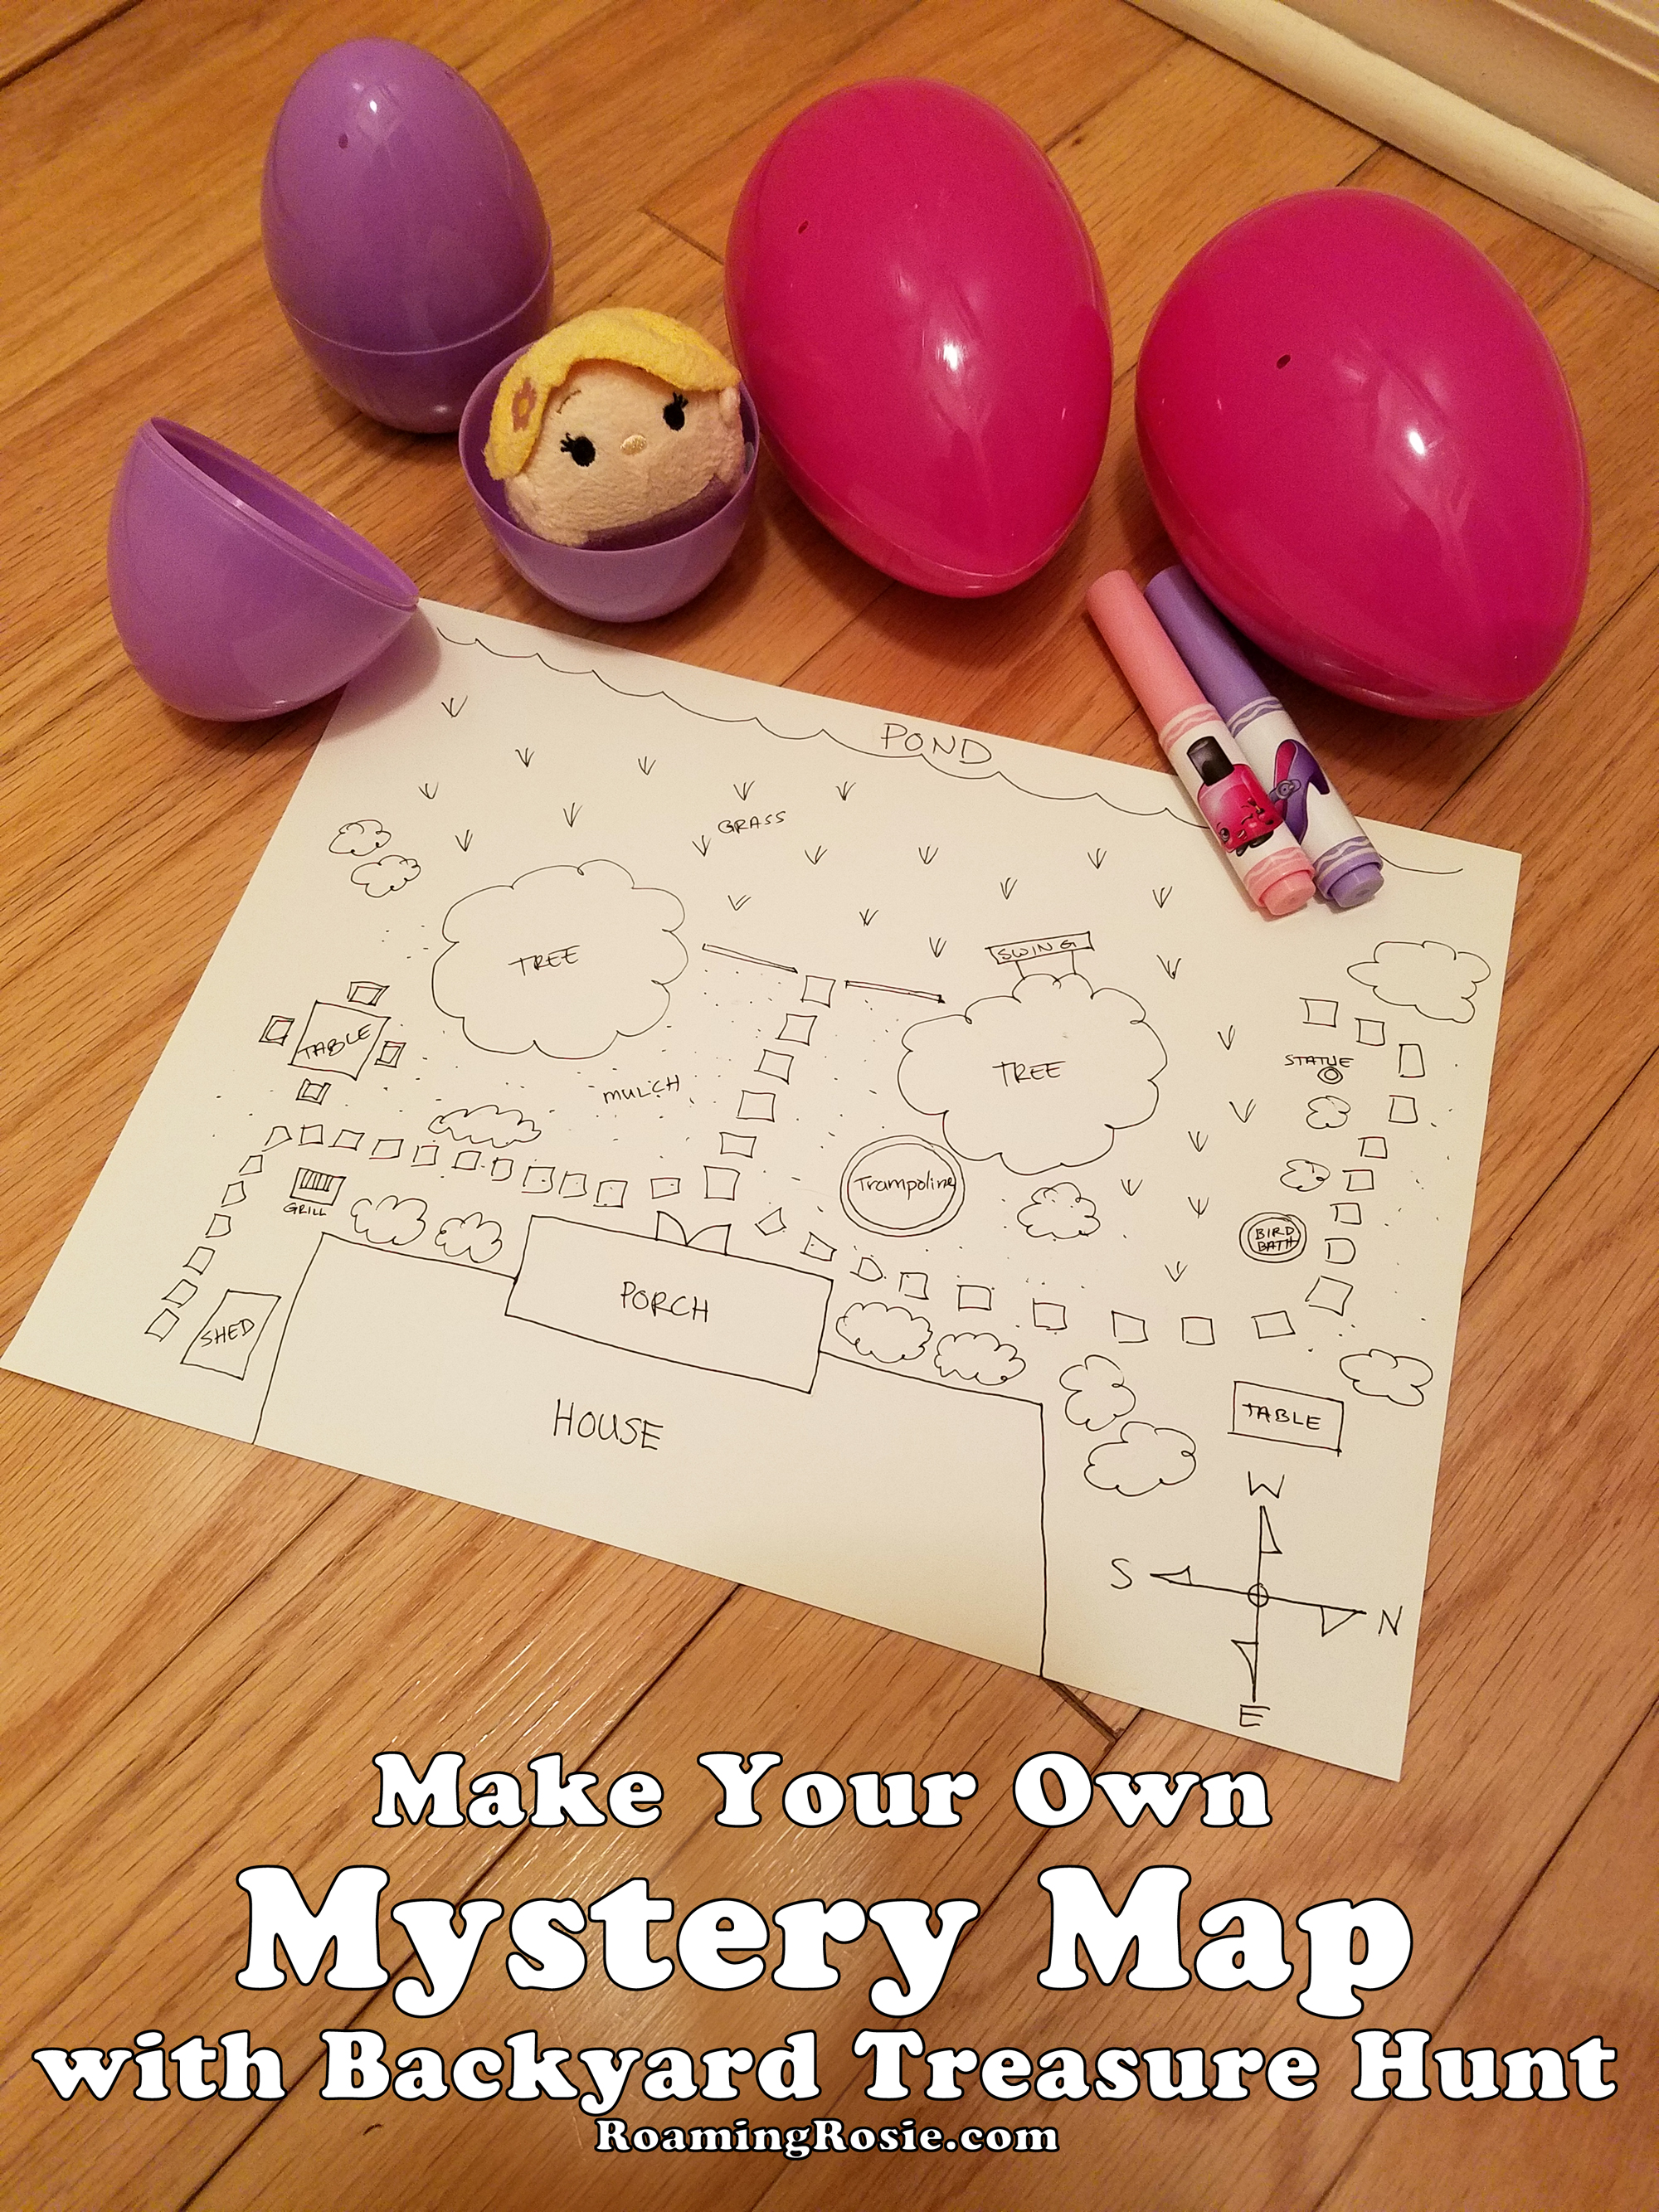
Our Mystery Map and Backyard Treasure Hunt was so much fun!
This is a great outdoor activity, and while it’s still quite hot outside as I write this, fall is coming. (Please hurry!!)
When I did this with my girls, I actually drew the map. I love maps, and I love floor plans, so for me it was astounding fun to create a layout of the backyard. Another option, however, is letting your kids make the map. Or make it a collaborate effort. It really depend on the ages of your children.
My main goal here, however, was the treasure hunt, as opposed to the map making. The latter, of course, is a great activity too, but instead of making the map, I had my kids navigate the one I made. With the goal of finding treasure!
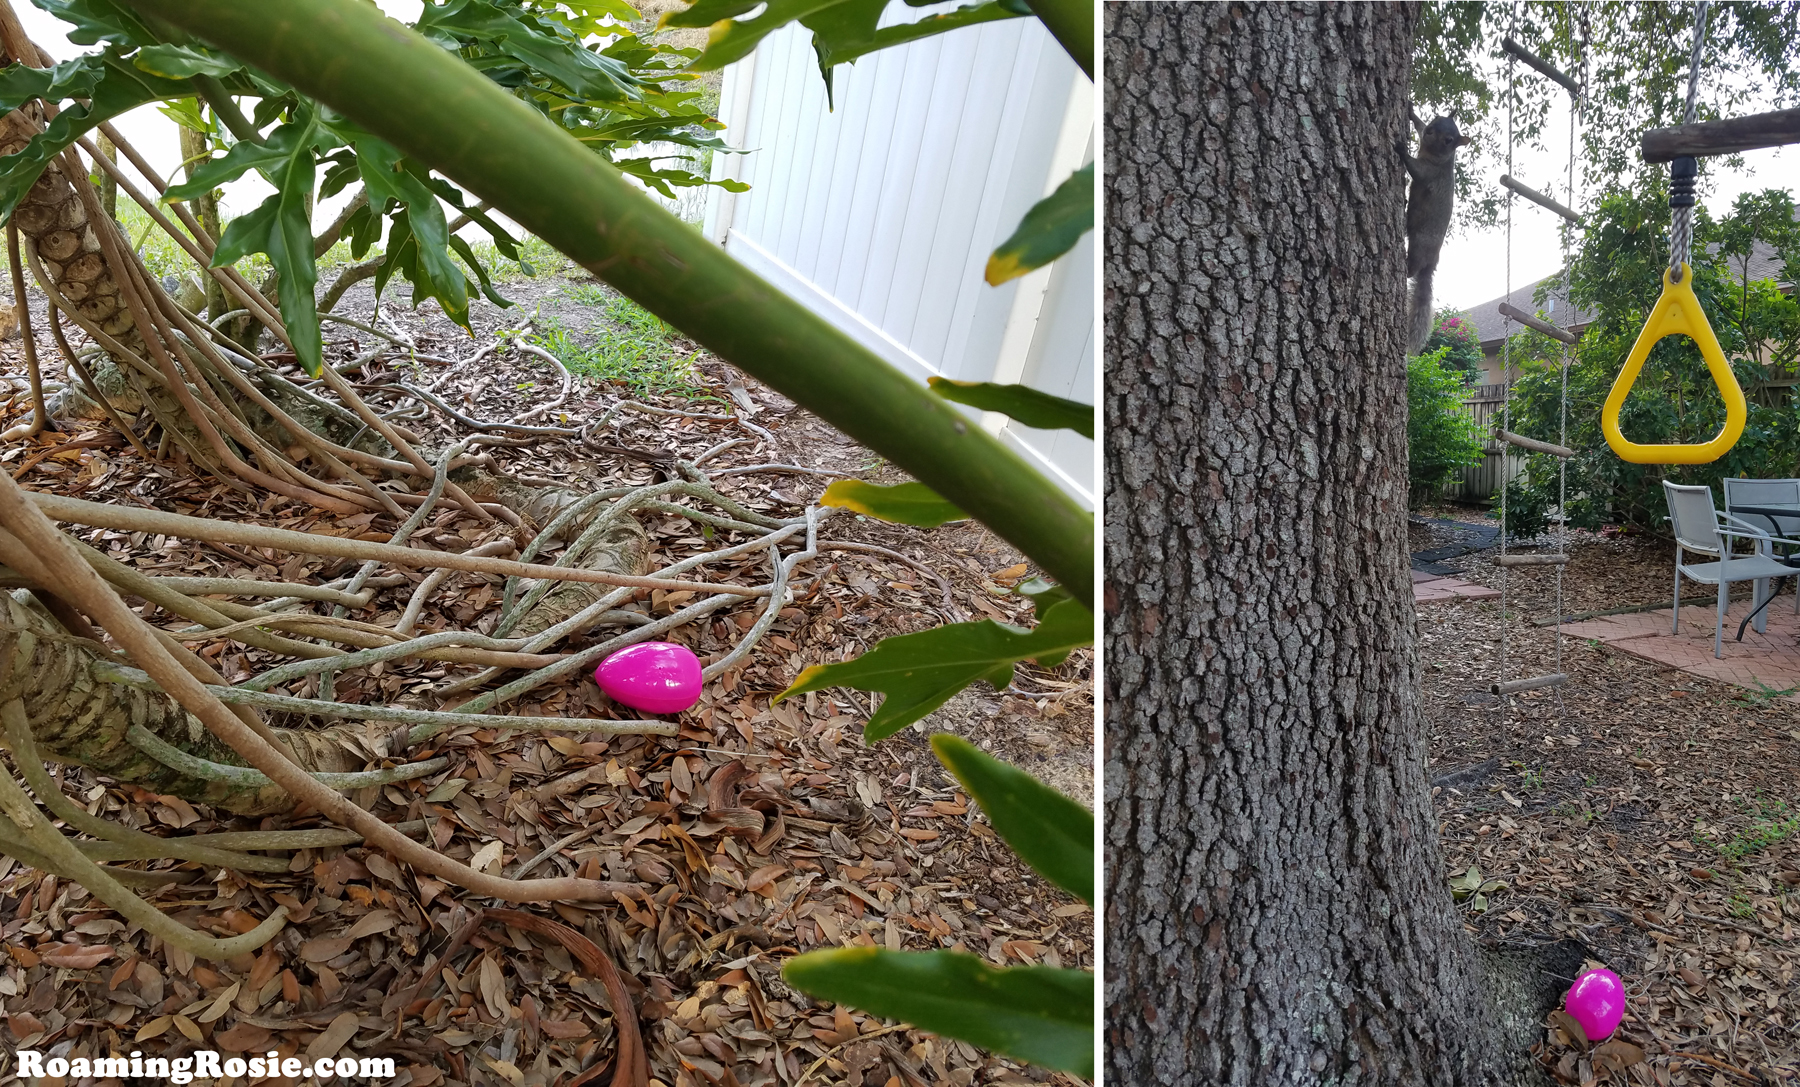
I got some new small toys (in this case, Tsum Tsums mini plush) and hid them inside some large-sized Easter eggs. Then I hid the eggs outside, handed the kids the map, and let them loose.
The instructions I had given them were to search the yard and make marks on the map to assist in the search.
Essentially, their mission was to mark off on the map each time they found an egg, and to cross off sections they searched which did not contain eggs.
As you can see below, I included everything from a bird bath to the tree swing on my map, but it doesn’t have to be that detailed. Unless you’re obsessive like me – then go all out!
My kids decided to use the two colors of markers for different purposes. They chose purple to circle the places where they found eggs, and pink to cross off the places they looked that were egg-less. I’d let them know there were four eggs, so they also knew when to stop.
Then they got to open their treasure eggs. So the hunt was fun, the treasure was exciting, and I was happy because they were outside in the fresh air. Wins all around.
No backyard? No worries! This can also be done inside (drawing couches and tables instead of trees), or you can head to your local park. If you’re planning a treasure hunt in a public place, however, you may want to hide vouchers of a sort that they can trade in for eggs, so that your kid can still find something but you don’t have to worry about someone else walking off with the treasure.
And, of course, y’all know I’m gonna talk about books if I get the change, right??
This was a project we did awhile ago (what can I say – it’s been a weird few years *shrugs*), but I got excited when I found a recent picture book that goes along with nicely with this type of activity.
Publisher: Anne Schwartz Books (2022)
The Boy Who Loved Maps by Kari Allen and G. Brian Karas is such a fun exploration of map making! It follows two children through the process of making a map of their neighborhood – and also exploring different places around the neighborhood – so if you’re already making a map of your backyard like we did here, this book makes a great visual for kids.
It has some educational backmatter to help you describe map making to kids, and it can give them ideas for drawing their own. Plus, it’s also an adorable story! The language used to describe their environment is nothing short of magical. I definitely recommend reading it.
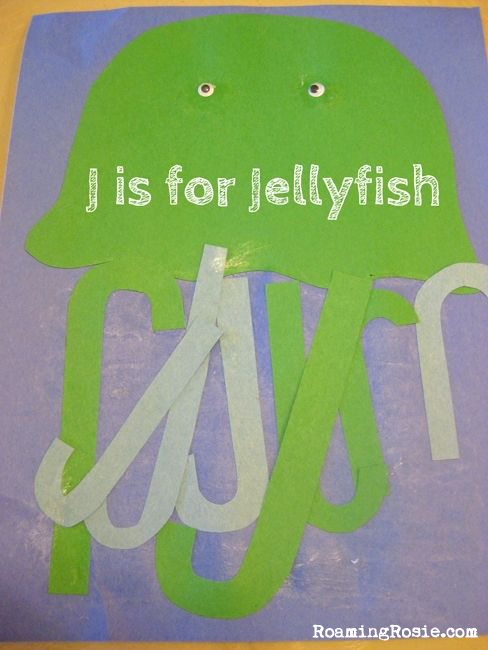
First, as always, we did our construction paper craft. But instead of one big letter that we decorated, we did a bunch of little letters.
I had cut out a pile of Letter Js and a rounded top so that my kids could make their own jellyfish with the letters as tentacles.
And googly eyes. I swear they get more excited about the letters that need eyes…
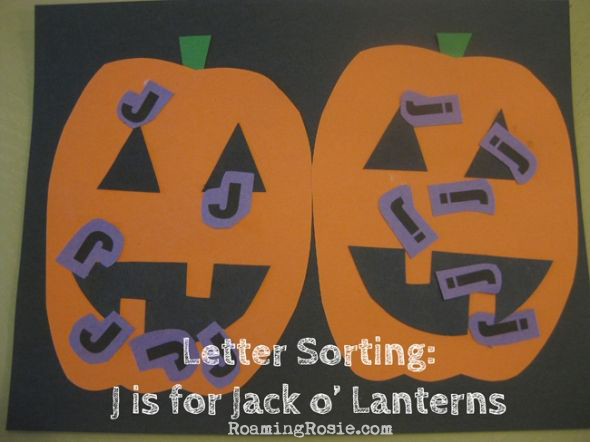
Then for our Letter Sorting activity, where they needed to separate out the capital and lowercase letters, I went with jack o’ lanterns.
My kids were still kind of little at this point in out Alphabet Activities, so I had cut out the pumpkins and faces ahead of time and all they did was glue the finished jack o’ lantern to the paper before gluing on the letters.
Now that they’re older, I might still have cut out the face pieces but I would have let them make the faces themselves first, probably from a selection of eyes and mouths.
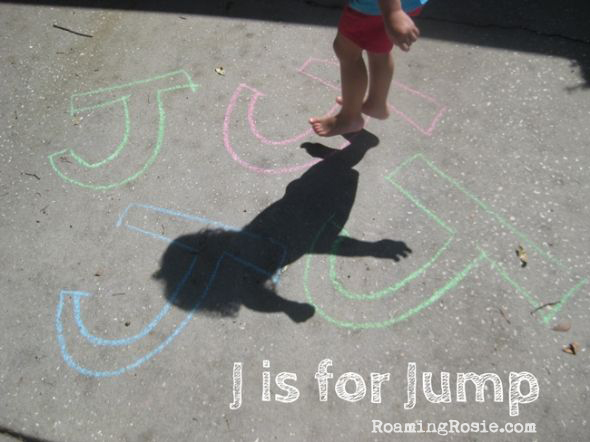
Back to the chalk!
I love that my girls love being outdoors, so chalk letters are great way to get them moving.
I drew a bunch of big Letter Js to represent the word “jump.” And then we did just that – jump from J to J.
This was a TON of fun for my girls.
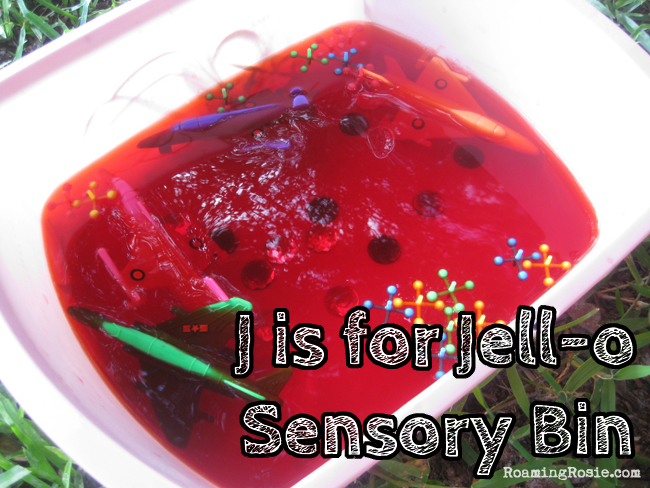
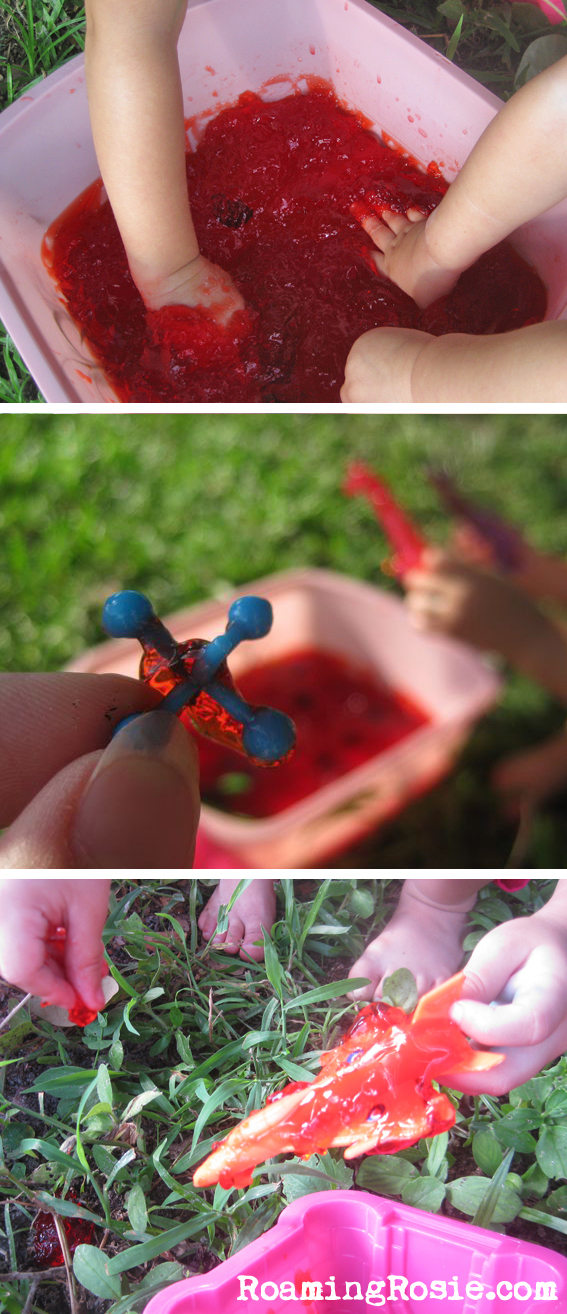
The night before Letter J Day, I made a couple of boxes of Jell-O in a big plastic bin and I threw a bunch of toys into it that started with the Letter J.
I didn’t get all fancy with worrying about where the toys would stay once the Jell-O solidified. I just tossed ’em in. Most of the toys floated to the top, but they were still partially submerged and, thus, still had to be dug out by little fingers that were eager to get messy.
We did it outside to keep the mess out of the house, but I suppose you could do it on a tile floor somewhere if you covered it in a tarp or with a tablecloth.
We made a pile of the toys in another bin (the sand castle-shaped container you see at the bottom), and then we rinsed off everything with the hose when we were done.
The toys we used were probably ones I found in the dollar store, but here are some examples of the plastic Jet party favors, craft Jewels, and plastic Jacks that are similar to what is pictured above.
I would check the party sections of your local store for similar items that are sold as party favors, and the craft section for the jewels.
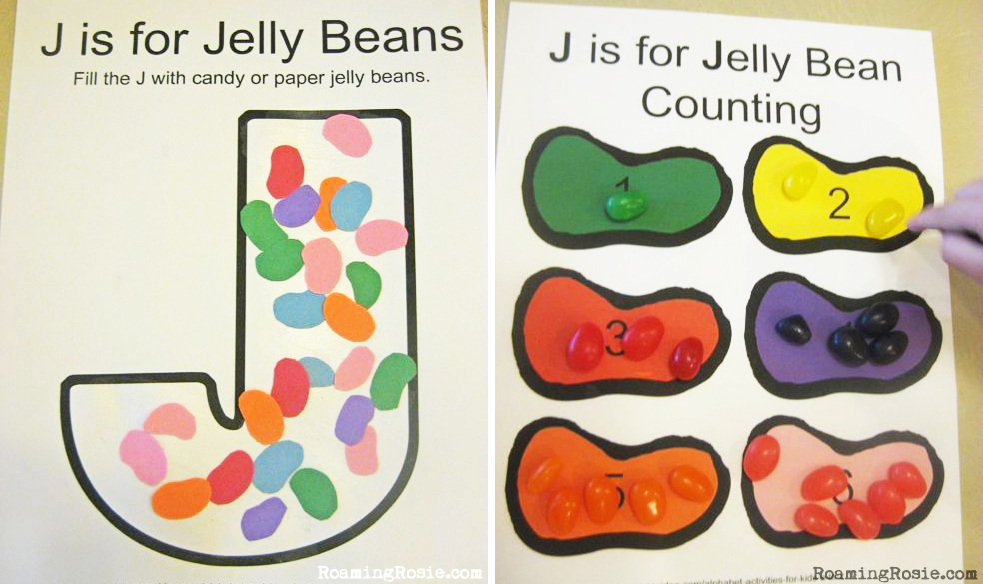
We did a few worksheets, as always. There were my typical letter searches and mazes and such, but the jelly bean ones were the favorites of the day.
So we watched the video above, which my girls love because they enjoy watching kids doing things (plus he’s really good), and then we tried juggling with some light balls we had around the house.
We weren’t terribly successful, except at producing lots of giggles. :)
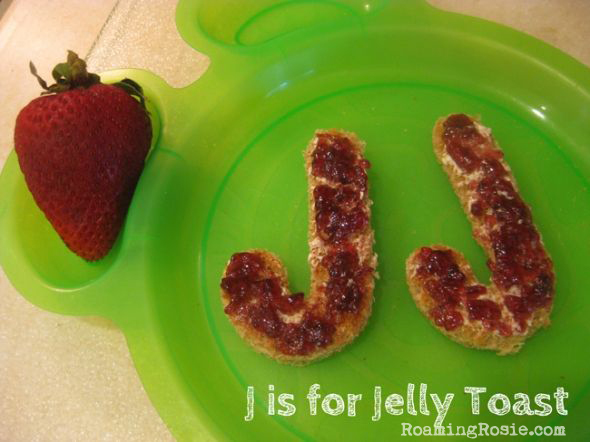
Gotta love jelly toast!
I cut out the J shapes with our letter cookie cutters, then slathered the toast in some butter and strawberry jelly.
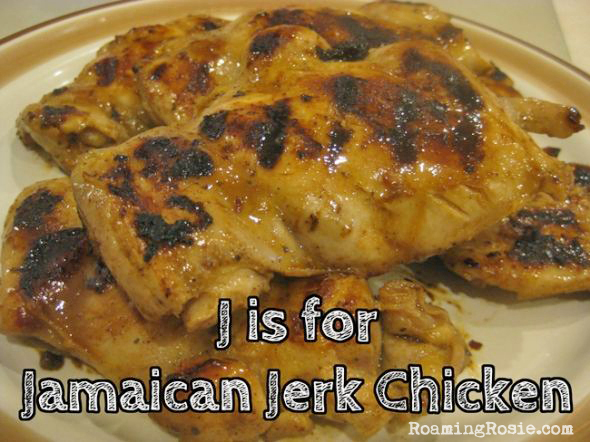
I didn’t want to make a big, complicated dinner in between our projects, so I kept things simple with this chicken.
I marinated a package of boneless thighs in some Jamaican Jerk Marinade that I picked up in the supermarket and threw them on a grill pan. Easy Peasy. (Don’t forget to have the Little Ones seek out the Letter J on the bottle of marinade!)
That’s it for Letter J! Except for the free printable worksheets I made, which you can get here:
These birdseed ornaments are a project I did with my kids around Christmastime, and so we used Christmas shaped cookie cutters, but it’s a project that can be done any time of the year.
There are a ton of options, but I let my girls pick and we used cutters shaped like a tree, snowflake, gingerbread man, candy can, shooting star, and an angel.
There are a few recipes out there for birdseed ornaments that include flour and corn syrup. These ingredients aren’t really healthy for birds and, besides, they are unnecessary.
Make sure you stir the mixture so that the gelatine covers all of the birdseed. The gelatin is what holds the ornaments together.
But if there is still a little puddle in the bottom of the pan after you mix the birdseed in, then go ahead and add a little more birdseed.
Place your cookie cutters upon some waxed paper and fill them with the birdseed.
We used little milkshake spoons because the smaller size fit better into the spaces. But I guess you could use your fingers, too.
Add a piece of string or twine once the cookie cutter is half full. Then scoop more birdseed on top of the string and press it all firmly in the cutter.
I knotted the middle of my sting and stuck that knot inside the ornament for greater support, leaving the other end of the string open so that I could tie it over the larger tree branches in our yard.
Allow them to sit overnight.
Then remove them from the molds by very gently pressing them out.
Try to press them out evenly: putting too much pressure in one area will break them apart.
Above you can see our angel and below our snowflake.
There were little bits and pieces that fell off because there wasn’t enough gelatine in a certain spot, but they mostly held their shapes.
Until the birds and squirrels got a hold of them … but then, that was kind of the point. :)
Birdseed Christmas Ornaments
Ingredients:
1/2 cup birdseed
2 packages (.25 ounce each) Knox gelatin
1/2 cup water
Thin rope or twine
Simmer the water in a saucepot. Add the gelatin and stir until fully dissolved.
Remove from heat and stir in the birdseed until all seed is fully coated. If the mixture is still wet after stirring well, add more birdseed.
Place medium to large cookie cutters on top of waxed paper. Scoop birdseed mixture into cookie cutters and fill halfway.
Place a piece of string into the cookie cutter and scoop more birdseed mixture on top of the string, making sure that part of the string is buried into the center of the ornament (I knotted the twine here for support) and part is hanging out. Use a spoon to press the birdseed down firmly.
Allow to sit overnight. Very gently push birdseed ornaments out of cookie cutters and hang where desired. Makes about 6 large shapes.
My girls have had – and are still having – so much fun with this Pretend Play activity of Raking Leaves.
And it’s so simple, too!
I bought 3 bags of 50 leaves each at the dollar store, and we already had the rakes – although I think we bought them at the dollar store in the spring.
I do suggest using plastic rakes because they’re safer for indoors. We also have metal and wooden rakes, but plastic worked best for this.
Also, I prefer doing this activity on the carpet, but it does work on the tile and wood floors. To be honest, though, I found raking the leaves up on carpet with the plastic rake to be somewhat soothing. Meditative, even.
To store the leave we use a basket that we already had, but you could also use a plastic baggy. {That’s what I plan to store them in at the end of fall.}
Another thing these leaves are perfect for is throwing.
Rake up a pile and toss them into the air!
Seriously: these are made of fabric, so they kind of flutter down gently. The whole reason I decided to do this with my kids is because they adore the Elefun Game so much. And, really, the Elefun game isn’t perfect. The butterflies/fireflies come out too quickly and there aren’t enough of them, but my girls still love catching them AND collecting them afterwards.
But that’s why I bought 150 leaves for this activity – so there would be enough to entertain both of them. Plenty to keep them busy with raking and throwing.
And organizing.
My 4yo would make piles of the leaves, sorting them by color and counting them. And my 2yo made piles that were her “birds nests.”
The options are limitless.
And, like I said, this activity can be extremely affordable. I already had the rakes and the basket, and I bought the 3 bags of leaves for a buck a piece at the Dollar Tree. The plastic rakes can also be found in the outdoor toy section or garden section of places like Target or Kmart even Walgreens – at certain times of the year.
I like to make homemade activities for my girls by recycling things we have around the house.
We use pipe cleaners {or chenille sticks} fairly often, so we’ve always got those on hand. I usually get them at the dollar store.
For this project, I used 4 pipe cleaners and cut them into inch-long pieces with a pair of strong scissors.
Then, the goal was simply to put them into an old spice container.
This is the type of spice container that holds dried herbs, like parsley or oregano. You’ll notice the top has only 6 large holes.
It’s a great way to work on fine motor skills and helps with prewriting skills.
The only drawback to this is that the metal inside the pipe cleaners can be a little sharp. There are a couple of ways around this. One: ignore it. And two: use pliers to curve over the very ends of the metal pieces, making sure that the sticks still fit through the holes in the spice container.
We chose option one.
Really, it’s not terribly sharp and you can insert them without pushing the ends anyway if you manipulate the pieces by holding them on the fuzzy part. Or pushing gently, which is what I showed my girls.
Or, if you’re really worried about it, you could just use pieces of yarn instead.
My favorite part is that all the little pieces fit inside the container, and, thus, it is self-contained and easy to store.
For more kid activities using items around the house, check out:
My girls love to do projects, and I love that they enjoy projects that help them with letter recognition, pre-reading skills, and a whole handful of other useful exercises.
The main problem is that I haven’t gotten around to posting about all of the activities yet. Or all of the worksheets that I’ve made for the girls. But I’m getting to it.
Today, for example, I’m sharing one of the Letter U activities that we did… even though I haven’t yet officially posted ALL of the Letter U activities and worksheets yet. But with summer ending, I wanted to get this one out there. It’s a great way to get the kids outdoors.
I cut two letters from a piece of purple foam and gave a U to each of my girls.
I showed them a letter U worksheet with the words Up, Underground, and Underwater. We talked about what each word meant, then we used the foam letters to demonstrate each concept.
They held the letters over their heads, then buried them in the dirt, and, finally, submerged them in the pool.
It was a lot of fun for them, and certainly memorable.
Here are a few pics of them playing with the deliciously scented dough:
Oh – and playing with it on their easy-to-clean Jake placemats, of course!
Lemon Scented Play Dough
Ingredients:
1 cup lemon juice (or water added to squeezed lemon juice to equal 1 cup)
1 cup flour
1/4 cup salt
Zest from one lemon
1 Tbsp. vegetable oil
2 tsp. cream of tarter
1 tsp. lemon extract
Yellow food coloring
Begin by zesting and juicing one lemon.
Squeeze the juice of the lemon into a glass measuring cup. If it is less than one cup, add water until it reaches the 1 cup line.
Mix all ingredients in a medium sauce pan, adding enough food coloring to reach your desired color.
Cook over medium heat, stirring constantly, until the mixture comes together into a ball.
Remove from heat and knead until smooth.
Store covered. Will keep for about two weeks.
[Note: even though all of the ingredients are technically edible, please don’t let your kids ingest this. Also, if your child is going to help with the kneading, please remember that the dough will still be hot when you first remove it from the pan. If stored in a sealed container, this will last many months.]
One of the first letter projects we ever did was an American flag.
And it really stuck with her.
To this day, my daughter points out the flags, excitedly shouting, “An American flag!”
The project itself was simple: I cut out red stripes, a blue rectangle, and punched out some white stars ahead of time. Then I showed my daughter a flag and she copied it in paper.
There are plenty of other flags you could do, too. Just to name a few: Austria, Australia, Argentina, and Afghanistan. Also, Alabama, Arizona, Alaska, and Arkansas.
I always do a letter sorting project where I print out both capital and lowercase letters ahead of time.
These letters were cut into apple shapes. {Don’t laugh at my apple trees!}
You could easily hand write the letters instead. Honestly, my printer gives me more trouble with construction paper…
This was a fun snack.
I cut some thin slices in an apple and used an A cookie cutter to make little apple ‘A’s.
And I ate all the scraps, too. :)
I’ve made these a bunch of times, usually for potlucks.
I’m not posting a recipe since it was all ready-made supplies {or you could substitute with your favorite homemade recipes}.
Check out the step-by-step photos:
I used a 2-inch flower shaped cookie cutter to cut pieces out of store bought pie crust. I placed the flower crusts in greased muffin tins. Then I scooped a few apples from a can of apple pie filling into the crust. I topped it with a generous sprinkle of my Cinnamon and Sugar Mix, and baked them according to the pie crust directions.
These little pies are always a hit.
Chocolate is a favorite in our house, so these chocolate acorns, it should go without saying, were also a hit.
The great thing is that they also work well for autumn-themed projects. I’m thinking of making them again around Thanksgiving.
As you can see in the photos, the ingredients are Hershey’s Kisses, mini Fudge Stripe cookies, and miniature chocolate chips.
I melted some chocolate chips in a baggy to act as the “glue” to hold it all together. Then we stuck the flat end of the Kisses onto the bottom of the cookies and let them sit for a minute to set. Then I put a drop of melted chocolate on the top of the cookies, and my daughter attached the kiss to the top.
My kids and I have been practicing the alphabet through Letter Days, exploring one letter a day through food, games, activities, and worksheets.
I originally began posting about them on Squidoo (which is now HubPages), and posted about half of the alphabet there. But that site keeps changing their format, so it’s just easier for me to redo everything here, to start from scratch. Besides, I’ve created new worksheets and edited the format of the old worksheets to make printing easier. Not only that, there’s new stuff here you won’t find there – which is why I didn’t include the links to the old articles.
For each letter, I’ll be posting about activities and recipe ideas and also a list of all the free worksheets I’ve made. The worksheets posted below are all in PDF format and are free for home and classroom use – so enjoy!
What is a Letter Day?
I would usually spend one full day doing projects on a letter, or spread it out over a few days. Although even if we did just one Letter Day, we’d still continue discussing that letter for the next couple of days.
To begin each Letter Day, we glue a letter into our alphabet binder. We have two binders that are quite full, with all of the paper activities separated by A-Z dividers.
I almost always do at least two construction paper crafts that include making a letter into something (an H into a horse or a Q into a queen, for example) and a letter sorting activity where my girls need to separate capital from lowercase letters onto two shapes.
I do cut the paper down, though, before we do the projects. I make them 8.5″ by 11″ and then use a 3 hole punch after we’re done to help them fit in the binder.
I used to cut out the construction paper pieces ahead of time, too, and just let my girls glue them on and sort the pieces however they liked. My girls are older now, though, so they can cut more of the pieces themselves. It’s up to you how you’d like to do it, depending on the age of your children.
We also do worksheets that include tracing letters, tracing lines, mazes, color matching, letter searches, and much more.
Sometimes we do a traditional craft indoors, sometimes we run around outside and dig in the dirt. And we pretty much always cook and/or bake something.
But whatever game we play or whatever food we eat, we always talk about the letters. If we’re eating gnocchi because it’s Letter G day, we take the time to find the letter G on the gnocchi package.
We usually do collages, too. But not always, so I don’t plan on including them in each post. When we started, my daughter wasn’t able to cut out shapes yet, so I spent some time cutting pictures out of magazines after she went to bed.
The finished collages looked like this:
We used apples, angels, artichokes, and an accordion for letter A; a bison, butterflies, babies, and bells for letter B; and cars, camera, cherries, and cats for letter C. Now that she’s cutting out shapes quite well on her own, though, I’m considering starting the project all over again, but letting her cut out the pictures this time.
Plus, since my girls love being outside and drawing with chalk, we also practice our letters with tracing and coloring in chalk:
Most of these projects use supplies that we have around the house or that are easy to find. Construction paper is a biggie.
Here are some of the things I’ve mentioned in this post, including construction paper, a paper cutter, a 3 hole punch, and page dividers:
But where do I find all of these projects and worksheets that you’ve mentioned?
I’m so glad you asked!
They’ll all be listed right here and under the Alphabet Activities category. I haven’t finished editing all the photos yet, but they’ll be listed here as I post them. Plus, at one point my old computer died and I lost a lot of photos. So now my oldest is a great deal older when than when I started these projects with her, and since we’ve had to redo some of them for the photos (and it’s taken me awhile to get around to posting them) you may notice some age gaps between the photos of my various blog posts. But taking three or so years to post something is just an everyday part of #momlife, right? Right??
Anyway, this is the best page to bookmark (or Pin) if you want to take full advantage of everything, since this is where you’ll find the list to all of the Letter Day activities and worksheets.