Tissue Paper Flower Cut Out Cards (Made with Cookie Cutters!)


Tissue Paper Flower Cards

Tissue Paper Flower Cards

This was a neat craft I enjoyed doing with my girls, and the Tissue Paper Cut Out Cards make great presents.

You can give the cards for Mother’s Day, birthday, Thank You cards, or even Thinking Of You cards.

They’re versatile that way, and you can let your kids get hands-on with the crafting.

I cut the tissue paper strips ahead of time by rolling up some colorful sheets of tissue paper into a tube-like shape and snipping off inch-wide pieces with sharp scissors.

Tissue Paper Flower Cards

I did do the cutting myself for these flower shapes because I wanted them to have the detailed shapes cut out of the middle of the paper, which is a little hard for small fingers to do.  But they had plenty of fun with the glue and tissue paper.

I used cookie cutters from a couple of different sets, kind of like this Spring Set and this Nesting Set.  We went with flowers because we made this during the springtime, but you could use any shape you like.

Tissue Paper Flower Cards

Fold a piece of construction or craft paper in half to make your card.

Trace the shape inside the cookie cutter, just like you would use a stencil, onto the front of the card.

Then poke your scissor in the middle of the shape and cut it out of the front of the card.  Or your could open the card and place it flat on some cardboard and use an X-Acto knife to carve out the shape, or let an older kid or teen do it.

Tissue Paper Flower Cards

Take a white sheet of paper and cut it to fit just inside the cards.

Let your kids slather the white paper with glue or glue sticks, and then lay out the tissue paper pieces in stripes that go across and touch each other or slightly overlap.

Tissue Paper Flower Cards

Once the sheet of white paper covered in tissue paper strips is mostly dry, slather the inside of the card where the cut out shapes are.

Lay the white paper carefully against the glue with the tissue paper facing the cut out shapes.

Tissue Paper Flower Cards

Then your colorful tissue paper will show through like this:

Tissue Paper Flower Cards

Isn’t that darling?

The recipients were quite charmed, and the girls enjoyed making them.

Tissue Paper Flower Cards

You could make these cards for other holidays, too.

You could do Christmas shapes and use red and white tissue in a green card, for example.  Or orange and purple tissue paper in a black card cut with Halloween shapes.

Tissue Paper Flower Cards

Follow me on Pinterest for more great crafting and activity ideas!

Have fun!

Roaming Rosie Signature

Cookie Butter Fudge

Cookie Butter Fudge Recipe

So I decided to create a recipe for Cookie Butter Fudge.

And … oh … this is quite possibly both the best and worst thing I have ever done.

This fudge, people, is RIDICULOUS.

If you’ve read my other fudge recipes, you know that I abhor the types of fudge that don’t set and require refrigeration.  So, in that vein, this fudge has no condensed milk, or even marshmallow creme or anything like that.  It’s just good old fashioned homemade fudge.

With cookie butter.

*drools*

If you are here, I’m assuming you’re familiar with cookie butter.  If not, you should seriously consider acquainting yourself immediately.

I used the Trader Joe’s Speculoos Cookie Butter which I often sometimes eat by the spoonful straight from the jar because, you know, it’s awesome. So that’s what I recommend.

But if it’s not available in your area (or you don’t want to order it from Amazon), I’ve seen similar products at Publix (European cookie spread) and Target (Biscoff creamy spread).

Cookie Butter Fudge 3

So, here we go…

Simple ingredients.  Just milk, cream, butter, and sugar for the base, and cookie butter and vanilla for the extra flavor.

Cookie Butter Fudge 4

Dump the first ingredients in the pot and whisk together.

If you’ve forgotten to set out your butter ahead of time, just slice it and throw it in cold.  Bring up the pan to a boil slowly, making sure the butter melts and gets combined.

But once it gets to a boil, do NOT stir it again.  (It will get all grainy and weird.)

Cookie Butter Fudge Recipe

As it comes to a rolling boil, it’s going to expand.  A LOT.

So use a very large pot.

Cookie Butter Fudge Recipe

As it cooks, it will reduce back down.

Cookie Butter Fudge 7

Once it gets to soft ball stage, it will be much thicker with larger bubbles.

This takes about 15 minutes.

Unless I’ve forgotten to leave it at a rolling simmer.  If the temperature is too low, it can take a lot longer than 15 minutes to get to soft ball stage.  Just make sure you get there, or the fudge won’t set.

Cookie Butter Fudge 8

Take it of the heat and quickly stir in the vanilla and cookie butter.

Cookie Butter Fudge 9

You’re going to beat it over a bowl of ice to help it cool down and set.

Stir it well, but as soon as it is thick enough to pull away from the sides and bottom of the pot while you stir it, go ahead and dump it in your prepared pan.

Cookie Butter Fudge 10

You’ll need to let it sit for awhile to finish setting up.

Once it’s hardened (this should take between 30 minutes and an hour), pull it out by the foil.  You can let it sit longer, on a cooling rack, if it feels wobbly and soft.

Then place a large platter over the fudge and use that platter to flip it over:

Cookie Butter Fudge 11

You’ll want it to rest upside down for a bit to make sure the bottom dries out.

Then place a cutting board over it and flip it back to right side up.

Cookie Butter Fudge 12

Cut the fudge with a long sharp knife, wiping the blade on a towel between slices.

Cookie Butter Fudge Recipe

Let the fudge rest for awhile (at least two hours but I’ve left it out as long as overnight) so that it hardens all the way around.

You want it fully set not only so that you can stack the pieces on a plate or in a container, but also for the wonderful texture balance of the sugary, buttery flakiness of the exterior that contrasts with the utter softness of the interior that will melt in your mouth like a liquid drop of cookie joy.

Cookie Butter Fudge Recipe from Roaming Rosie

Cookie Butter Fudge

Ingredients:

1 cup whole milk
1 cup heavy whipping cream
3 cups sugar
1/2 cup (1 stick) butter, softened
1/2 cup Speculoos Cookie Butter
1 teaspoon vanilla extract

Prepare an 8×8-inch baking dish with tin foil and a light coating of butter or cooking spray.

Whisk together the milk, cream, sugar, and butter in a large saucepan.  Bring it to a rolling boil.

Reduce the heat and simmer it without stirring.  This is important:  do NOT stir the mixture!  After 15 minutes, test the temperature with a thermometer.  Once it reaches 235°F or soft ball stage, remove from heat.  Do NOT stop simmering until it reaches this temperature, or it will not set.  This may take more than 15 minutes.  It will be noticeably thicker when it’s done.

Remove from heat and stir in the cookie butter and vanilla extract.

Fill a large bowl with ice and place the saucepan into the bowl on top of the ice.  Stir the fudge over the ice until it is very thick.  Then (making sure not to let any of the melted ice get into your fudge) pour it into the prepared baking dish, spreading it smooth.

Place baking dish on a wire rack and allow to set.  This may take a half hour or longer, depending on the temperature and humidity of your home.  Carefully remove the fudge from the dish by pulling out the foil.  Place a large plate over the fudge and flip it over so that the fudge can rest upside down for a few minutes, to let the bottom to dry.  Follow the same procedure to flip it right side up on a cutting board.

Cut into squares or rectangles with a sharp knife, wiping the blade on a towel between slices.  Allow the pieces to sit without touching for at least a 2 hours or overnight to make sure each piece is fully set and has a nice solidity all the way around the smooth interior.  Then store covered.

Makes about 3 dozen 1-inch pieces.

[Note:  I used Trader Joe’s Speculoos Cookie Butter, but you can substitute any European cookie spread.]

**********

And to print the free PDF of the recipe, click here:

Cookie Butter Fudge

Happy Baking!

Roaming Rosie Signature

Birdseed Christmas Ornaments

Birdseed Christmas Ornaments

These birdseed ornaments are a project I did with my kids around Christmastime, and so we used Christmas shaped cookie cutters, but it’s a project that can be done any time of the year.

There are a ton of options, but I let my girls pick and we used cutters shaped like a tree, snowflake, gingerbread man, candy can, shooting star, and an angel.

Birdseed Christmas Ornaments

There are a few recipes out there for birdseed ornaments that include flour and corn syrup.  These ingredients aren’t really healthy for birds and, besides, they are unnecessary.

Just the water and gelatin are sufficient.

Birdseed Christmas Ornaments

Small birdseed works best.

Make sure you stir the mixture so that the gelatine covers all of the birdseed.  The gelatin is what holds the ornaments together.

But if there is still a little puddle in the bottom of the pan after you mix the birdseed in, then go ahead and add a little more birdseed.

Birdseed Christmas Ornaments

Place your cookie cutters upon some waxed paper and fill them with the birdseed.

We used little milkshake spoons because the smaller size fit better into the spaces.  But I guess you could use your fingers, too.

Birdseed Christmas Ornaments

Add a piece of string or twine once the cookie cutter is half full.  Then scoop more birdseed on top of the string and press it all firmly in the cutter.

I knotted the middle of my sting and stuck that knot inside the ornament for greater support, leaving the other end of the string open so that I could tie it over the larger tree branches in our yard.

Birdseed Christmas Ornaments

Allow them to sit overnight.

Birdseed Christmas Ornaments

Then remove them from the molds by very gently pressing them out.

Try to press them out evenly:  putting too much pressure in one area will break them apart.

Birdseed Christmas Ornaments

Above you can see our angel and below our snowflake.

There were little bits and pieces that fell off because there wasn’t enough gelatine in a certain spot, but they mostly held their shapes.

Until the birds and squirrels got a hold of them … but then, that was kind of the point.  :)

Birdseed Christmas Ornaments

Birdseed Christmas Ornaments

Ingredients:

1/2 cup birdseed
2 packages (.25 ounce each) Knox gelatin
1/2 cup water
Thin rope or twine

Simmer the water in a saucepot. Add the gelatin and stir until fully dissolved.

Remove from heat and stir in the birdseed until all seed is fully coated. If the mixture is still wet after stirring well, add more birdseed.

Place medium to large cookie cutters on top of waxed paper. Scoop birdseed mixture into cookie cutters and fill halfway.

Place a piece of string into the cookie cutter and scoop more birdseed mixture on top of the string, making sure that part of the string is buried into the center of the ornament (I knotted the twine here for support) and part is hanging out. Use a spoon to press the birdseed down firmly.

Allow to sit overnight. Very gently push birdseed ornaments out of cookie cutters and hang where desired. Makes about 6 large shapes.

**********

To print the instructions, click here for the PDF copy:  Birdseed Christmas Ornaments

Roaming Rosie Signature

DIY Fine Motor Skills Craft for Toddlers with Pipe Cleaners

DIY Fine Motor Skills Craft for Toddlers with Pipe Cleaners at RoamingRosie.com

I like to make homemade activities for my girls by recycling things we have around the house.

We use pipe cleaners {or chenille sticks} fairly often, so we’ve always got those on hand.  I usually get them at the dollar store.

For this project, I used 4 pipe cleaners and cut them into inch-long pieces with a pair of strong scissors.

Then, the goal was simply to put them into an old spice container.

This is the type of spice container that holds dried herbs, like parsley or oregano.  You’ll notice the top has only 6 large holes.

It’s a great way to work on fine motor skills and helps with prewriting skills.

The only drawback to this is that the metal inside the pipe cleaners can be a little sharp.  There are a couple of ways around this.  One:  ignore it.  And two:  use pliers to curve over the very ends of the metal pieces, making sure that the sticks still fit through the holes in the spice container.

We chose option one.

Really, it’s not terribly sharp and you can insert them without pushing the ends anyway if you manipulate the pieces by holding them on the fuzzy part.  Or pushing gently, which is what I showed my girls.

Or, if you’re really worried about it, you could just use pieces of yarn instead.

My favorite part is that all the little pieces fit inside the container, and, thus, it is self-contained and easy to store.

For more kid activities using items around the house, check out:

Practice Measuring with Rice

Painting With Chalk

Our Colorful Backyard: Color Matching Activity for Kids

Blustery Day Water Play

Free Kid Activity: Developing Fine Motor Skills with Crayons

Pretend Play: Makeup

Free Kid Activity: Chalk on Construction Paper

Free Kid Activity: Painting Newspaper

Make Your Own Color Shadows

Dirt Soup: In Contact With Creation

Have fun!

Roaming Rosie Signature

Chocolate Chip Cinnamon Banana Bread

Chocolate Chip Cinnamon Banana Bread

This is some awesome bread.

I came up with this recipe to get a bread that was moist and soft and very, very chocolatey.

It’s kinda rich, too.

If you prefer to have a little crunch in the middle, though, you could substitute half of the chocolate chips with chopped walnuts.

Chocolate Chip Cinnamon Banana Bread

It’s a pretty basic banana bread recipe.

All the usual suspects.

Plus the chocolate chips, and a little cinnamon for an extra layer of flavor.  I love cinnamon.

Chocolate Chip Cinnamon Banana Bread

It will look pretty wet as you’re mixing it, but that’s okay.

Chocolate Chip Cinnamon Banana Bread

Here’s the dough in the pan.

The little bit of moisture around the edge is from the baking spray I used.  I don’t usually have the patience to butter and flour a pan, so I use the baking nonstick spray that has flour in it.  Maybe not the healthiest thing in the world, but it’s easy.

I did add a piece of parchment paper to the bottom of the pan, as well, just in case.  Better safe than sorry.

Chocolate Chip Cinnamon Banana Bread

Doesn’t that look amazing?

And it smells even better than it looks.

Chocolate Chip Cinnamon Banana Bread

Like I said:  very, very chocolatey.

That chocolate in every bite is what I think makes the smoothness of the bananas and the spice of the cinnamon extra awesome.

Sometimes I eat it just like that, and sometimes with butter.  Sometimes for breakfast, and sometimes for dessert.

Either way, it’s pretty filling.

And awesome.

Chocolate Chip Cinnamon Banana Bread

Chocolate Chip Cinnamon Banana Bread

Ingredients:

3 large, ripe bananas
1/3 cup butter, melted
1 cup sugar
1 egg, beaten
1 tsp vanilla extract
1 tsp ground cinnamon
1 teaspoon baking soda
1/8 tsp salt
1 1/2 cups all-purpose flour
1 cup miniature chocolate chips

Preheat oven to 350°F and prepare a 9×5 inch loaf pan.

In a large bowl, smash the bananas with a fork until mostly smooth. Mix the melted butter into the bananas. Mix in the sugar, egg, and vanilla until combined. Then mix in the cinnamon, baking soda, and salt. Stir in the flour, 1/2 cup at a time. Stir in the chocolate chips.

Pour the batter into the loaf pan. Bake for 50 minutes to 1 hour, until browned. Cool in pan for 5 minutes, then transfer to a wire rack and cool completely.

[Note: This is a moist bread with chocolate in every bite. If you want less chocolate, and a little crunch, you could substitute half of the chocolate chips for chopped walnuts.]

********

For the printable PDF version of the recipe, click here:  Chocolate Chip Cinnamon Banana Bread

Enjoy!

Roaming Rosie Signature

Lemon Scented Play Dough

Lemon Scented Play Dough

I came up with this recipe because my 4yo was asking to make play dough and I’d just found an extra lemon hanging out in our kitchen.

So:  lemon scented play dough.

Because scented sensory play is fun for everyone, including moms.

Seriously.  I love playing with this stuff.

Lemon Scented Play Dough

Anyway, the ingredients are pretty basic.

And it’s easy to put together – you just throw everything in a pot:

Lemon Scented Play Dough

Then you keep stirring it over medium heat until it looks like this:

Lemon Scented Play Dough

And then you knead it to make it smooth.

As you can see in the blurry photo below, my daughter was already grabbing pieces of it to play with before I had a chance to knead it.  :)

Just be careful, because it will be hot.  I kinda like digging my hands into the warm dough, tho.

Lemon Scented Play Dough

My girls like to roll it out and cut out shapes with cookie cutters, or cut it using a small angled spatula.

Here are a few pics of them playing with the deliciously scented dough:

Lemon Scented Play Dough

Lemon Scented Play Dough

Oh – and playing with it on their easy-to-clean Jake placemats, of course!

Lemon Scented Play Dough

Lemon Scented Play Dough

Lemon Scented Play Dough

Ingredients:

1 cup lemon juice (or water added to squeezed lemon juice to equal 1 cup)
1 cup flour
1/4 cup salt
Zest from one lemon
1 Tbsp. vegetable oil
2 tsp. cream of tarter
1 tsp. lemon extract
Yellow food coloring

Begin by zesting and juicing one lemon.

Squeeze the juice of the lemon into a glass measuring cup. If it is less than one cup, add water until it reaches the 1 cup line.

Mix all ingredients in a medium sauce pan, adding enough food coloring to reach your desired color.

Cook over medium heat, stirring constantly, until the mixture comes together into a ball.

Remove from heat and knead until smooth.

Store covered.  Will keep for about two weeks.

[Note: even though all of the ingredients are technically edible, please don’t let your kids ingest this. Also, if your child is going to help with the kneading, please remember that the dough will still be hot when you first remove it from the pan. If stored in a sealed container, this will last many months.]

********

To print the free PDF of this recipe, click here:

Lemon Scented Play Dough

Happy Crafting!

Roaming Rosie Signature

Homemade Croutons

Homemade Croutons

Croutons are something I love to make from scratch.  They’re one of those things that supports the theory that homemade always tastes better.

It works a little better with day-old bread, but I almost never seem to have that on hand when I go to make croutons.  But, when I do notice that the bread I have is getting stale, I do love using it up this way.

You can use any type of bread for this, too, which is awesome.  What I used for the photos in this post was a regular white-wheat sandwich bread.

Also, I leave the crust on the bread when I made croutons.  You don’t have to, but I love that additional layer of extra crunchiness upon the crunchiness of cube of mad crunchy goodness.

Homemade Croutons

First off, dice your bread into pieces about an inch square.  They can be bigger, just make sure they’re uniform so they cook evenly.

Homemade Croutons

Throw all the bread pieces into a large bowl.  Generously drizzle olive oil over the bread.  I use extra virgin because I love the sharp, distinctive taste it gives the finished product.

Then generously sprinkle the bread with salt, pepper, and garlic powder.  Mix well, adding more oil if the bread still seems dry and adding more spices if they don’t prominently appear on the bread.

Then generously drizzle the olive oil over a cookie sheet that’s been covered with foil (for easy clean up).  Spread out the bread pieces over the pan.  Drizzle with a little more oil, if any pieces don’t appear fully saturated, and sprinkle a little more salt, pepper, and garlic powder over the pieces.

Don’t be shy with the spices; they’re what gives these little beauties flavor.  The salt and garlic may be a little harder to see, but you should be able to see the pepper on every single piece of bread.

Don’t be afraid of flavor.  The croutons won’t taste as strong once you mix them into a salad or throw them in a soup.

Of course, in my house, we eat these things by the handful.

Homemade Croutons

Anyway, then you’ll bake them in a preheated oven at 250 degrees F for about 20 or 25 minutes, or until browned and crispy.  Be sure to watch them because it only takes a couple of minutes to go from done to burnt.

Also, I didn’t type up an actual recipe for this because it’s all about personal preference.  So, just to review, here are the basics:  mix diced bread with plenty of olive oil, salt, pepper, and garlic powder.  Bake at 250F for 20 minutes.  Enjoy.

And here’s a pic with the recipe on it, which is great to post to Pinterest or Facebook for future reference:

How to make Homemade Croutons

Also, these croutons keep well.  Sometimes I even think they taste better the next day.

To be sure your croutons keep well for at least a week (though I’ve kept them longer) just store them in a closed container (Tupperware) with a paper towel or napkin at the bottom of the container to collect extra moisture.

Here are some recipes where I’ve used them:

50 {-ish} Garlic Soup Recipe

Roaming Rosie Signature

50 {-ish} Garlic Soup Recipe

50 Garlic Soup

I was sick.  Again.  Just as I recovered from an upper respiratory infection, a sinus infection hit.  And it was so, so much nastier.

I was miserable.

I’d been near-comatose for over a week, binging on things like garlic-heavy chicken soup and garlic-infused Parmesan popcorn.  Plus all the echinacea, zinc, myriad vitamins, and thickly steamy showers… but life was still oppressively blurry.

Time to attack:  super garlic style.

Why garlic?  It has a lot to do with allicin, which is touted to be the fix-all for just about everything from boosting your immune system to preventing cancer.  Without getting into the specifics of its anti-bacterial and anti-fungal superpowers, the general message is this:  it’s great for you when you’re sick.

So I made a garlic soup based on various recipes that are floating around the internet, like this 52 Garlic Soup.  One of the things I like about their recipe was using coconut milk.  Most of the others I found called for half and half or cream.  But… I’m sick.  Sore throat and all, so dairy is a huge nope.  Coconut milk is non-dairy.  Problem solved.

Anyway, they also used lemon and ginger, but I left those out.  Feel free to add some to boost the health value of your soup.

But what about the taste?

Good question.  I have to admit, I was actually frightened of this soup.  I’ve made some awful recipes in the past and I was afraid this would be inedible.

Much to my relieved surprise – it was good.  I actually enjoyed eating it.  I ate it for two days, in fact.

The spices helped to clear out my sinuses, but even with all that garlic, it was also pretty easy on my poor, upset stomach.

In other words, I feel good recommending this soup to people.  Especially sick people.

50 Garlic Soup

Here you can see most of the ingredients.

I’d like to reiterate that I used coconut milk instead of dairy, even though many versions of this soup that I found called for half and half or even heavy cream.  You should note that the coconut milk won’t make the soup as thick as cream would, but still gives it a hint of that dairy flavor.

50 Garlic Soup

Garlic is easy to roast, and it can be baking while you get everything else prepared.

Above you can see that all you really need to do is cut off the top third of the garlic bulb and drizzle olive oil over it.  Then you loosely cover the pan with foil and bake until it’s soft and awesome.

50 Garlic Soup

When chopping up fresh thyme, be sure to remove the leaves from the stems first.

You don’t want the stems in your soup.  I pulled the leaves off with my fingers.

50 Garlic Soup

And I decided to shred the onion.  I think that’s easy, but not everyone may agree.  Plus, I like the extra juice you get from shredding it that you can add into the soup.

But, feel free to dice the onions with a knife or food processor if you prefer.

50 Garlic Soup

See:  onion juice.  :)

50 Garlic Soup

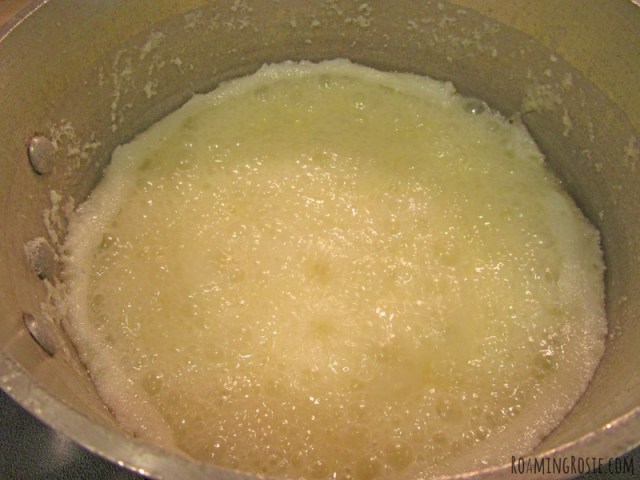
Anyway, here is the onion cooking down in the pot with a tablespoon of coconut oil and lots of pepper and just a small touch of salt.

Cook the onions until tender and translucent before adding the garlic.

And don’t be afraid of the spices.  I added more pepper again after the above photo was taken.  The pepper and cayenne (which I added with the garlic) really help to open up your sinuses, and they’re strong enough to compliment the garlic flavor without getting lost.

50 Garlic Soup

Look at that beautiful garlic!

50 Garlic Soup

Sqeeeeeeeeeze the garlic cloves right into the pot.

50 Garlic Soup

Onions, garlic, and lots of spice!

50 Garlic Soup

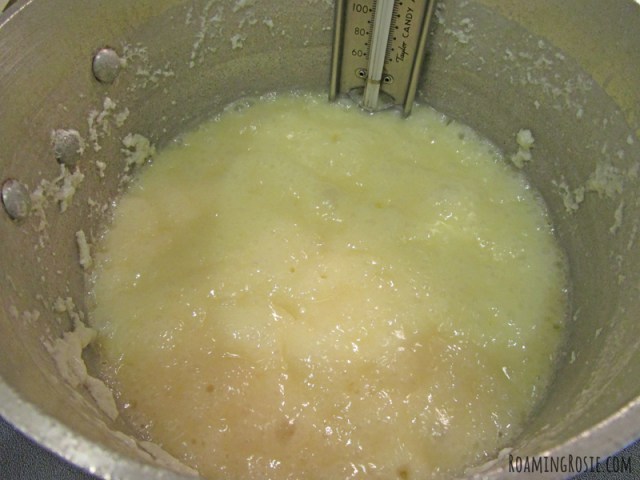
Then some chicken broth and a bit of fresh thyme.  Blend it a little.

50 Garlic Soup

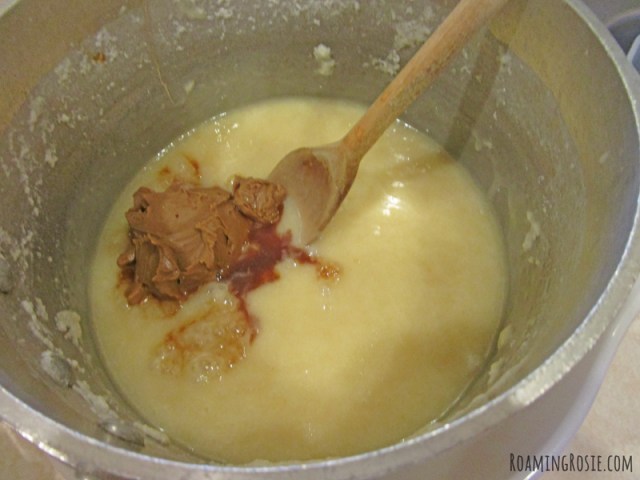
And finally, add some coconut milk.

Plus, after I took the garlic out of the oven, I stuck in some homemade croutons.  I love croutons in soup.

50 Garlic Soup

So, here’s the recipe:

50 Garlic Soup
Or: 50-ish Feel-Much-Better Garlic Super Soup

Ingredients:

5 bulbs of garlic (about 50 cloves)
Olive oil
2 Tbsp. coconut oil
1 large Vidalia (sweet) onion, diced
1 tsp. ground black pepper
1/4 tsp. salt
1/2 tsp. cayenne pepper
2 tsp. chopped fresh thyme
4 cups chicken stock
1 cup coconut milk
Croutons (optional)

Preheat oven to 350°F. Cut top third off of the garlic bulbs. Place on a pan and drizzle with olive oil. Gently cover pan with tented foil and roast until garlic is golden brown and tender, about 45 minutes.

In a large saucepot, melt coconut oil (or butter). Add in diced onions, salt, and pepper, and cook over medium until onions are soft and translucent, about 8 or 10 minutes.

Squeeze the garlic out of the bulbs into the pot with the onions. This is easier to do once they’ve cooled slightly (not right out of the oven). Add cayenne. And more pepper, if desired. Stir to combine.

Stir in the chicken broth and thyme and let simmer for 20 to 30 minutes.

Remove pan from heat and using a stick immersion blender, puree the soup until smooth. (You can use a traditional blender, too, working in batches, but this step isn’t completely necessary is you don’t have a blender. Or are too sick to be bothered with it.)

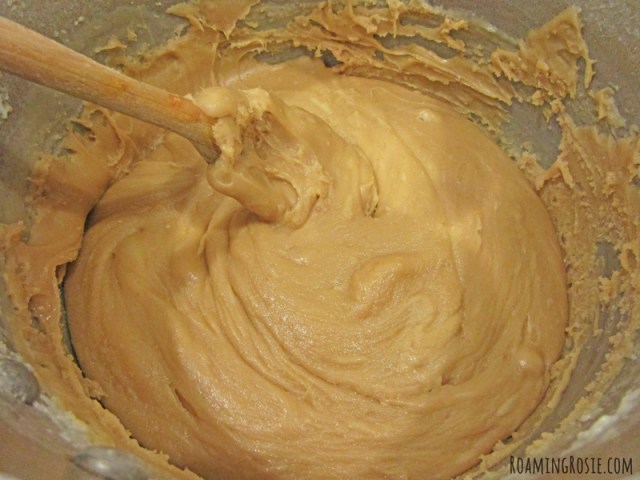
Stir in coconut milk and bring back to a gentle simmer for a few minutes.

Serve warm, sprinkling crusty croutons on top just before eating.

*****

And for easy reference, here is the free printable PDF:  50 Garlic Soup

Check out the recipe for my Homemade Croutons, which I used with my soup:

How to make Homemade Croutons

Enjoy!

And if you found this post because you’re feeling lousy, then I hope you feel better very soon!

Roaming Rosie Signature

15 Minutes to Chocolate Pudding

Chocolate Pudding

It was late.  I found myself in the mood for chocolate, but not wanting candy or ice cream or, even, (heaven forbid) cookies.

But I needed chocolate.

What could I make?  What would satisfy my craving?  What could be done quickly since it was already nine at night?

I couldn’t decide, so I explored Pinterest.  There were so many, many amazing foods, but nothing quite what I needed… until I came across The Best Chocolate Pudding You’ll Ever Have (in 15 minutes!).

Fifteen minutes?  That’s worth a try for silky smooth dark chocolatey goodness.

Unfortunately, I didn’t have any dark chocolate cocoa on hand, so mine was more semi-sweet.  Still awesome, tho.

Chocolate Pudding

It was definitely simple.  Whisk together a few ingredients.

Chocolate Pudding

Boil some milk.  Whisk the rest of the ingredients.  Eat.

Chocolate Pudding

I was pleasantly surprised by how simple and quick the whole process was.  The thing that took the longest was stirring in the chocolate chips (above) and waiting for them to melt.  If I’d had chocolate shavings instead, it would have been even faster.

And there were a few chips that didn’t melt completely, but that didn’t really bother me.

Chocolate Pudding

The problem with taking photos was that I was in a rush to eat it, and my powdered sugar kept melting as soon as I sprinkled it on.  The thick, gooey chocolate was calling my name.

It’s awesome when it’s well-chilled, too.  Of course.  Which I know because I couldn’t eat it all in one sitting.  Which was lucky for my girls.  They got to enjoy it the next day.  :)

So be sure to check out the recipe at A Cup of Jo – and the photos, too, they’re much better than mine!

And then be sure to enjoy some homemade chocolate pudding.  :)

Roaming Rosie Signature

Chalkboard Pumpkins: Halloween Crafts

This October, I decided to incorporate my daughters’ love of chalk into our Halloween activities.

The result?

Chalkboard pumpkins!

chalkboard pumpkins halloween and thanksgiving crafts for kids

These were so easy.  I started with a can of my trusty chalkboard spray paint, and picked up 3 foam “carve-able” pumpkins from the Dollar Tree.

Since the pumpkins were a bit porous, I did a few more coats than I normally would.  I placed them on some old cardboard, sprayed the bottoms first, then turned them over and sprayed the top.

Did 5 coats over the top half-ish.  Let the paint dry between coats, of course.  Then took them, and a box of chalk, outside.  Did some crafting in the fresh fall air.

chalkboard pumpkins halloween and thanksgiving crafts for kids

The girls spent a lot of time decorating their pumpkins.  Spent some time wiping off the designs with a damp paper towel, and then drawing all over them again.

The pumpkins are decorating our house now.  And they’ll be re-decorated themselves a few times before Halloween even gets here.  But, because they’re pumpkins, we’ll probably leave them out for Thanksgiving, too.

One thing important to mention, is that we did initially play with these outside, but they’re really indoor decorations because of the material the pumpkins are made from.  But you could always use something different if you want to display them outdoors.

chalkboard pumpkins halloween and thanksgiving crafts for kids

chalkboard pumpkins halloween and thanksgiving crafts for kids

And just for informational purposes, here is a photo of the half-finished pumpkins, to give you an idea of what they looked like while they were being painted:

chalkboard pumpkins halloween and thanksgiving crafts for kids

Have fun – and let me know if you try it!  :)

Oh, and here are our Halloween crafts from last year!

Plus, read about the Digital Wasabi Tape I used in this post.

This project was featured at:

Sweet Bella Roos