I love homemade bread.
The smell of the yeast, the feel of the dough in my hands, the baking aroma that floats out of the oven and through the entire house…
Dreamy. Delicious. Why don’t I do this more often?
Anyway, I finally decided it had been too long since I’d made bread from scratch, but this time, I made a few changes.
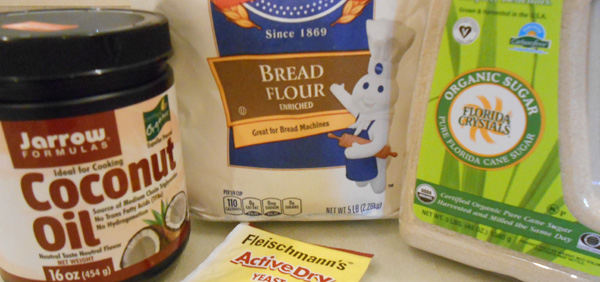
This is based off of a basic Amish recipe for bread that’s slightly sweet and a little dense, but this time I made it with coconut oil. The end result in appearance, texture, and taste was the same as if I’d made it with vegetable oil, so I’m thrilled.
However, extra virgin coconut oil may add a coconut taste to the bread – but I’ve never used extra virgin for baking, so I’m not really sure.
I also used Organic Natural Cane Sugar, but one with the texture of regular granulated sugar, unlike the consistency of Demerara or Sucanat, which I sometimes put in my coffee. This way, the weight of the sugar didn’t need to be adjusted for the recipe. Makes my life easier. :)

Anywho, you can see some of the products I mentioned in this photo. And the only yeast I had on hand was those little packets, instead of the larger jar, so I had to use about one and a half of them, which irked me a little. The jar is back on my shopping list.

Yeast is one of my favorite smells in the whole world. I love proofing it.
Here are some tips I’ve picked up over time: get warm water from the sink because the microwave is tricky and water that’s too hot will kill your yeast, and add sugar to the warm water first, to give the yeast something to get really excited about.
In other words, the first thing you’ll do in this recipe (or any yeast dough) is add some warm water to a measuring cup. (Forgive me for not photographing this step.) Run the water from your sink until it is just barely painful to touch, then fill your measuring cup to whatever your recipe calls for. You can test it with a candy thermometer. It should be between 100 and 110 degrees Fahrenheit.
Put this pre-measured water into the large bowl in which you will create your dough. Stir in a tablespoon or two of the total amount of sugar from the recipe – don’t add sugar to what’s called for, just use part or all of what you already would to make your dough. Then add the yeast, sprinkling it over the top of the warm sugar water. You don’t need to stir it in, but sometimes I do. Leave it alone for 5 to 10 minutes and you’ll know it’s ready when the top is nicely covered in a frothy, foamy layer of soft, strong-scented yeastiness. (That’s a word, right?? It should be.)
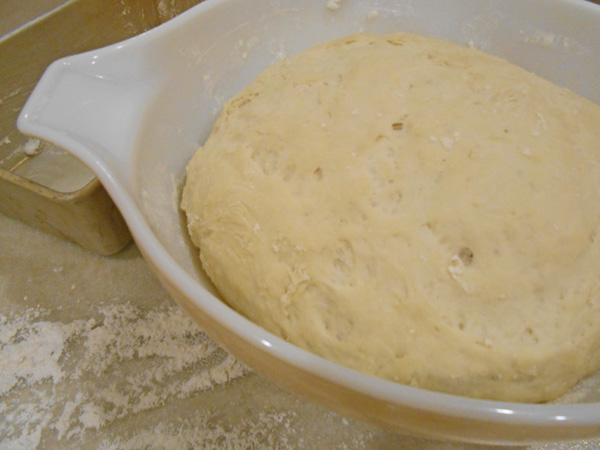
At this point, you’re ready to make the dough. For this particular recipe, this would be when you add in the salt and coconut oil. You need a liquid coconut oil for this, so I find it easiest to stick the solid oil in the microwave for 30 seconds to melt it. Then you’ll mix in the flour. I start this with a spoon, but usually end of finishing it with my hands (above photo), and then knead it on a floured surface.

Grease your bowl by rubbing a bit of the coconut oil inside of it, and put your kneaded dough back into the bowl. Cover lightly with a kitchen towel and let it rise for an hour.
It will double in size. Punch (yes, punch) it down, knead it for a minute again, and then separate it into two halves. Coat two bread loaf pans with the coconut oil and place loaf-shaped dough into the pans. I formed the loaf by tucking the dough under itself to create a smooth top.

Let the dough rise one more time, until approximately doubled in size or risen to about an inch over the top of the pan. This will take between 30 to 60 minutes.
Bake until browned on top. I prefer mine lightly browned, but you could bake it an extra few minutes for a darker brown – just watch the bread so it doesn’t burn.
Allow the bread to cool in the pans on a cooling rack for awhile. About a half hour. Then remove the bread from the pans and allow it to finish cooling on the rack. Keep your bread wrapped in a bread bag or tin foil.
Whatever you’re not planning to eat in the next 2 or 3 days can be easily frozen. You can slice the bread and freeze it that way, too.

I also enjoy making cinnamon toast with the bread (pictured above). My mom often made this for me when I was growing up, and it’s still one of my favorite dishes. To make it: slice a piece of bread that will fit in your toaster. Toast to a light brown and spread with butter immediately so the butter will be very soft and mostly melted. Sprinkle with a cinnamon and sugar mixture immediately so that the sugar will absorb into the butter. Enjoy!
Okay, here’s the good stuff:
Homemade Bread Recipe
Ingredients:
2 cups warm water (110 F or 45 C)
1/4 cup granulated sugar
1 1/2 tsp active dry yeast
1 1/2 tsp salt
1/4 liquid coconut oil (or vegetable oil)
6 cups bread flour
In a large bowl, stir the sugar into the warm water. Pour the yeast over the water and mix it in, if desired. Let sit for 10 minutes until yeast develops a thick foam.
Add the salt and oil to the yeast. Mix in the flour one cup at a time. Knead the dough on a lightly floured surface for a few minutes, until smooth. Place dough in a bowl coated with oil, cover with a towel, and allow to rise for one hour.
Punch dough down, then knead for a few minutes. Divide dough in half. Form dough into loaf shapes and place in two oiled loaf pans, about 9 by 5 inches each. Let the dough rise for 30 minutes or until about an inch over the tops of the pans.
Bake at 350 F or 175 C for 30 minutes.
(Note: I used solid coconut oil to grease the bowl and loaf pans by rubbing on a couple tablespoons with my fingers.)
*****
And now for the FREE printable PDF: Homemade Bread
Next up will be the awesome Tropical Almond French Toast that I made with my homemade bread: yum! :)


