Happy Halloween!
Today I’m sharing the Haunted Castle Halloween Cake we made this year.
The mold is from the princess party I threw the girls years ago. It’s the Nordic Ware Pro Cast Castle Bundt Pan. I’d kind of forgotten about it and we recently discovered it in the back of a cabinet.
Well, it’s October, right? So now it’s officially no longer a castle cake pan, but a HAUNTED castle cake pan!
But how should we go about it?
I had a hard time covering it with icing last time I used it, and besides, I wanted it spooky this time.
So I did some research and put together a pourable icing with a fudge-like consistency. AND I used Hershey’s Special Dark Cocoa Powder. The dark chocolate adds a great flavor, plus it makes it a darker color – almost black.
For the cake itself, I went with chocolate.
A regular box mix, ’cause hey – I don’t have time to make everything from scratch, amiright?
Just make sure you spray down the cake pan with a non-stick spray first.
Preferably one with flour already in it, like Baker’s Joy.
Following the directions on the box, we wound up with just enough from one box to almost fill the mold. Two boxes would have been way too much.
You can see that the cake batter rose plenty high enough.
True, we didn’t get the detail around the bottom, like that ramp up to the gate, but it was honestly not noticeable once the cake was turned upright.
After cooling in the pan for about 5 minutes, if you sprayed it well, it should pop out with minimal effort.
A bit of tapping and poof! Cake.
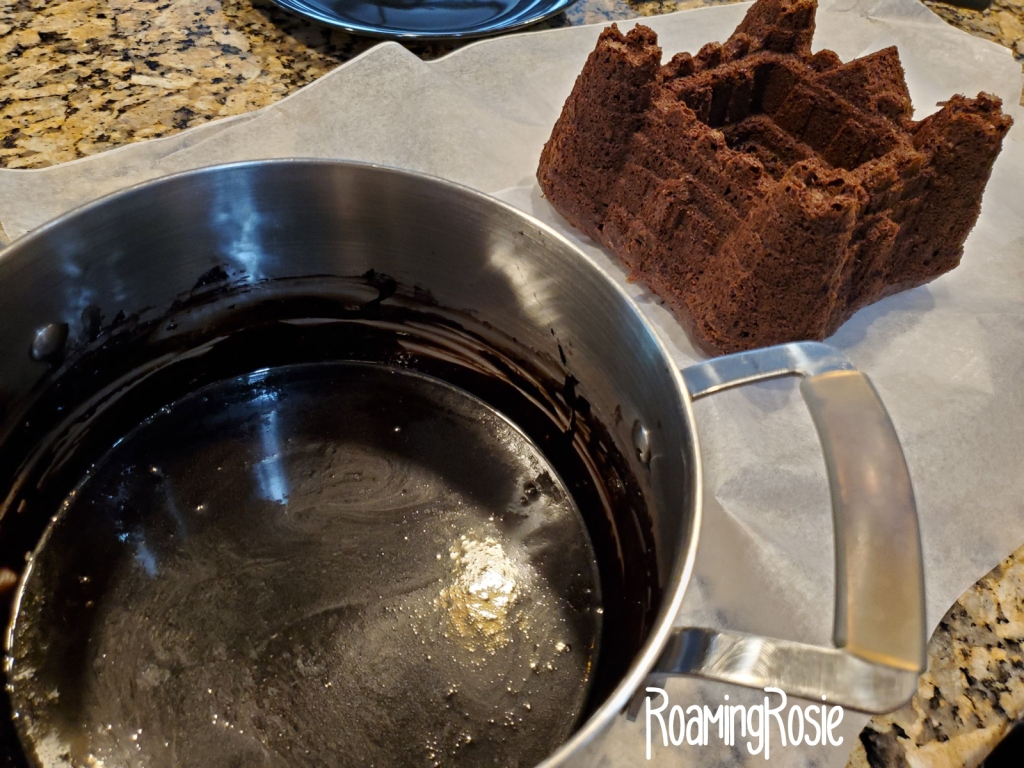
Sure, a few turrets suffered some damage, but overall it looks pretty darned nice to me.
For the icing, we went with a pourable fudge sauce.
And like I mentioned above, the dark chocolate makes the most amazingly spooky color!
And my pot is pretty big. I made extra so we would have it, but there was a LOT left over. You can just follow the recipe and you’ll have plenty.
Use a small measuring cup or a spoon to drizzle the icing slowly over your dessert, stirring the icing from time to time. It does harden fairly quickly.
As you go, be sure to scoop the icing out of the center. It will pool there.
It’s best to drizzle it over waxed paper. Then, once the cake is fully coated, you can move it with two spatulas onto your serving platter.
Our final step was decorating!
We drew some ghosts by hand with melted white candy melts and added miniature chocolate chips for eyes and mouths.
Those only take a few minutes to harden, then you can add them to the cake by squeezing some of the melted chocolate onto the cake to act as glue.
We also added some candy corn and Mellocreme pumpkins.
Here are the instructions for making the icing.
Make sure your cake is fully cooled before you try and decorate it.
Chocolate Fudge Pourable Icing
Ingredients:
1/4 cup butter
1/3 cup dark unsweetened cocoa powder
2 teaspoons vanilla extract
2 tablespoons butter
1/2 cup whole milk
3-1/2 cup powdered sugar
Directions:
Melt butter in pot on stove top.
Once melted, whisk in cocoa, vanilla, and milk.
Add in a small scoop of powdered sugar at a time, until you’ve added it all. Be sure to whisk while adding the sugar.
Remove pot from heat. Keep whisking until smooth.
Slowly pour icing over cake or other dessert with a spoon or small measuring cup.
You can download the PDF of the recipe here:
(The arrows on the top right will offer you more options if you don’t see the “print” button. There is also a “download” button beneath the document.)
Store the cake covered. It will taste best if eaten within a few days. The extra icing will keep in the refrigerator for a couple weeks.
If you make a Haunted Castle cake of your own, please share with me on my Facebook page!
Happy Baking!


