Graveyard Brownie Halloween Cupcakes

Graveyard Brownie Halloween Cupcakes

These Graveyard Brownie Cupcakes are SO MUCH FUN to make (and eat!) and very, very rich.

If you’re a chocolate lover, then you need to try these!

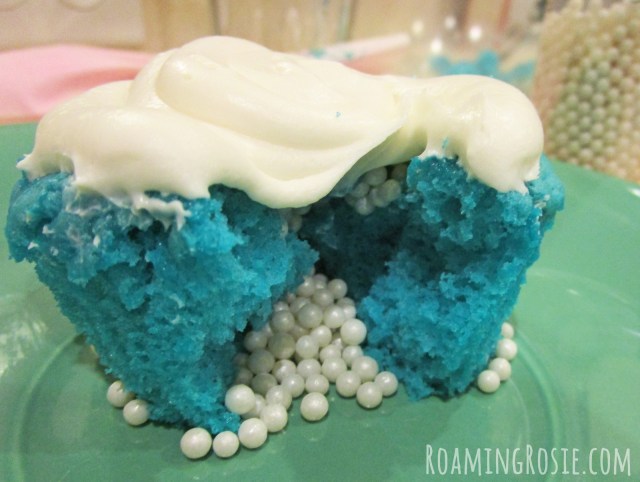
To make them a little less decadent, you could make regular cupcakes in place of the brownie base, and even try a milder flavor like yellow cake dyed orange.

But I was in need of some heavy-duty chocolate.  This hit the spot.

graveyard-brownie-halloween-cupcakes-2

The first thing I did was make some of my Chocolate Covered Marshmallow Pumpkins with my girls.  We made them the day before.

Then we melted some white candy melts to make the chocolate bones using this skeleton mold from Wilton.

We crushed up a handful of Oreo cookies in a plastic bag for our graveyard “dirt,” and we baked up some box brownies according to the package directions.

I’d thought about making the brownies in a big pan to construct a large graveyard scene, but then switched to the cupcake idea.

I was going to use regular cupcake lines and write RIP in icing on some Milano cookies for the gravestones, but then I found these cute graveyard cupcake liners that come with their own paper gravestones on toothpicks.  I happened upon them at Walmart, but there are similar products online and at other stores, too.

graveyard-brownie-halloween-cupcakes-3

We let the brownies cool completely, then iced them with chocolate icing.

We pressed in the graveyard picks and some pumpkins and bones into the icing, before sprinkling over a little of the Oreo dirt.  (If you sprinkle the cookie crumbs first, the chocolate pieces won’t stick into the icing.)

Then we savored the festively decedent chocolate culinary celebrations.

I recommend you share them, and not attempt to eat 18 thick piles of chocolate all by yourself.  Because:  wow.  ;)

Graveyard Brownie Halloween Cupcakes

Happy Halloween Baking!

Roaming Rosie Signature

Save

April Showers *Sprinkle Surprise* “Raining” Cupcakes

April Showers Sprinkle Surprise Raining Cupcakes from Roaming Rosie

I know:  it’s a mouthful.

Both the cupcake and the name.  But so much fun!

I love the idea of food with hidden surprises inside, and with spring coming at us full force, I wanted to do something in that vein.

Thus was born the April Showers *Sprinkle Surprise* “Raining” Cupcakes!

April Showers for the fact that it’s now April and raining.  A lot.  The day we made the cupcakes, in fact, was hounded by heavy thunderstorms.  Sprinkle Surprise because of the sprinkles hidden inside.  And Raining because the cupcakes “rain” out sprinkles like raindrops when they’re opened or bit into.

April Showers Sprinkle Surprise Raining Cupcakes from Roaming Rosie

Here are all the supplies I used.  I did use blue sugar crystal sprinkles to top some of the cupcakes, which you can see in one of the photos, just not on all of them.  In the end, I decided I preferred the way it looked without the sprinkles on top – when the icing looked like just a white fluffy cloud on top of the blue “sky” cupcakes.

The sprinkles we used to fill the cupcakes were the Wilton White Sugar Pearls.  You could use just about any kind of sprinkle here, except maybe sugar crystals, but I liked how these represented raindrops so well.  They’re one of the pricier sprinkles, too, but we didn’t use the whole container, so there’s still some left for future projects.

Oh, and to make life much easier, we used store bought cake mix and icing.  I got the Blue Velvet cake mix because it’s in stock around here during springtime, but you could always add blue food coloring to any plain cake mix to achieve the same result.

April Showers Sprinkle Surprise Raining Cupcakes from Roaming Rosie

The steps to create the hidden surprise of the raindrops/sprinkles inside the cupcakes is done after the cupcakes are baked.

Once the cupcakes are fully cooled, scoop out the center with a melon baller, but hang onto that little piece you remove.

Fill the hole in the center with your sprinkles.  Be generous here.  Add as many as will fit, because if you only put a few, then they won’t really “spill” out when you split open or bite into the cupcake.

April Showers Sprinkle Surprise Raining Cupcakes from Roaming Rosie

Take that little piece of cake you’ve removed with the melon baller and pick off some of the fluffy interior of the cake from the flatter top portion of it, to make it more of a smooth and flat piece instead of a ball.

Then put that flat piece back on top of the hole that’s filled with sprinkles.  And put aside (to discard or eat or whatever) those extra fluffy interior pieces that were removed to make room for the sprinkles.

It doesn’t have to fit perfectly – I didn’t exactly keep track of which piece went with which cupcake.  Just put a little piece on top of the sprinkles just to hold them in a little better.

April Showers Sprinkle Surprise Raining Cupcakes from Roaming Rosie

Then top the cupcakes with icing.

I put the icing into a bag with a large round icing tip to make this process quicker and easier.  If you try to spread on the icing with a knife, things could get a little messy because the icing is what holds down the piece that you cut out, trimmed, and replaced on top of the sprinkles.

At this point we added the blue sugar sprinkles to the tops of about half of the cupcakes.  Like I said, this part is up to you.

April Showers Sprinkle Suprise Raining Cupcakes 6

Just make sure to remind people to eat these over a plate, since once you bite into them they will “rain” sprinkles!

Enjoy!

Please share your own baked goodies with me on my Facebook page and follow me on Pinterest for more ideas!

Happy Baking!

Roaming Rosie Signature

FROZEN Snowflake Mini Candy Cupcakes

FROZEN Mini Candy Cupcakes

I made these adorable little Frozen Mini Candy Cupcakes for my girls.

Just because.

We didn’t eat them ALL ourselves, of course.  I shared some.  But the reason behind their creation was simply my girl’s love of the Disney movie FROZEN.

And because they were cute.

FROZEN Mini Candy Cupcakes

I’ve made these mini “cupcakes” before with regular Reese’s miniature peanut butter cups, but when I found the white chocolate versions in the store, I just knew they would be perfect for a project like this!

I matched them with some blue icing {store bought icing + blue food coloring} and some snowflake sprinkles.

I used the Cake Mate Sequins Winter Snowflake sprinkles, not even noticing until afterwards that the actual “snowflakes” look more like little flowers than anything else.

So, next time, I’ll probably opt for a different sprinkle.  Something more like Wilton’s Pearlized Snowflake Sprinkles.

FROZEN Mini Candy Cupcakes

But they’re still cute, right??

Totally cute.

And my girls LOVED them.  So did the other people I shared them with.

They would be completely perfect for a FROZEN birthday party {something Elsa herself might whip up}, or even any winter themed event.

TO ASSEMBLE THE CANDY CUPCAKES:

1.  Unwrap peanut butter cups.
2.  Separate snowflakes from other sprinkles {if necessary}.
3.  Add blue food coloring to icing, mixing thoroughly.
4.  Put blue icing in a piping bag fitted with a small star tip {about #16} or gallon size plastic storage baggy with the end snipped off.
5.  Pipe icing on top of peanut butter cups like you would a cupcake.
6.  Top with snowflake sprinkle before icing sets.
7.  Store covered in a cool location.

FROZEN Mini Candy Cupcakes

Enjoy!

Roaming Rosie Signature

Red Velvet Jelly Bean Cupcakes for Valentine’s Day

Red Velvet Jelly Bean Cupcakes for Valentine's Day

Okay, technically we made mini red velvet cupcakes for Grandma’s birthday.

And, as my daughter and I were making the cream cheese icing, Grandma happened to mention something about the jelly beans that she received as a birthday present and how neat they would look on the cupcakes.

Sweet!

So I picked out just the red, pink, and white ones to match the red velvet and topped the mini cupcakes with 5 jelly beans in a circle that kinda looked like a flower.

And the colors just so happened to go with a Valentine’s Day theme.  So we froze some.

Totally ready for Valentine’s Day now!

Dessert=solved.

Lol:  right… as if I’m not going to have the urge to bake cookies and brownies and drape everything in varying layers of chocolate and sugar and pink and red sprinkles come mid-February.  Sure.

Maybe I should just raid the freezer now …

Roaming Rosie Signature

2013 Halloween Cupcake Contest Winners

Squidoo just wrapped up their 2013 Halloween Cupcake Baking Contest – and the votes are in!

The one I voted for came in at #1, and I’m not really surprised:  they’re awesome!  Because, I mean – really – who wouldn’t want a spooky cupcake topped with cotton candy clouds?

The 1st place winner was Under The Light of The Moon Halloween Cupcakes:

Death by Chocolate Under the Light of the Moon Halloween Cupcakes

Death by Chocolate Under the Light of the Moon Halloween Cupcakes

In 2nd place was Caramel Apple Cupcakes:

Caramel Apple Halloween Cupcakes

And in 3rd place was How to Make Your Very Own Happy, Smiling, Pumpkin Cupcakes With Fondant:

Happy Fondant Pumpkin Cupcakes for Halloween

To see the rest of the winners, check out the 2013 Squidoo Halloween Cupcake Baking Contest page!

I hope you are now inspired to create your own eerily delicious, creepy, crawly goodness!  :)