Our construction paper project was making an island.
The island itself, in the shape of an uppercase I, is cut from brown paper. I made some little palm trees ahead of time (I free-handed those and they must have been close enough because my daughter knew what they were ;).
They we used some craft sand to represent the beach. You can sometimes find craft sand in the same place where they sell artificial flowers, or just in the craft section.
We probably should have tried gluing the trees down first, but my daughter was excited about the sand. We used white glue (not glue sticks) for this project, though, so that helped with getting the palm trees to stick to the sand once the glue below it was dry.
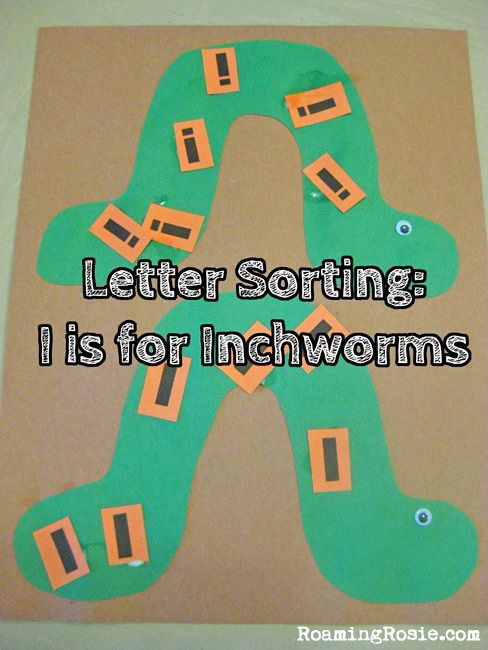
For our Letter Sorting, we made inchworms.
And watched the Sesame Street version of the Inchworm Song:
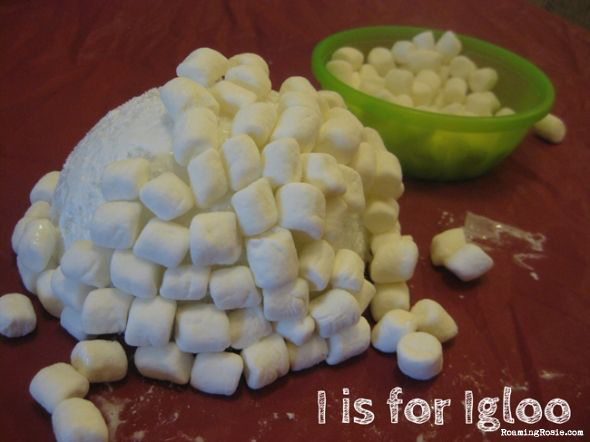
Then we tried to make marshmallow igloos.
This particular attempt didn’t work. We spread white glue all over a Styrofoam dome, and tied to stick mini marshmallows to it.
They fell off.
It occurred to me a few days afterwards that what we should have done instead was to slather the dome in white cake icing (icing is an I word!) and stick the marshmallows into that. That would have totally worked. And if I owned a dome cake pan we could have made a cake interior for our marshmallow igloo.
Next time.
Or, you know, you could just turn a bowl upside down and slather that with icing. There are actually plenty of options.
Either way, I would suggest having a separate (small) bowl of marshmallows available for snacking, to help keep the kiddos from eating the ones for the project.
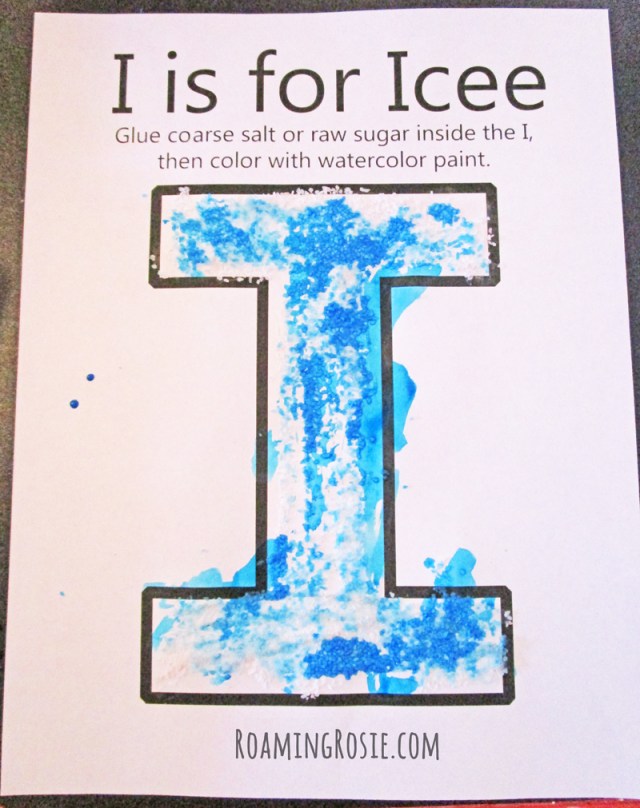
You glue down some course salt or raw sugar and, once the glue is dry, add some watercolor paints.
We used kosher salt which was attached via glue stick.
It’s a fun way to play with texture. Just make sure you shake off all of the excess salt once the glue is dry and before you paint. That way you won’t end up with pieces of salt in your watercolor tray.
Oh – and this project is meant to represent an “Icee,” which is a crushed ice drink. Just in case that’s not a thing where you lived and you were wondering why I spelled “icy” incorrectly. ;)
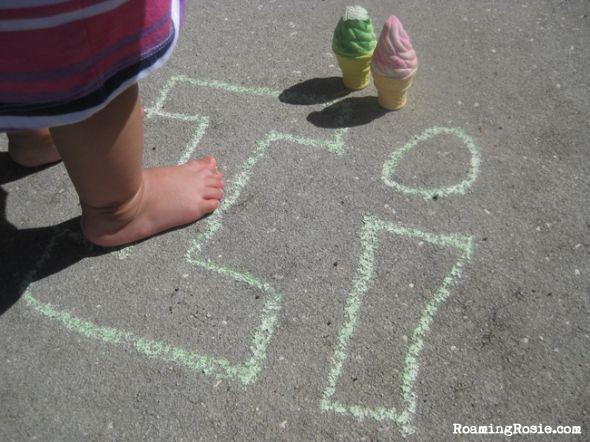
I found this really cool ice cream shaped chalk at the dollar store, so we did some chalk drawings.
We often do practice our letters with chalk, but it was even more exciting this time around. :)
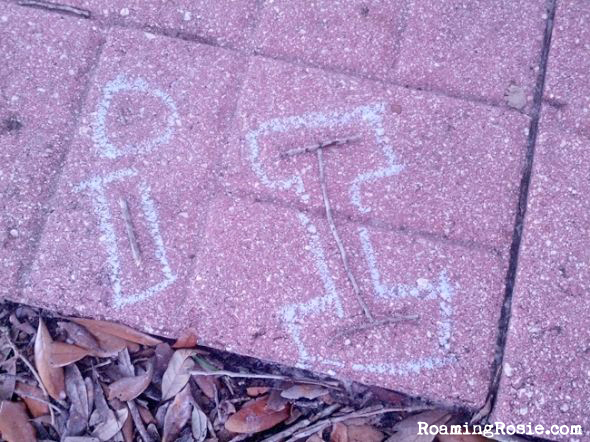
Then, we used our ice cream shaped chalk to trace around some letters we made out of sticks we found in the yard.
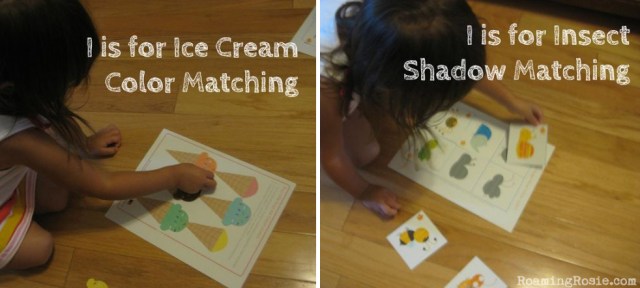
This was a lot of fun, especially since my girls love puzzles. I still have these in our Folder Games binder.
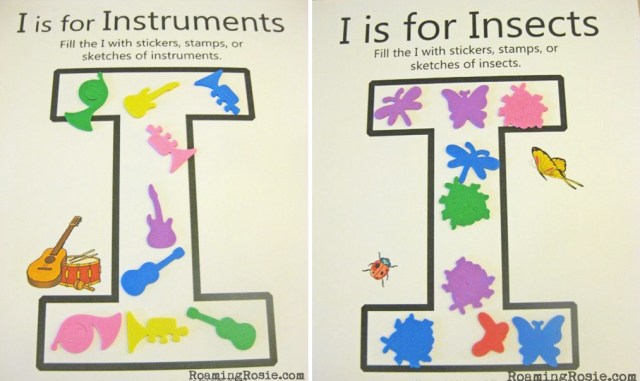
You can find similar things by doing an internet search, but these are a color matching worksheet with ice cream cones and an insect shadow matching worksheet which I got from Busy Little Bugs.
Of course, you could always use any type of sticker or stamp for these, or just make little sketches.
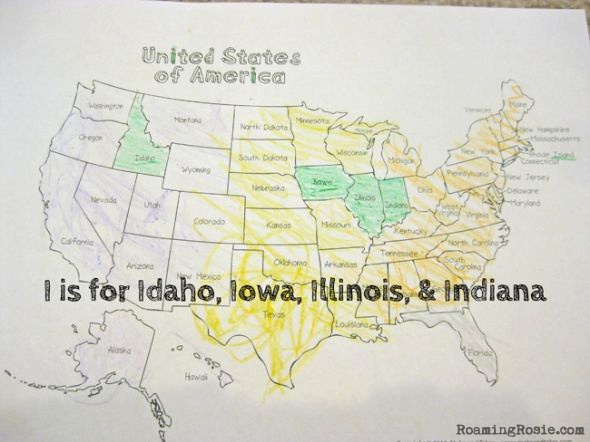
This was a map I found on a random internet search. There’s a very similar one at Free US and World Maps.
First we found all the states that began with our letter of the day, colored them and the letters in the title green, and then my daughter colored the rest of the map however she felt like it. (We also underlined the “island” part of Rhode Island.)
We made a construction paper Hamburger, and although my daughter didn’t put it together quite as I had conceived she would, we still got the point across. :)
I had cut out an H in brown to represent the burger patty, and there’s a bun in orange, a tomato in red, lettuce in green, and some Swiss cheese in white.
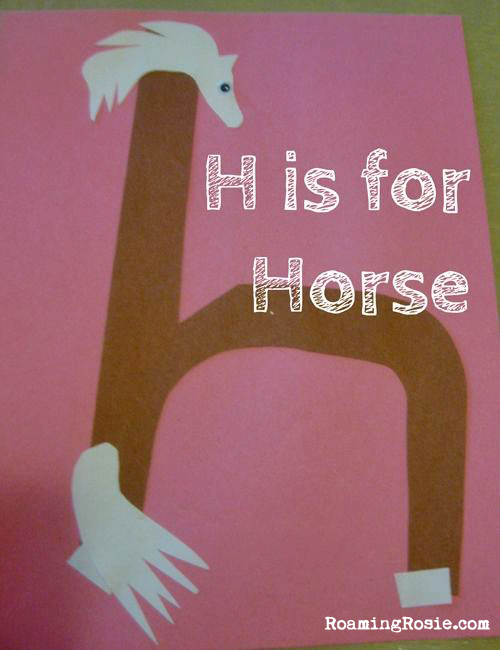
I also made a lowercase H and cut out some pieces in white that vaguely represented a horse’s head, tail, and hooves.
And my kids always love combining glue and construction paper, but if you throw in a googly eye then it’s really a party.
For our Letter Sorting, I cut out two shapes that looked kind of like houses and drew on some doors and windows and roof shingles. My daughter was pretty young when I did this, but she’s old enough now that I’d let her draw the doors and windows herself if we did it again.
Then she put the lowercase Hs on one house and the uppercase on the other.
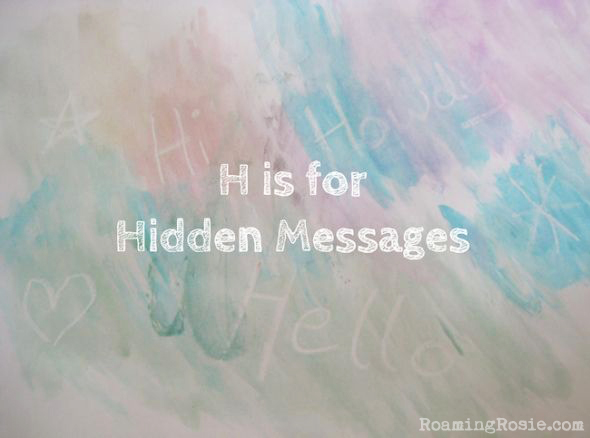
Making Hidden Messages was pretty fun. This was the example I did for her, and I can’t remember why I don’t have a picture of the one she did. I think I didn’t photograph as well.
Anyway, you draw designs on a white piece of heavy or construction paper with a white crayon, and then you paint over it with water colors.
The crayon resists the paint and your designs show through.
You could always prep some hidden messages for them, kind of like I did. I used Letter H words: Hi, Hello, and Howdy.
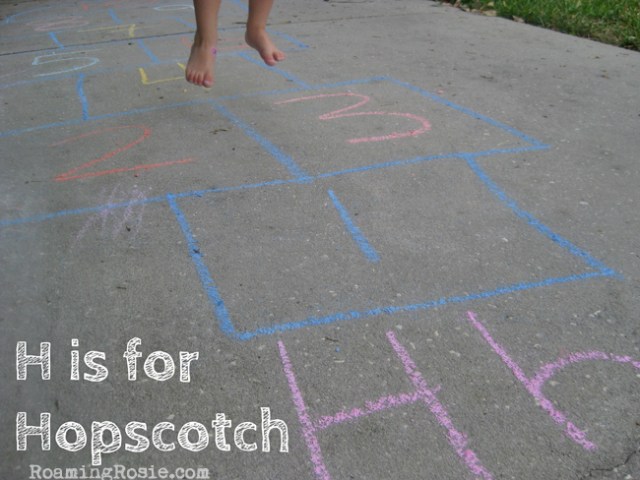
Hopscotch is always a big hit in our house, and it’s great for practicing numbers.
This time I drew a big and little H at the start of the Hopscotch.
You could also make a version that’s like our Power Word Hopscotch, and fill the squares with H words (Hi, Hello, Hand, Happy, etc.) instead of numbers and have your child shout out the words as they hop over the board.
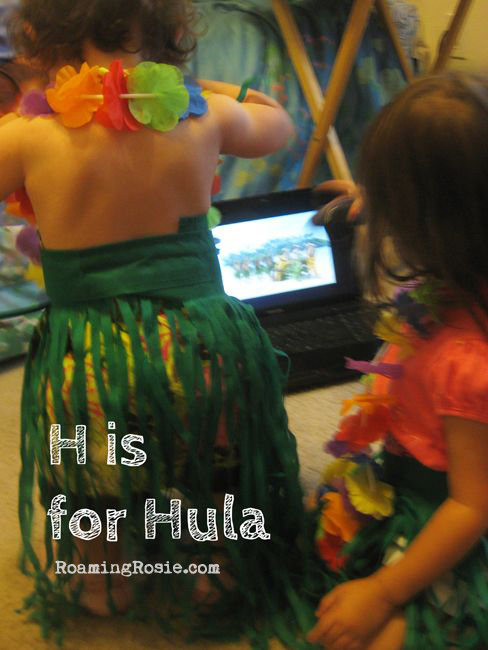
This was SO much fun. After discussing how “hula” started with H, we pretty much went right into dancing and dressing up.
During the summertime, it’s pretty easy to find hula skirts and leis at the local dollar stores around here. Or you could try a party store or check online.
Then we danced to some videos, including The Hula Song from The Lion King (just for laughs):
Then we watched the He Mele No Lilo scene from Lilo & Stitch:
And finally, we watched a more traditional He Mele No Lilo. My girls really loved this and we watched it over and over, dancing along with them. My older daughter also spent some time studying the little girls and the way they moved:
Then it was back to our projects…
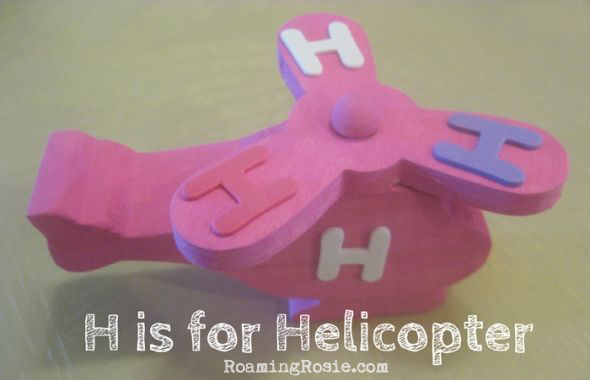
I found these little wooden helicopters in the craft section of Walmart.
I think I paid about a dollar apiece for them.
After we painted them, we attached some of the little foam letter stickers that I had picked up in the bargain section of Target.
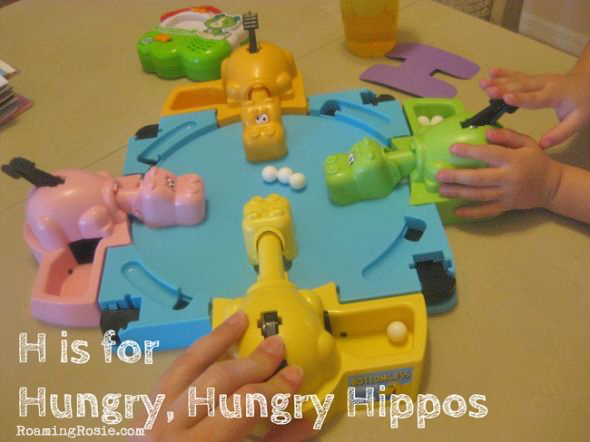
You can also see our LeapFrog Fridge Phonics magnet in the background (which is the older version of this one and kind of similar to this bucket set), because – of course – we had to discuss how both Hungry and Hippos started with H before we went on a crazy marble-eating rampage.
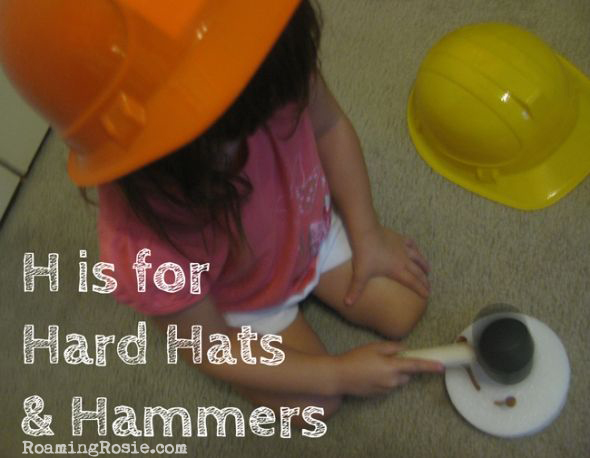
This was a fun activity for practicing fine motor skills.
I found some plastic hard hats and the dollar store and we hammered some gold tees into a piece of Styrofoam with a rubber mallet.
This one definitely needs close supervision because you may have to hold the golf tee steady for them at first or (preferably) you may want to stick it in the foam a little before allowing them to hammer it further down.
But it was fun. And we still play with the hats sometimes. :)
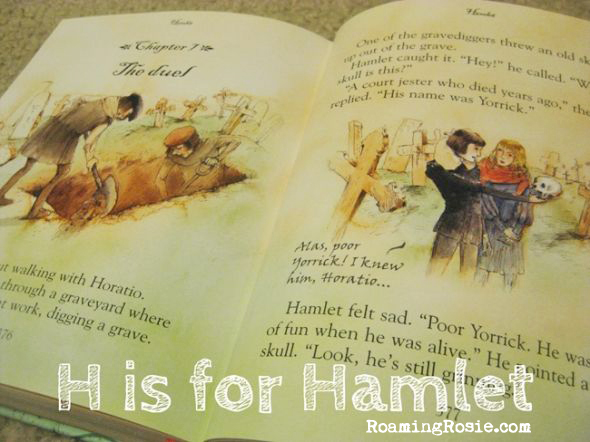
It just wouldn’t be Letter H day without a discussion of my favorite play.
My girls are quite familiar with Shakespeare and a few of his plays, and one of these days I’ll get around to posting some of the Hamlet crafts and recipes we’ve done, but for now you can still see some of the kid-friendly books about him.
The one pictured above is from the very first Usborne book I ever purchased (which has led to a serious obsession with Usborne, but that’s a little off topic). It’s called Illustrated Stories from Shakespeare, and is filled with gorgeous paintings and a story version of Hamlet and five other plays that are short enough to read to children.
Or, if you’d rather have a box set with five separate hardback books, including Hamlet, you could get The Shakespeare Gift Collection instead.
Depending on the age of your kids, there’s also the Shakespeare Sticker Dressing, recommended for age 5 and up, where you can dress up characters from the plays (like Hamlet) with stickers, and then there’s also the incredible Where’s Will book that’s like a “Where’s Waldo” book but with characters from Shakespeare’s plays (like Hamlet). The second book is recommended from ages 7 and up (and I really bought it for myself anyway….) but even my three-year-old enjoyed searching with me.
I first made these a few years ago, and I recently changed the recipe a little.
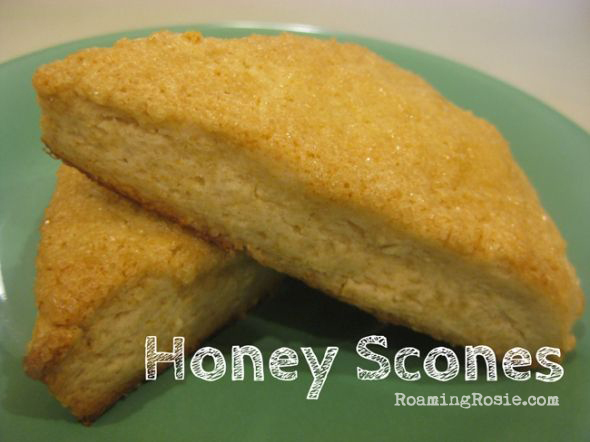
So here are the updated Sweet Honey Scones!
These scones are crumbly yet moist and permeated with a distinct honey flavor. And boy do I love me some honey.
But why “sweet”?
Not only are these made with honey, but they also have a small amount of sugar in them, which you don’t always find in scones. Plus, I added in some vanilla, which adds a beautiful aroma and pairs well with the honey.
Just a few basic ingredients.
Make sure the butter and cream are cold.
Once you cut in the cold butter pieces, you’ll mix together the honey, vanilla, and cream and stir that in.
Stir just until everything is moistened. You don’t want to over mix the dough or the scones will be heavy.
To bring the dough fully together, gently knead it.
I knead it right in the bowl, since all you’re really doing at this point is making sure it comes together.
On a lightly floured surface, press the dough into a square or a circle.
Shape it with your hands by patting it out into the shape you want. A circle will make rather large wedges, and the square pictured above can be further cut down to make small triangles by cutting each of those squares diagonally.
Oh, and I find a pizza cutter is the easiest way to shape your scones. :)
Spread out your pieces on a parchment paper lined cookie sheet, leaving some space to spread.
Brush the scones with cream and sprinkle generously with raw sugar.
Then bake until set and browned. The bottoms will get dark much faster than the rest, so keep a close eye towards the end of the baking time.
And, as you can see, some of mine were touching because they were close together on the cookie sheet. But as long as you gave them some room to spread, they’ll be fine. Even if they touch a little.
Don’t those look delicious?!
Here’s the recipe, and the printable version below:
Sweet Honey Scones
Ingredients:
2 1/4 cup flour
1/4 cup sugar
2 ½ teaspoons baking powder
1/4 teaspoon salt
1/2 cup (one stick) cold unsalted butter, sliced
1/4 cup honey
1 teaspoon vanilla
1/2 cup + 1 tablespoon heavy whipping cream
3 tablespoons raw or turbinado sugar
Preheat the oven to 400°F (200°C).
Whisk together flour, sugar, baking powder, and salt.
Use a pastry cutter or two knives to cut the cold butter into the flour mixture until it resembles large crumbs.
In a small bowl, mix the honey, vanilla, and the 1/2 cup whipping cream. Add that to the dry mixture and stir until just moistened. Then knead it gently with your hands to pull it all together. Do not overmix.
Sprinkle a little flour over your work surface, and shape the dough with your hands into a circle or square about 8 inches across and one inch high. Cut the circle into 8 large wedges or cut the square into 16 smaller squares (at this point you could also cut each square diagonally to create 32 triangles), and place the pieces an inch apart on a baking pan lined with parchment paper.
Brush the tops with the reserved heavy cream and sprinkle with the raw sugar. Bake for 12 to 15 minutes or until the edges are just browned.
If you like chocolate and you like Spice Cookies, then you’re going to agree with me that these cookies are Uh-MAZING!!
They’re gooey and chocolately and bursting with fragrant flavor! A total hit with everyone who has tried them. Well … the ones I was willing to share! ;)
They’re loosely based off of the Land O’ Lakes Chocolate Chai Latte cookies. I like how those had a soft chocolate cookie base, are flavored with spices, filled with chunks of chocolate, and iced with a cinnamon glaze.
So I made this recipe to incorporate those elements, but with all the individual ingredients instead of starting with a cake mix. Cake mixes differ a lot, and I wanted to know exactly what was going into my cookies. Plus this way the cookies all turn out the same, unlike if you have a different cake mix on hand from the last time.
I played around with the measurements until I found something I loved, including adding more spice into mine. I picked out spices I liked and measured them out, instead of using using a drink mix like the Chai cookies.
Because, really, I’m far too unorganized to have a specific cake and drink mix on hand whenever I decide to make these. All of the ingredients I use here are things I usually have in the pantry. Except if I’ve forgotten to stock up on powdered milk, but that’s shelf stable, so I usually keep that around, too.
(Scroll down for the printable PDF of the recipe.)
It looks like a lot of ingredients, but once you get everything set up, it’s super simple to whip up a batch.
And you can see that I used milk chocolate for these. I suppose you could use semi-sweet or dark, but I like the way the softer and gentler milk chocolate chips contrast with the rest of the cookie.
The chips are one part of the “Triple” chocolates for which I named these. Aside from the cookie itself, there is also chocolate in the icing. :)
Would you just LOOK at all that FLAVOR!?
The dough is coming together…
A little thick, but that makes for soft, puffy cookies!
Scoop it out onto parchment paper or on a pan like this that releases the cookies easily.
The just-baked cookies.
See that moisture in the cracks? Get ready for some moist, fudgy goodness!
And the icing ingredients.
I made this icing with both cocoa powder and cinnamon for maximum chocolatey-spicy flavor.
The icing consistency is ready when it easily drips from the fork or spoon in thick ribbons.
Drizzle the icing over the cooled cookies by dipping the fork back into the icing then waving it back and forth above the cookies.
Wait until the icing hardens completely to eat them. The slight crunch of the icing makes a wonderful combination with the soft cookies.
Store them covered, and if you’ve waited until the icing is completely cooled (doesn’t smoosh and melt apart when you press it with your finger), then you shouldn’t even need to separate the layers of cookies with paper or anything. Just throw the ones you didn’t consume immediately into a container.
Triple Chocolate Spice Cookies
Ingredients:
1 ½ cups all-purpose flour
1 ½ cups sugar
1/2 cup cocoa powder
1/3 cup instant nonfat dry milk powder
1 teaspoon baking powder
1 teaspoon baking soda
1/2 teaspoon salt
2 teaspoons ground cinnamon
1 teaspoon ground cardamom
1 teaspoon ground ginger
1/4 teaspoon ground cloves
1/2 cup (1 stick) butter
2 large eggs
3 tablespoons milk
2 cups milk chocolate chips
Icing:
2 cups powdered sugar
2 tablespoons cocoa powder
2 teaspoons ground cinnamon
3 to 5 tablespoons water
Preheat the oven to 350°F (180°). Combine the first 11 ingredients in a large bowl with a whisk or fork. Add in the butter, eggs, and milk and blend with a mixer on medium speed until fully combined. Stir in the milk chocolate chips by hand. The dough should hold together but be thick. Scoop rounded teaspoons of dough onto cookie sheets, about two inches apart. Bake for 10 to 12 minutes. The cracks in the cookies will still look moist when they are done. Allow to cool on cookie sheets for two minutes, then transfer to cooling racks and allow to cool completely.
Using a fork, combine the powdered sugar, cocoa powder, and cinnamon in a bowl. Add in 3 tablespoons of water, stirring well until icing is smooth. Add a teaspoon more of water at a time until the icing drips from the fork in thin, unbroken ribbons. Line your workspace with waxed paper beneath the cooled cookies, and use the fork to drizzle the icing over the cookies. Allow icing to harden completely and store cookies covered. Makes four dozen.
**********
Click here to print the free PDF version of the recipe:
Yesterday, I posted our Power Word Hopscotch, and I also wanted to share this game that we played to practice my daughter’s vocabulary (or sight words) for Valentine’s Day.
This was a versatile way to play with some of the words she needs to know. Her school calls them power words, so this is our Power Word Pom Pom Toss.
And since it was February when I made it, I just had to do it with cute little hearts!
I picked up some Valentine-colored pom poms and dollies at the dollar store.
Being February, it was easy to find these things in red and pink, but you can often get this stuff when it’s not Valentine’s Day. For example, you can buy heart dollies most of the year, sometimes in the cake baking section of a large retail store, or in a party store, and the pom poms are usually stocked in the craft section all year, though maybe not with little hearts on the label. :)
My daughter had a list of 60 power words, so I bought two packs of 30 dollies each and wrote out each word on a separate heart.
Then we would pick a handful and lay them out on the floor. For the game above, we would call out a word and then try to throw a pom pom onto that word.
Even for me it took a few tries, but that allowed up to repeat the word a few times.
Then, we would trade those few words out for a few others.
Then, we did a game where we would call out each word and hop onto them, kind of like our Power Word Hopscotch from yesterday.
Just be careful with this one, and be sure to put the dollies onto carpet or something similar. If you put them onto tile or some wood floor, they will slip right out from under you when you jump onto them.
And for the younger crowd, like preschoolers, you could substitute individual alphabet letters for the sight words!
We recently did some Power Words Hopscotch to help my daughter practice her vocabulary.
I drew a hopscotch board on the driveway in chalk and filled it with some of her Power Words (also known as Sight Words). Most of the words were ones she kept missing, but I also threw in some she knew well as encouragement.
One of the reasons we did a game like this – with her calling out each word as she jumped to it – was because she’s supposed to know these words on sight instead of having to sound them out each time.
And my daughter is always in a hurry, always rushing through her reading, so she often doesn’t take the time to sound things out anyway. She just guesses. One of the most important things in the world to me is that reading is fun for my kids, so instead of sitting her down and having her get frustrated and upset at herself, I’ve been trying to incorporate more learning activities that include movement and laughter.
Because for as much as I read to her every day, and as much as she would ask me to read to her, she wasn’t in a hurry to learn herself. To keep up with her classmates, though, she needs to practice. So we’ve been playing “games” instead of just sitting in a chair and going over flashcards again and again. ‘Cause that’s even boring for mommy….
This one was a suggestion from her teacher and it worked out really well. The chalk lasted for days (it didn’t rain) and every day for a week she would ask to go out and play hopscotch, including each time we were getting in and out of the car for school.
Plus, she called out the words for her younger sister, so they could both play. Extra practice for the big sis, and a heartwarming moment thrown in for good measure. :)
I also love this concept of hopscotch for learning because of the versatility.
You could use this for other vocabulary words, of course, but also for just letters for the younger crowd. For example, if you’re working on some Alphabet Activities with your preschoolers, you could practice your alphabet by putting letters instead of the traditional numbers inside the squares.
I love the idea of food with hidden surprises inside, and with spring coming at us full force, I wanted to do something in that vein.
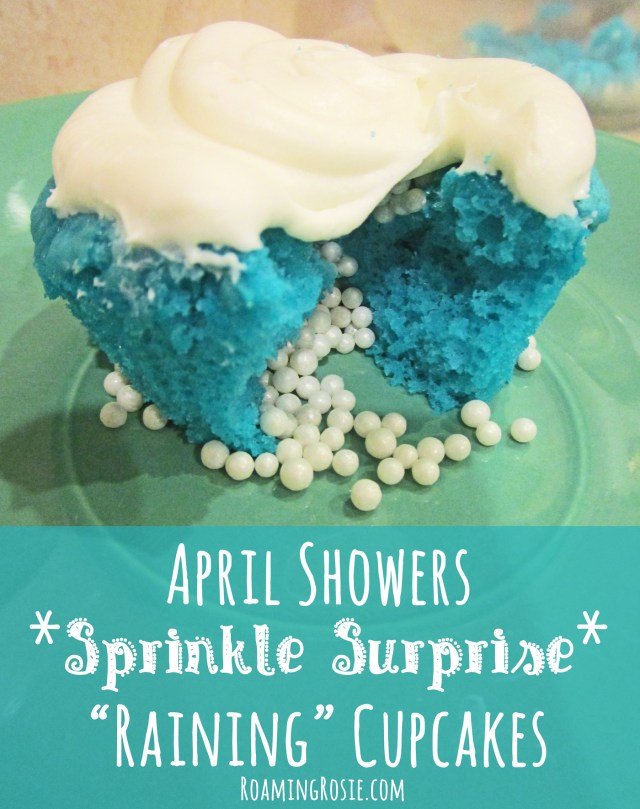
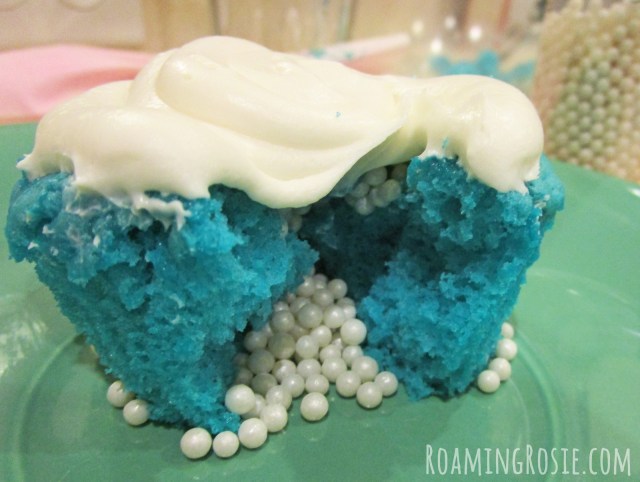
Thus was born the April Showers *Sprinkle Surprise* “Raining” Cupcakes!
April Showers for the fact that it’s now April and raining. A lot. The day we made the cupcakes, in fact, was hounded by heavy thunderstorms. Sprinkle Surprise because of the sprinkles hidden inside. And Raining because the cupcakes “rain” out sprinkles like raindrops when they’re opened or bit into.
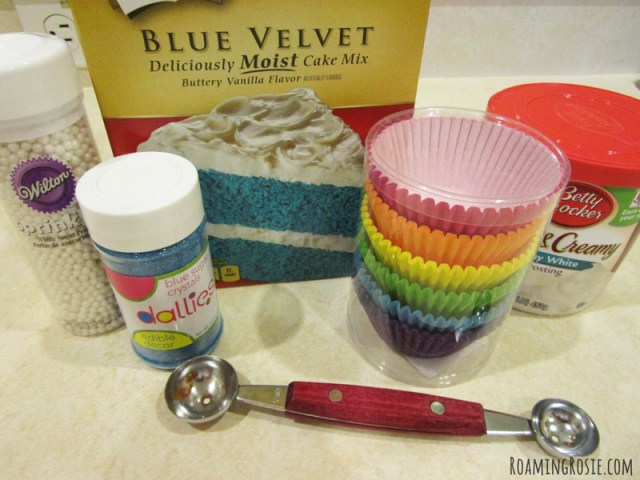
Here are all the supplies I used. I did use blue sugar crystal sprinkles to top some of the cupcakes, which you can see in one of the photos, just not on all of them. In the end, I decided I preferred the way it looked without the sprinkles on top – when the icing looked like just a white fluffy cloud on top of the blue “sky” cupcakes.
The sprinkles we used to fill the cupcakes were the Wilton White Sugar Pearls. You could use just about any kind of sprinkle here, except maybe sugar crystals, but I liked how these represented raindrops so well. They’re one of the pricier sprinkles, too, but we didn’t use the whole container, so there’s still some left for future projects.
Oh, and to make life much easier, we used store bought cake mix and icing. I got the Blue Velvet cake mix because it’s in stock around here during springtime, but you could always add blue food coloring to any plain cake mix to achieve the same result.
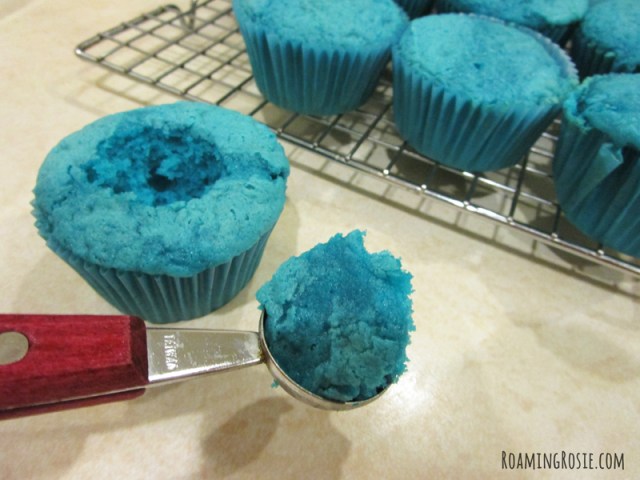
The steps to create the hidden surprise of the raindrops/sprinkles inside the cupcakes is done after the cupcakes are baked.
Once the cupcakes are fully cooled, scoop out the center with a melon baller, but hang onto that little piece you remove.
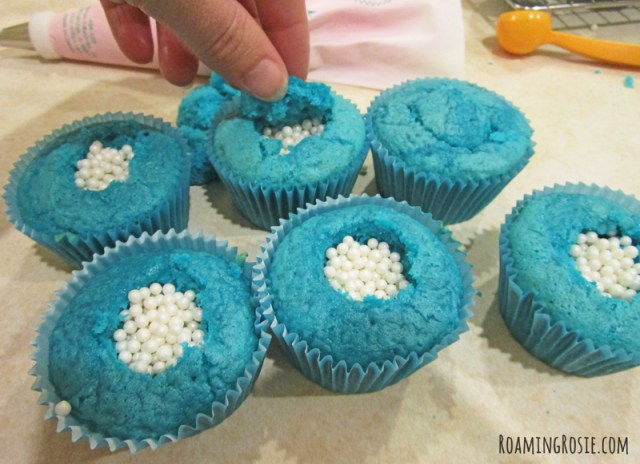
Fill the hole in the center with your sprinkles. Be generous here. Add as many as will fit, because if you only put a few, then they won’t really “spill” out when you split open or bite into the cupcake.
Take that little piece of cake you’ve removed with the melon baller and pick off some of the fluffy interior of the cake from the flatter top portion of it, to make it more of a smooth and flat piece instead of a ball.
Then put that flat piece back on top of the hole that’s filled with sprinkles. And put aside (to discard or eat or whatever) those extra fluffy interior pieces that were removed to make room for the sprinkles.
It doesn’t have to fit perfectly – I didn’t exactly keep track of which piece went with which cupcake. Just put a little piece on top of the sprinkles just to hold them in a little better.
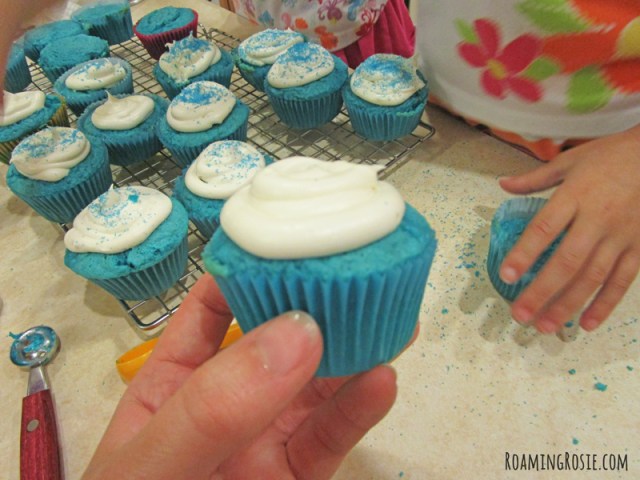
Then top the cupcakes with icing.
I put the icing into a bag with a large round icing tip to make this process quicker and easier. If you try to spread on the icing with a knife, things could get a little messy because the icing is what holds down the piece that you cut out, trimmed, and replaced on top of the sprinkles.
At this point we added the blue sugar sprinkles to the tops of about half of the cupcakes. Like I said, this part is up to you.
Just make sure to remind people to eat these over a plate, since once you bite into them they will “rain” sprinkles!
Enjoy!
Please share your own baked goodies with me on my Facebook page and follow me on Pinterestfor more ideas!
But this year I changed it up just a little and decorated a couple of the mini pumpkins with nothing but silverand gold glitter glue.
I started at the center of the top of the pumpkin, slowly pouring out the glitter glue in a tight circle around the stem. I did a gold circle, then a silver one, then gold, et cetera, keeping the circles tight and touching each other until I had the entire top of the pumpkin covered in a thick layer of glitter glue and it was just barely starting to drip down the sides in the creases.