Tropical Almond French Toast

Tropical Almond French Toast Recipe

First, with the polar vortex turning everyone’s blood to ice, and now with this “bombogenesis” upon us, I decided to metaphysically warm up with a tropical breakfast.

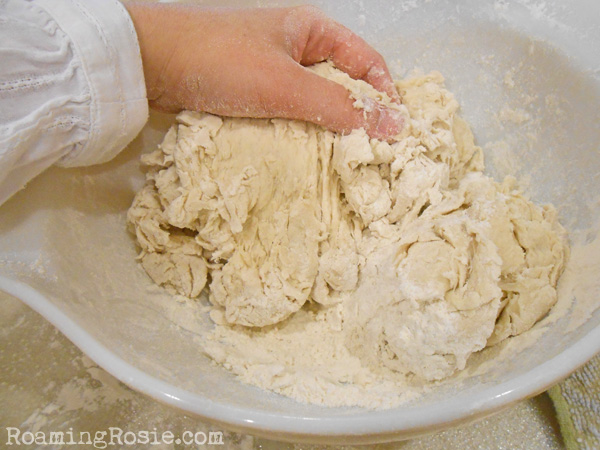
I took my Homemade Bread and turned it into Tropical Almond French Toast, based off of the Coconut-Almond French Toast with Tropical Fruit recipe from a January 2014 issue of Woman’s World, but with a few changes.

Tropical Almond French Toast

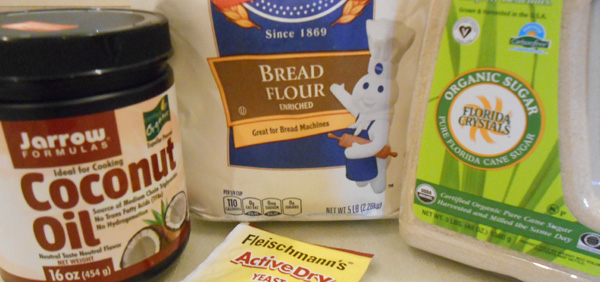
Here are some of the ingredients I used, although I forgot to put the coconut in the photo.  Anyway, the french toast gets its amazing almond flavor from the almond milk and almond extract.

The coconut is added before you cook it, and the diced fruit afterwards, as a topping.  I used bananas and mango mixed with some brown sugar and lime juice, but you could add in just about any fruit here that you like, or whatever’s in season.  I found this to be a good combination, especially because the banana and mango were flavorful but still mild enough to allow the almond and coconut flavors to really shine through.

French Toast

Just like my usual french toast, I took day-old bread and dunked it into a mixture of milk and eggs and flavoring.  The bread needs to be crusty and dry to absorb the liquid.  If it’s fresh bread, the liquid will only cover the surface instead of absorbing.  You’ll know for certain it was too fresh if you have a bunch of milk mix left over after soaking all of the bread.  The best way to get the right consistency of bread is to leave it out, with the slices spread out, at least overnight.

coconut on french toast

After letting the bread soak in the milk mixture for a minute, turning it to ensure even coating, gently pull the bread out of the milk.  The bread will be heavy with the milk, so be careful to support it.

Just before placing the bread on a greased griddle, sprinkle it with some sweetened coconut.  Then, lay it coconut-side down on the griddle and sprinkle coconut on the side that’s facing up.  The coconut is an important step because I love the sweet, crispy crust that it forms toast.

Tropical Almond French Toast

Let the french toast brown, then flip and brown on the other side.  Make sure the bread cooks long enough that it cooks all the way through.  At least 3 or 4 minutes, or longer if your bread is thick like mine – you don’t want gooey egg on the inside when you’re eating it.

Tropical Almond French Toast

Once the french toast is done, put it on a plate and top with the fruit mixture.  I suggest a wee bit more fruit than what’s pictured here.  I didn’t want to overload it for the photos, but I added more while eating it.

Also, a slight sprinkle of powdered sugar over the top adds a nice balance of sweetness, as does a drizzle of honey, which also adds a little extra moisture but functions as a substitute for syrup.  You could use maple syrup if you prefer, but I like how the honey blends with the fruit.

Tropical Almond French Toast

If you cut the slices of your bread thick, then one slice should be enough per person.  The leftovers freeze well, but also keep in the refrigerator for awhile.

Enjoy!  Let me know what you think!

Tropical Almond French Toast

Ingredients:

1 1/2 cups almond milk
6 large eggs
4 Tbsp packed brown sugar, separated
1/2 tsp almond extract
8 to 10 thick slices day-old bread
1/2 cup sweetened coconut flakes
1 mango, diced
2 bananas, diced
1 Tbsp lime juice
confectionary sugar
honey

Whisk together almond milk, eggs, 2 Tbs. brown sugar, and almond extract in a large, shallow bowl.

Dip bread into mixture for about a minute on each side, allowing bread to absorb the milk. Carefully remove bread from bowl allowing excess liquid to drip back into the bowl (use a fork or spatula to prevent tearing if it’s become too soggy) and sprinkle each side with coconut flakes.

Place bread on a greased, flat skillet or griddle over medium to medium high heat. Cook until browned, about 3 or 4 minutes per side.

Meanwhile, mix the mango and banana pieces with the remaining 2 Tbs. brown sugar and the lime juice.

To serve, place French Toast on a plate and top with the fruit mixture. Then sprinkle powdered sugar over top and drizzle with honey.

(Note: you can use just about any combination of fruit you like, in addition to or in substitution of the mango and banana. Also, you can substitute maple syrup for the honey, if you prefer.)

*****

And here is the FREE printable PDF:  Tropical Almond French Toast

Roaming Rosie Signature

Homemade Bread Recipe

Homemade Bread Recipe

I love homemade bread.

The smell of the yeast, the feel of the dough in my hands, the baking aroma that floats out of the oven and through the entire house…

Dreamy.  Delicious.  Why don’t I do this more often?

Anyway, I finally decided it had been too long since I’d made bread from scratch, but this time, I made a few changes.

This is based off of a basic Amish recipe for bread that’s slightly sweet and a little dense, but this time I made it with coconut oil.  The end result in appearance, texture, and taste was the same as if I’d made it with vegetable oil, so I’m thrilled.

However, extra virgin coconut oil may add a coconut taste to the bread – but I’ve never used extra virgin for baking, so I’m not really sure.

I also used Organic Natural Cane Sugar, but one with the texture of regular granulated sugar, unlike the consistency of Demerara or Sucanat, which I sometimes put in my coffee.  This way, the weight of the sugar didn’t need to be adjusted for the recipe.  Makes my life easier.  :) 

Homemade Bread Recipe

Anywho, you can see some of the products I mentioned in this photo.  And the only yeast I had on hand was those little packets, instead of the larger jar, so I had to use about one and a half of them, which irked me a little.  The jar is back on my shopping list.

Homemade Bread Recipe

Yeast is one of my favorite smells in the whole world.  I love proofing it.

Here are some tips I’ve picked up over time:  get warm water from the sink because the microwave is tricky and water that’s too hot will kill your yeast, and add sugar to the warm water first, to give the yeast something to get really excited about.

In other words, the first thing you’ll do in this recipe (or any yeast dough) is add some warm water to a measuring cup.  (Forgive me for not photographing this step.)  Run the water from your sink until it is just barely painful to touch, then fill your measuring cup to whatever your recipe calls for.  You can test it with a candy thermometer.  It should be between 100 and 110 degrees Fahrenheit.

Put this pre-measured water into the large bowl in which you will create your dough.  Stir in a tablespoon or two of the total amount of sugar from the recipe – don’t add sugar to what’s called for, just use part or all of what you already would to make your dough.  Then add the yeast, sprinkling it over the top of the warm sugar water.  You don’t need to stir it in, but sometimes I do.  Leave it alone for 5 to 10 minutes and you’ll know it’s ready when the top is nicely covered in a frothy, foamy layer of soft, strong-scented yeastiness.  (That’s a word, right??  It should be.)

At this point, you’re ready to make the dough.  For this particular recipe, this would be when you add in the salt and coconut oil.  You need a liquid coconut oil for this, so I find it easiest to stick the solid oil in the microwave for 30 seconds to melt it.  Then you’ll mix in the flour.  I start this with a spoon, but usually end of finishing it with my hands (above photo), and then knead it on a floured surface.

Homemade Bread Recipe

Grease your bowl by rubbing a bit of the coconut oil inside of it, and put your kneaded dough back into the bowl.  Cover lightly with a kitchen towel and let it rise for an hour.

It will double in size.  Punch (yes, punch) it down, knead it for a minute again, and then separate it into two halves.  Coat two bread loaf pans with the coconut oil and place loaf-shaped dough into the pans.  I formed the loaf by tucking the dough under itself to create a smooth top.

Homemade Bread Recipe

Let the dough rise one more time, until approximately doubled in size or risen to about an inch over the top of the pan.  This will take between 30 to 60 minutes.

Bake until browned on top.  I prefer mine lightly browned, but you could bake it an extra few minutes for a darker brown – just watch the bread so it doesn’t burn.

Allow the bread to cool in the pans on a cooling rack for awhile.  About a half hour.  Then remove the bread from the pans and allow it to finish cooling on the rack. Keep your bread wrapped in a bread bag or tin foil.

Whatever you’re not planning to eat in the next 2 or 3 days can be easily frozen.  You can slice the bread and freeze it that way, too.

Cinnamon Toast made with Homemade Bread Recipe

I also enjoy making cinnamon toast with the bread (pictured above).  My mom often made this for me when I was growing up, and it’s still one of my favorite dishes.  To make it:  slice a piece of bread that will fit in your toaster.  Toast to a light brown and spread with butter immediately so the butter will be very soft and mostly melted.  Sprinkle with a cinnamon and sugar mixture immediately so that the sugar will absorb into the butter.  Enjoy!

Okay, here’s the good stuff:

Homemade Bread Recipe

Ingredients:

2 cups warm water (110 F or 45 C)
1/4 cup granulated sugar
1 1/2 tsp active dry yeast
1 1/2 tsp salt
1/4 liquid coconut oil (or vegetable oil)
6 cups bread flour

In a large bowl, stir the sugar into the warm water.  Pour the yeast over the water and mix it in, if desired.  Let sit for 10 minutes until yeast develops a thick foam.

Add the salt and oil to the yeast.  Mix in the flour one cup at a time.  Knead the dough on a lightly floured surface for a few minutes, until smooth.  Place dough in a bowl coated with oil, cover with a towel, and allow to rise for one hour.

Punch dough down, then knead for a few minutes.  Divide dough in half.  Form dough into loaf shapes and place in two oiled loaf pans, about 9 by 5 inches each.  Let the dough rise for 30 minutes or until about an inch over the tops of the pans.

Bake at 350 F or 175 C for 30 minutes.

(Note:  I used solid coconut oil to grease the bowl and loaf pans by rubbing on a couple tablespoons with my fingers.)

*****

And now for the FREE printable PDF:  Homemade Bread

Next up will be the awesome Tropical Almond French Toast that I made with my homemade bread:  yum!  :)

Roaming Rosie Signature

15 Minutes to Chocolate Pudding

Chocolate Pudding

It was late.  I found myself in the mood for chocolate, but not wanting candy or ice cream or, even, (heaven forbid) cookies.

But I needed chocolate.

What could I make?  What would satisfy my craving?  What could be done quickly since it was already nine at night?

I couldn’t decide, so I explored Pinterest.  There were so many, many amazing foods, but nothing quite what I needed… until I came across The Best Chocolate Pudding You’ll Ever Have (in 15 minutes!).

Fifteen minutes?  That’s worth a try for silky smooth dark chocolatey goodness.

Unfortunately, I didn’t have any dark chocolate cocoa on hand, so mine was more semi-sweet.  Still awesome, tho.

Chocolate Pudding

It was definitely simple.  Whisk together a few ingredients.

Chocolate Pudding

Boil some milk.  Whisk the rest of the ingredients.  Eat.

Chocolate Pudding

I was pleasantly surprised by how simple and quick the whole process was.  The thing that took the longest was stirring in the chocolate chips (above) and waiting for them to melt.  If I’d had chocolate shavings instead, it would have been even faster.

And there were a few chips that didn’t melt completely, but that didn’t really bother me.

Chocolate Pudding

The problem with taking photos was that I was in a rush to eat it, and my powdered sugar kept melting as soon as I sprinkled it on.  The thick, gooey chocolate was calling my name.

It’s awesome when it’s well-chilled, too.  Of course.  Which I know because I couldn’t eat it all in one sitting.  Which was lucky for my girls.  They got to enjoy it the next day.  :)

So be sure to check out the recipe at A Cup of Jo – and the photos, too, they’re much better than mine!

And then be sure to enjoy some homemade chocolate pudding.  :)

Roaming Rosie Signature

Merry {Caffeinated} Christmas

someecards.com - It's not a happy or merry anything until I've had my coffee.

True.  So true.

Perhaps that’s why I felt inspired to construct my latest BuzzFeed post around porn for coffee addicts.  But not just any porn.  Holiday porn.

Here are a few examples:

*shudders*

Oh, my… are you salivating yet?

If you haven’t abandoned your computer in pursuit of your favorite coffee mug, then check out the rest of the tantalizing photos at 45 Photos Of Holiday Porn For Coffee Addicts.

May your holidays be ever joyful.  And fully caffeinated.

Elf-Sized Chocolate Chip Confetti Cookies

Elf Sized Chocolate Chip Confetti Cookies

Actually, all I had intended to do was make mini chocolate chip cookies… until my daughter said, “I want to put sprinkles on them!”

Whoa.

How did I ever come up with creative ideas before I had a 3-year-old to guide me???

Seriously.

Elf Sized Chocolate Chip Confetti Cookies

Anyway, as you can see from the batter, we actually poured the sprinkles right into the mix so they would be spread throughout the miniature cookies.

Elf Sized Chocolate Chip Confetti Cookies

And when we scooped them onto the cookie trays to bake, we made them smaller than normal, about a half of a teaspoon each.

Perfect for elf-sized hands.  :)

Elf Sized Chocolate Chip Confetti Cookies

Elf-Sized Chocolate Chip Confetti Cookies

Ingredients:
1 1/8 cup all purpose flour
1/2 tsp. baking soda
1/2 tsp. salt
1/2 cup (1 stick) butter, softened
1/2 cup granulated sugar
1/2 cup brown sugar
1 tsp. vanilla extract
1 large egg
1 cup mini semi-sweet chocolate morsels
1 cup rainbow sprinkles

Preheat oven to 375F.  Combine flour, baking soda and salt in a small bowl.

Beat butter, granulated sugar, brown sugar, and vanilla extract in a large bowl, with a mixer or by hand.  Add egg.

Gradually blend in flour mixture.  Stir in chocolate chips and sprinkles.

Drop a half teaspoon of batter onto baking sheets.  Bake for 8 to 10 minutes, or until lightly browned.

Cool on wire racks.  Store covered.

*****

Click to PRINT the free PDF of the recipe:  Elf Sized Chocolate Chip Confetti Cookies

And, of course, don’t forget to share some cookies with your elf.

Merry Christmas!  :)

Honey Granola with Quinoa

Honey Granola with Quinoa

I know many people eat granola all by its lonesome, just in a bowl with milk, but I prefer it with yogurt.

The first time I saw someone eat it this way was when I was at a hotel breakfast buffet in Germany.  Someone spooned yogurt into a dish and sprinkled granola over the top.

I was intrigued.

And then I was addicted.

The silky smooth, fruity yogurt intensified the sweet and crunchy granola.  It seemed an ideal breakfast, indeed.

But I hadn’t made my own from scratch yet.  That needed to change.

Honey Granola with Quinoa

I began with a recipe by David Lebovitz that was based off a recipe by Nigella Lawson.  Then I made some changes.

I knew I wanted to increase the amount of honey, and I wanted to incorporate quinoa.  Plus, I love walnuts, so I swapped out the almonds for them.

You can see these changes in the photo above, which shows the dry ingredients, minus the spices and sugar.  Incidentally, I used dark brown sugar, although light brown sugar would work as well.  I prefer the stronger flavor.  And I used honey-roasted sunflower seeds instead of plain sunflower seeds – again, to increase the honey-ness of the granola.

Honey Granola with Quinoa

The long list of ingredients can appear a little intimidating at first, but the process is incredibly simple.

You mix the dry ingredients in a large bowl and the wet ingredients in a small saucepan.  Heat the wet ingredients, then pour them over the dry ingredients, and mix well.

Honey Granola with Quinoa

Spread the granola over two cookie sheets lined with parchment paper, and bake for an hour, stirring occasionally.

That’s it:  you’ve got homemade granola!

Honey Granola with Quinoa

And, of course, I suggest serving it over yogurt for breakfast.  Strawberry yogurt, specifically.  But feel free to play with it.  Perhaps you’d prefer it over vanilla ice cream?  Leave a comment to let me know how you enjoy it best!

Honey Granola with Quinoa

Here’s the recipe, and scroll down for the printable version:

Honey Granola with Quinoa

5 cups old-fashioned rolled oats
3 cups chopped walnuts
1 cup honey roasted sunflower seeds
1 cup quinoa
1/2 cup brown sugar
1 tablespoon ground cinnamon
1 teaspoon salt

3/4 cup unsweetened applesauce
1/2 cup honey
2 tablespoons vegetable oil

Preheat oven to 300ºF (150ºC).

In a large bowl, mix the dry ingredients:  oats, walnuts, sunflower seeds, quinoa, brown sugar, cinnamon, and salt.

In a small saucepan, mix the applesauce, honey, and oil.  Stir over low heat until just warmed and combined.

Pour the applesauce mixture over the dry ingredients and stir until well combined and all the dry ingredients are coated.

Pour granola evenly over two cookie sheets.  Bake for one hour, stirring every 10-15 minutes.

Cool completely.  Store covered for up to one month.

**********

Get the free printable PDF of the recipe:

Honey Granola with Quinoa

Enjoy!

Roaming Rosie Signature

Personalized Santa Christmas Photo Ornament and Plate

Christmas Dated Photo Ornament Christmas Dated Photo Ornament

This Santa-inspired personalized Christmas photo ornament has long been one of my favorites.  I created a couple of different ones for my Zazzle stores (like this and this), but this one pictured here is the most popular.

The reason I’m posting about it today is because I’m excited that people have been saying such great things about it!

Some of the comments left on Zazzle include:

“This was my first time ordering a product from Zazzle and I was extremely pleased with the outcome. The product was well made and the order was executed very efficiently. I received the product quicker than expected.”

“This is a nice ceramic ornament. The ribbon hanging cord is an added touch. Not flimsy at all. Good quality.”

Okay, not raving I-must-have-this-right-now-type comments, but still nice.  Nice enough to share.  :)

Actually, the matching plate:

Personalized Christmas Custom Photo Plate

got a slightly better-sounding review:

“This plate can be a gift for any occasion. The process of ordering was very simple, and the delivery was fast. While the colors suggest a Christmas gift, I gave this as a shower gift. The colors came out beautifully, the font choices were great and the recipient loved it!”

So, either way, I’m pretty excited about this design.  If you like it, too, please leave me a comment to let me know!

Garlic-Infused Parmesan Popcorn Recipe

Garlic Infused Parmesan Popcorn Recipe

I’ve always loved cheese on my popcorn.  And I love garlic.

So, one day, I’m browsing recipes and I start looking over ways to infuse olive oil.  Then I thought – hey, I use olive oil to cook my popcorn… I wonder what it would taste like if I used an infused oil instead?

I was not disappointed.

What I love about this recipe is the subtle but certainly noticeable garlic flavor, and, since I’m also a big fan of garlic flavor in my pizzas, I was delighted with the garlic and cheese combination.

I think Parmesan is a perfect match for popcorn.  But, you’ll notice I also added pepper to mine.  That’s because it balances out the saltiness of the cheese while complementing the spice of the garlic.

Overall, I’ve found the final result to be quite enjoyable.  And addictive.

Seriously, I’ve eaten a whole batch of this stuff myself.

Garlic Infused Parmesan Popcorn Recipe

Anyway, first things first:  infusing the olive oil.

You’ll peel and smash the garlic and bring it to a gentle simmer in the olive oil over medium heat, then turn it to low heat.

You need to be careful here – burnt garlic has an awful and bitter flavor, so you’ll want to keep an eye on it.  It should only bubble a little while it cooks.

Since it simmers for 10 minutes but then has to steep for an hour, I will usually stick this pot on the stove while cooking dinner, and let it sit while we eat dinner and clean up.  Then later, when I’m ready to make the popcorn, the oil is ready, too.

You could always make a larger batch of the olive oil, I suppose, but I’ve always done it this way.

Garlic Infused Parmesan Popcorn Recipe

Here is the garlic steeping.  You can see that it is a little browned, but not too much.

I usually turn the cloves only once while they’re cooking, and swirl the pot just a couple times.

I’ve thought about keeping the boiled garlic and using it for something else, but I haven’t found anything to suit that purpose yet.  I’m open to ideas, but mostly, it seems best fit for compost after this.  The flavor has really left the cloves at this point.

Garlic Infused Parmesan Popcorn Recipe

And here is the popcorn, freshly popped.  It’s important to note that, while I infused the olive oil in a small saucepan, I popped the popcorn in a much larger skillet.

Most people use a deep pot for this purpose, but, luckily, I’ve got a large, high-sided skillet that’s perfect for this amount of popcorn.  And easy to clean.

Garlic Infused Parmesan Popcorn Recipe

And the finished product.  Mmmmmmmm… every time I look at this photo I get hungry!

On to the details:

Garlic-Infused Parmesan Popcorn Recipe

Ingredients:

1/4 cup olive oil
4 cloves garlic
1/3 cup popcorn kernels
2 Tbsp. butter, melted
1/4 cup grated parmesan cheese
1/2 tsp. pepper

Peel the garlic cloves and gently smash them to release their flavors while still holding their shape.

Place the olive oil and garlic cloves in a small saucepan and warm over medium heat until the oil begins to bubble around the garlic.  Turn the heat to low and continue to very gently simmer the garlic for 10 minutes.  The garlic should be only slightly browned.  Do not let it burn!

Take the pan off the heat and let it sit and steep for one hour.

Discard the used garlic.

In a large saucepan or pot, add the flavored olive oil and 2 or 3 kernels.  Warm over medium heat until the kernels pop, then add in the rest of the popcorn.  Cover.

Leave over medium heat until the popping stops, gently shaking the pan now and then.  This should take only a couple of minutes.

Once the popcorn is done, transfer it to a large bowl.  Drizzle the melted butter over the popcorn and mix well to coat all the pieces.

Mix the parmesan and pepper in a small dish, then sprinkle over the popcorn.  Mix well.  Store loosely covered.

*****

To PRINT the PDF copy of the recipe, click here:

Garlic Infused Parmesan Popcorn Recipe

Enjoy!  :)

Roaming Rosie Signature

Frilly Pettiskirts for Babies

These pretty pettiskirts from Butterfly Wishes are so fluffy and frilly I can barely stand it!

Technically, I could still get away with putting my toddler and preschooler in a skirt like this, but it’s just not the same as a newborn.  And, with the recent birth of my great niece, I’ve got a touch of baby fever.  Can’t seem to stop thinking about fluffy and frilly things.  :)