Letter E: Free Alphabet Worksheets for Kids

Free Letter E Printable Worksheets {Alphabet Activities at RoamingRosie.com}

If you’re new here, please read the Introduction to the Alphabet Activities first!

Here are all of the printable PDFs for the Letter E.  They are free for home and classroom use, but please don’t sell or reproduce them.

E is for Eagle and Easter Eggs

E is for Earth

E is for Elephants Eating Eggplants

E is for Emergency

E is for Eyes Googly Eye Worksheet

E is for Spotted Eagle Dot Marker Coloring Page

And don’t forget to check out all of our Letter E Alphabet Activities!

Follow me on Facebook and Pinterest to see my latest posts.

Have fun!

Roaming Rosie Signature

Letter D: Free Alphabet Worksheets for Kids

FREE Printable Letter D Alphabet Activities Worksheets at RoamingRosie.com

If you’re new here, please read the Introduction to the Alphabet Activities first!

Here are all of the printable PDFs for the Letter D.  They are free for home and classroom use, but please don’t sell or reproduce them.

D is for Deer

D is for Dime

D is for Doctor

D is for Dolphin

D is for Dots for Dalmatians

D is for Duck

D is for Letter D Dogs Eating Doughnuts 1

D is for Letter D Dogs Eating Doughnuts 2

D is for Letter D Dot Marker Coloring Page

And don’t forget to check out all of our Letter D Alphabet Activities.

Follow me on Facebook and Pinterest to see my latest posts.

Have fun!

Roaming Rosie Signature

U is for Up, Underground, and Underwater

U is for Up, Underground, and Underwater {Letter Activities for Kids}

We do a lot of Alphabet Activities in our house.

My girls love to do projects, and I love that they enjoy projects that help them with letter recognition, pre-reading skills, and a whole handful of other useful exercises.

The main problem is that I haven’t gotten around to posting about all of the activities yet.  Or all of the worksheets that I’ve made for the girls.  But I’m getting to it.

Today, for example, I’m sharing one of the Letter U activities that we did… even though I haven’t yet officially posted ALL of the Letter U activities and worksheets yet.  But with summer ending, I wanted to get this one out there.  It’s a great way to get the kids outdoors.

I cut two letters from a piece of purple foam and gave a U to each of my girls.

I showed them a letter U worksheet with the words Up, Underground, and Underwater.  We talked about what each word meant, then we used the foam letters to demonstrate each concept.

They held the letters over their heads, then buried them in the dirt, and, finally, submerged them in the pool.

It was a lot of fun for them, and certainly memorable.

Here is the free printable PDF of the worksheet I made for this activity:  U is for Up Underground and Underwater

{The worksheet is free for personal and classroom use.  Please do not sell or redistribute it.}

We colored in the words after we finished swimming.  Can’t just put the letters in the pool and not ourselves, right?

I’ll be uploading more worksheets and activities soon!

Roaming Rosie Signature


Letter C: Free Alphabet Worksheets for Kids

FREE Printable Letter C Alphabet Activities Worksheets at RoamingRosie.com

If you’re new here, please read the Introduction to the Alphabet Activities first!

Here are all of the printable PDFs for the Letter C.  They are free for home and classroom use, but please don’t sell them.

C is for Camel

C is for Candy

C is for Car

C is for Clocks

C is for Counting Colorful Cats 1

C is for Counting Colorful Cats 2

C is for Cow and Cheese

C is for Crab

C is for Types of Clouds

And don’t forget to check out all of our Letter C Alphabet Activities.

Follow me on Facebook and Pinterest to see my latest posts.

Have fun!

Roaming Rosie Signature

Letter C: Alphabet Activities for Kids

Letter C: Alphabet Activities for Kids at RoamingRosie.com

Welcome to Letter C Day!

If you haven’t read the Introduction to the Alphabet Activities, you should start there.

And don’t forget to check out the Letter C:  Free Alphabet Worksheets for Kids, too!

Letter Sorting: C is for Cars {Alphabet Activities at RoamingRosie.com}

For our letter sorting activity, I made two paper cars.

To make it a little easier to distinguish between the capital and lowercase Cs, I cut out the capital Cs in a slightly bigger circle than the lowercase ones.

But kids tend to be more observant than us anyway, and I’m not sure that extra step was necessary.

C is for Caterpillar {Alphabet Activities at RoamingRosie.com}

This paper project goes great with Letter C Day and with a reading of The Very Hungry Caterpillar, which we read anyway.

But instead of cutting out circles for the body of the caterpillar, I cut out large letter Cs in different colors.

C is for Counting Colorful Cats {Alphabet Activities at RoamingRosie.com}

This is a file folder-type game that I made.  And it’s one that my daughter still pulls out of the “file folder” game binder to play.

It’s a simple concept of matching the cats that are the same color, but lets you practice counting as well as color matching.

You can find the free printout on my Letter C:  Free Alphabet Worksheets for Kids post.

C is for Cloud Watching {Alphabet Activities at RoamingRosie.com}

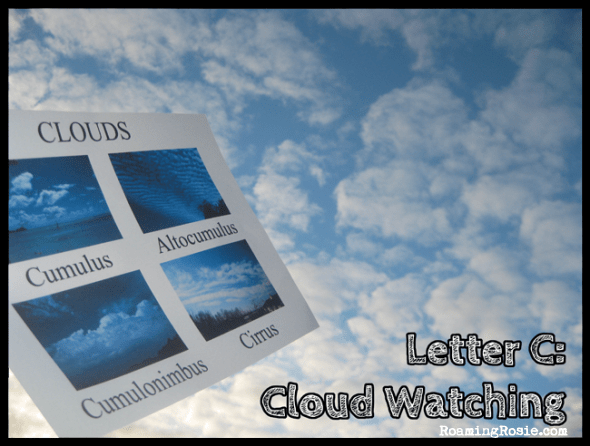
This was probably my favorite activity.

I know it seems a little strange at first glance – after all, what toddler/preschooler can pronounce “cumulonimbus?”

Honestly, I struggled to say the words, too.

But, with this chart in hand, we lay in the grass and watched the clouds.  We talked about the different shapes and which picture on the chart best matched the clouds we saw.  We picked animals out of the floating masses and laughed as the shapes fell apart again.

My daughter still excitedly points out shapes she sees in the clouds, and her younger sister is starting to, as well.

I made this chart with photos from the NOAA and you can get the free printout on my Letter C:  Free Alphabet Worksheets for Kids post.

C is for Cotton Clouds {Alphabet Activities at RoamingRosie.com}

After watching the clouds outdoors, we made our own.

I cut fluffy cloud shapes out of blue construction paper, which my daughter smeared with glue and covered with cotton balls.

I punched a hole at the top so we could tie a string and hang them in our living room.

C is for Constellations {Alphabet Activities at RoamingRosie.com}

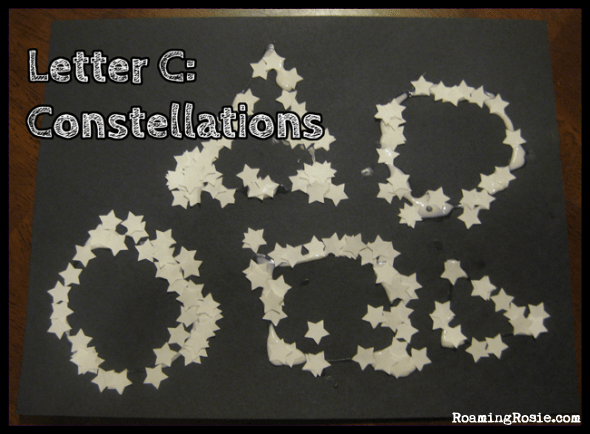
This is a great project, and for many ages, too.

The version of constellations you see here was done when my daughter was a toddler.  I made different shapes with glue and she sprinkled the cut out stars over the glue.  The stars were made with a craft punch.

Now that she’s a preschooler, we’ve replicated the project, though a little differently.  She draws the lines with a white or silver crayon on the black construction paper, dotting on glue and paper stars at important points along the path, such as where the lines intersect.

C is for Corn Sensory Bin {Alphabet Activities at RoamingRosie.com}

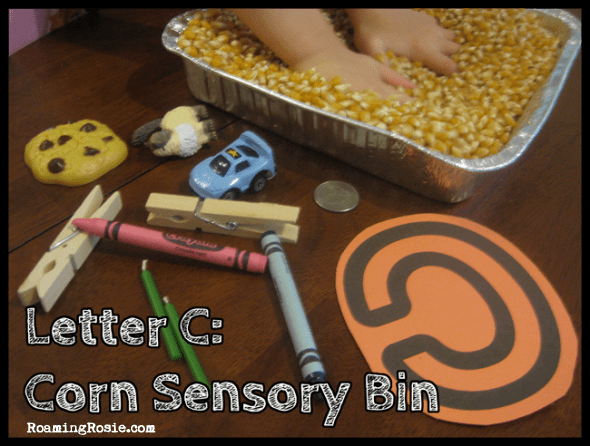
This corn sensory bin was so cool.  Seriously.  Have you ever been to a corn maze where they had a giant sandbox full of corn kernels that you could play in?

This was like the miniature version of that.  With letter C toys to find.

What I’m trying to say is that it felt really neat.  Corn is a great sensory tool because it has a wonderfully soothing feel as you move your hands through it.

And you can reuse it.  This is just popcorn kernels, and we did pop them after the project was done.

The letter C items that I hid in the corn included a toy cookie, cat, car, a coin, some crayons, candles, and clothespins.

C is for Candy Cane Craft {Alphabet Activities at RoamingRosie.com}

The next few crafts work for both Letter C Day and for Christmas Crafts.

For this one, I had precut some candy cane shapes from red construction paper and some strips of white paper.

My daughter glued the candy canes onto the paper and the candy cane strips on top of them.

C is for Chenille Candy Canes {Alphabet Activities at RoamingRosie.com}

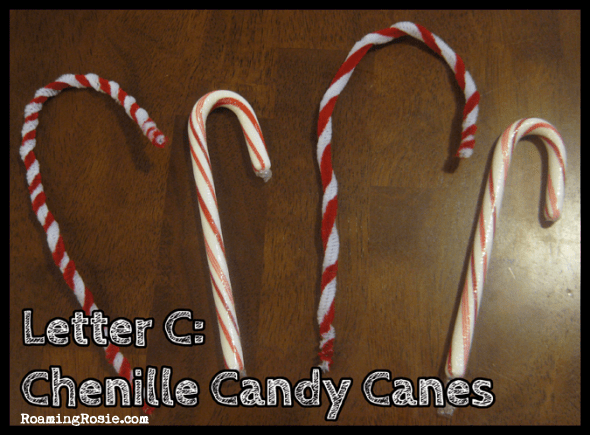
I love using chenille {pipe cleaner} sticks for crafts.  Especially since they’re something you can get at the dollar store.

For this one, we took one white and one red pipe cleaner and twisted them together.  Then, we hooked over one end to make the candy cane shape.

Mine is the one on the left and my daughter’s on the right.

If you make these around Christmastime, they make adorable decorations that can be hung on furniture or the tree.

C is for Circle Christmas Trees {Alphabet Activities at RoamingRosie.com}

With this one, we had some discussions not just about the letter C but also about shapes.

I drew a triangle to represent the shape of a Christmas tree on the paper and we filled it with glue.  My daughter filled the triangle with the large green circles for the tree and topped it the the star.

Then we drizzled glue over the tree and she sprinkled on the tiny circles for ornaments.

I cut out the star by hand and the green circles as well.  If you have a large hole punch you could use that instead.  For the small circle ornaments, I used a single hole punch.

And since it was winter, this decorated our fridge before I transferred it to our Alphabet Activity Binder.

C is for Cars Under Cups {Alphabet Activities at RoamingRosie.com}

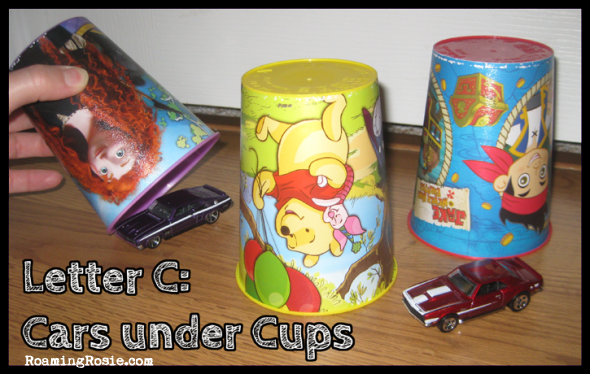
This was a little something we did for fun, after discussing how both of the words Car and Cup start with the letter C.

A variation on a Shell Game, I hid two cars under the three cups, moved them around and asked her to find the cars.  Not much of a challenge since the cups are all different, but it was still fun.  There were lots of giggles.

C is for Cinnamon Toast Cs {Alphabet Activities at RoamingRosie.com}

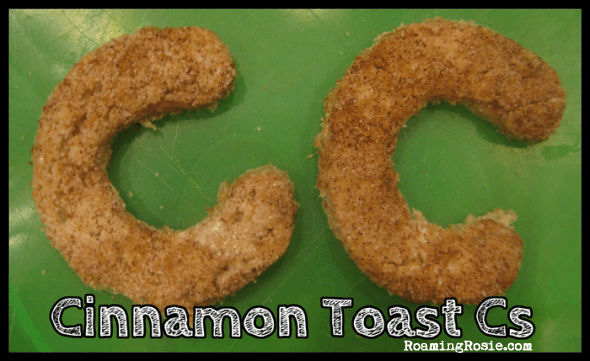
These adorable Cinnamon Toast Cs were made by cutting the letter C out of Cinnamon Toast with a cookie cutter.

I made the toast with regular sandwich bread, buttered the warm toast and sprinkled it with my Cinnamon Sugar Mix.  Then I pressed in the cookie cutter to get letter C shapes.

And I ate all of the “leftovers.”  Of course.  :)

C is for Carrot Cake Cupcakes {Alphabet Activities at RoamingRosie.com}

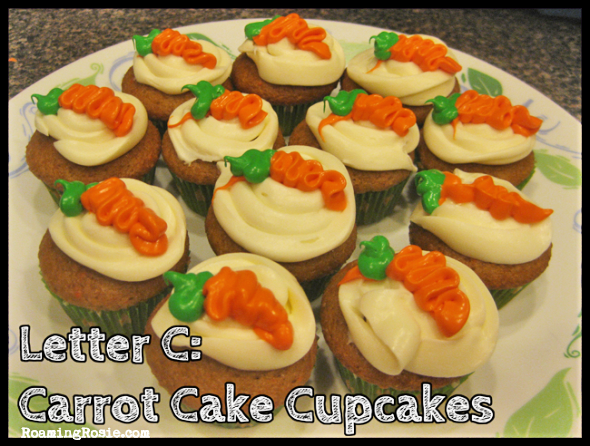
These were quick because I used a box mix and store bought icing.  I wanted to focus on the other projects and not baking from scratch – we do that enough on other days.

I made mini cupcakes and topped them with some cream cheese icing that I put in a plastic baggie with the corner snipped off.  I squeezed it on top in circles.

Then I mixed some icing with green food coloring and a little more with orange food coloring.

To make the carrot shapes I took the orange colored icing, also in a small plastic baggie with the corner snipped off, and drew a squiggle pattern that was thicker at one end and slightly pointed at the other.  Then I added a little dab of green icing where the “carrot” was thickest.

C is for Chili Con Carne with Cheese, Sour Cream, & Cornbread {Alphabet Activities at RoamingRosie.com}

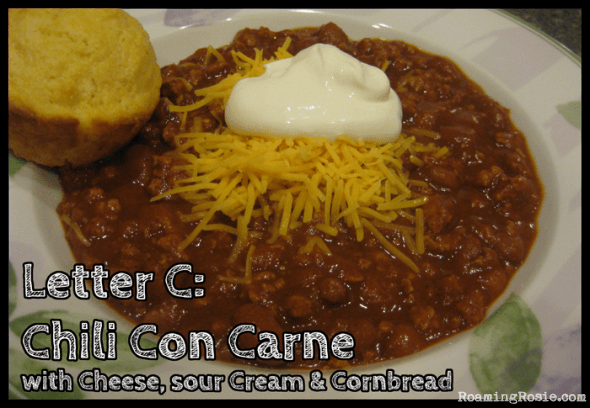
For dinner we had a mouthful of letter C:  Chili con Carne with cheese, sour cream, and cornbread.

I made my 4 Ingredient Chili and some cornbread baked in muffin tins.

C is for Chocolate Chip Cookies {Alphabet Activities at RoamingRosie.com}

And chocolate chip cookies.  Yum.  How could we possibly have a day celebrating the letter C and not mention chocolate chip cookies??

C is for Cookie, that’s good enough for me…..

Anyway, while baking your favorite recipe of chocolate chip cookies, melt some chocolate chips in a baggie, snip off the corner, and draw some letter Cs onto waxed or parchment paper.  Allow them to set (this only take a few minutes) and when you pull the tray of cookies out of the oven, place the chocolate C on top and press down ever so slightly.  The heat from the cookie will melt the bottom of the C to help it adhere.

And here are some of the supplies I’ve mentioned in this post, including the star punch, popcorn, and cookie cutters (for the Cinnamon Toast).

Craft Star PunchOrganic PopcornCookie Cutters

I’d love for you to share if you’ve done any of these projects with your little ones!

Follow me on Facebook and Pinterest to see my latest posts.

Have fun!

Roaming Rosie Signature

Spinach Stuffed Shells

Spinach Stuffed Shells

I always loved stuffed shells growing up.

We didn’t have them that often, mostly because of the steps involved in making them.  They’re easy to make, but take a bit of preparation.  But the end result of gooey cheese smothered tomato sauce makes the effort well worthwhile.

And to spice things up a bit, I like to add in some spinach these days.

My kids like spinach and will eat it with just some spices, but I like to mix it into other dishes, too, like Easy Spinach Alfredo with Chicken, just to change things up now and then.

Spinach Stuffed Shells

The basic recipe consists of a bunch of cheese mixed together, stuffed into shells, and surrounded by tomato sauce.

Nothing bad about that, right??

{I mean, except that the only Ricotta I could get at a last minute’s notice was the Wal-mart brand, but that’s beside the point.  It worked.}

In the past, I didn’t usually use Mascarpone, but the recipe on the Barilla box included it, and I wanted to try it.

I’m glad I did.

It adds a nice soft, creamy texture and slight tang that makes a subtle but noticeable difference to the normal Ricotta and Mozzarella mix.  If you can’t find it, it’s not essential, but I suggest trying it.

Spinach Stuffed Shells

After mixing all the cheese and spices together, then you’ll add in the spinach.

But the most important part of prepping the spinach is to make sure you completely drain it of water.

Spinach Stuffed Shells

Spinach tends to hold a lot of water.  The water will make your recipe wet.  Wet means the cheese will be slippery and the tomato sauce won’t stick.  Not what you want.

I’ve tried a lot of different ways to drain it, but I favor just putting the spinach in a mesh colander and pressing it with a fork until no more water drips out.

Spinach Stuffed Shells

After cooking the macaroni, lay them out for a few minutes so that they’ll be cool enough to handle.

Spinach Stuffed Shells

Fill the shells with the cheese mixture and lay them in a pan whose bottom has been generously layered with tomato sauce and spices.

Spinach Stuffed Shells

Doesn’t that look beautiful?

But you’re not done yet.  Most recipes will just put cheese on top, but I like a little extra moisture from the tomato sauce, so I put some of that on top, too.

Spinach Stuffed Shells

Now it really looks good, right?

Just wait until it’s baked…

Spinach Stuffed Shells

Oh, and since I had a few extra shells I cut them into slices and covered them with extra sauce.  This went into the fridge and served as a simple lunch the next day.

Spinach Stuffed Shells

And:  the finished product.  Warm, gooey, cheesy, delicious!

Scoop it into your plate and enjoy it by itself or with some crusty bread and a salad.

Spinach Stuffed Shells

Spinach Stuffed Shells

Ingredients:

1 box (12 oz.) Jumbo Shell pasta (I used Barilla)
1 jar or can (15 to 28 oz.) tomato sauce
1 1/3 cup ricotta cheese
8 oz. mascarpone cheese
1 cup parmesan cheese, grated or shredded
2 cups (8 oz.) mozzarella cheese, shredded
1 package (10 oz.) frozen chopped spinach, thawed
1/2 tsp. each salt, pepper, and garlic powder

Preheat the oven to 400°F.

Cook the Jumbo Shells according to directions until they are al dente (about one minute less than the recommended time). Drain and set aside.

Squeeze all of the water from the thawed spinach.

In a large bowl, combine ricotta, mascarpone, half of the parmesan, half of the mozzarella, and the spices. Stir in the spinach.

In a 9 x 13 inch pan, generously cover the bottom with tomato sauce. Sprinkle with more spices if desired.

Fill each of the cooked shells with a scoop of the cheese filling. After you fill each shell, place it on top of the tomato sauce in the prepared pan.

Once you have filled all the shells and the pan is full, add a teaspoonful of tomato sauce to the top of each shell. Then sprinkle the remaining parmesan and mozzarella over the top.

Cover with foil and bake for 30 minutes.

[Note: If you can’t find mascarpone cheese, you can leave it out and increase the ricotta to 3 cups.]

*****

To print the free PDF, click here:  Spinach Stuffed Shells

Enjoy!

Roaming Rosie Signature

Mini Irish Soda Bread with Guinness Recipe

Mini Irish Soda Bread with Guinness Recipe

Happy St. Patrick’s Day!

This Paddy’s Day, we made some Irish soda bread to accompany our corned beef and cabbage.  But not just any Irish soda bread – Irish soda BEER bread.

The Irish half of my heritage was very excited about this.

And I was right to be excited, because these things were amazing!

Seriously:  little loaves of sweet, warm goodness with thick, crusty exteriors crackling open in my hands to reveal a velvety soft smoothness.

Yum.

And you could technically use any brand of beer you like, but I strongly recommend Guinness.  Although, I must admit, I’m tempted to make these again with chocolate stout…

But I digress.  Point is, these things are crunchy on the outside, soft on the inside, have just the right amount of sweetness, and taste wonderful smothered in butter.

And they’re easy to make.

They are a wee bit on the heavy side, though, so one is more than enough per person (the recipe makes 12 mini loaves), and you could probably even make it into a batch of 16 instead.

Mini Irish Soda Bread with Guinness Recipe

Also, Irish soda bread usually calls for caraway seeds, but, since I don’t like caraway seeds, when I put this recipe together, I left them out.

If you’re a fan, however, feel free to throw in a tablespoon while mixing the flour with the sugar.

Mini Irish Soda Bread with Guinness Recipe

And, like I said, it’s easy.

Essentially, you throw everything together in one bowl, then knead for a minute, then bake.

Mini Irish Soda Bread with Guinness Recipe

The dough can be a little sticky, but that’s an easy fix.  Make sure to knead it on a floured surface, and coat your hands with flour.

Mini Irish Soda Bread with Guinness Recipe

Also, when cutting the loaf into tiny loaves and rolling them into balls, if they start to stick to your hands or the counter, just pat on a little more flour.

Mini Irish Soda Bread with Guinness Recipe

Kitchen shears or sharp scissors are the best way to make the X in the top of the mini loaves, although I suppose you could use a sharp knife if you don’t have shears.

Mini Irish Soda Bread with Guinness Recipe

Brushing egg over the tops adds a nice texture and color to the loaves.

Plus, make sure you bake them on parchment paper, or a some sort of nonstick baking mat.   Alternatively, you could grease the pan with nonstick cooking spray.

Mini Irish Soda Bread with Guinness Recipe

Was I wrong?  Do these things not look amazing??

Mini Irish Soda Bread with Guinness Recipe

And the aroma, the texture…

You won’t regret trying these.  I’m definitely going to find more excuses to make these.  And not just for Paddy’s Day.

Mini Irish Soda Bread with Guinness Recipe

Mini Irish Soda Bread with Guinness

Ingredients:

1 1/4 cups stout Guinness
4 cups all-purpose flour
2/3 cup sugar
1 Tbsp. baking powder
3/4 tsp. salt
1/2 tsp. pepper
1 cup raisins
1/4 cup melted butter
2 eggs

Pour the beer into a measuring cup and let sit for about a half hour at room temperature, until flat.

Preheat oven to 350°F.

In a large bowl, combine the flour, sugar, baking powder, salt, and pepper. Stir in raisins. Then, stir in beer, melted butter, and 1 egg until a dough forms.

On a floured surface, knead dough until smooth. Coat your hands in flour to prevent the dough from sticking to you.

Shape the dough in a ball. Using a sharp knife, cut the dough into quarters. Cut each of these quarters into three equal pieces. Shape each of these 12 pieces into balls and place on a cookie sheet that is lined with parchment paper.

Using kitchen shears, cut an X in the top of each loaf. Then lightly beat the remaining egg and brush it over the loaves.

Bake 45 to 50 minutes or until the top is lightly browned and the loaves sound hollow when tapped on the bottom.
Cool on a wire rack.

(Note: Traditionally, Irish Soda Bread contains caraway seeds. I’ve omitted them from this recipe, due to personal tastes, but if you’d like to add them, simply stir in a Tbsp. of caraway seeds when combining the flour, sugar, baking powder, and spices.)

*****

Click here for your FREE printable PDF:  Mini Irish Soda Bread with Guinness

Enjoy!  :)

Roaming Rosie Signature

Letter L: Free Alphabet Worksheets for Kids

Free Letter L Printables

If you’re new to our Alphabet Activities, please read the Introduction to the Alphabet Activities first!

Here are all of the free printable PDFs for the Letter L.  They are for home and classroom use, please don’t sell them.  Click on each title to print or download them:

L is for Lace

L is for Large Lemonade

L is for Lions that Look Like Lambs

L is for Lively Lizards

L is for Lollipops

L is for Loopy Ladybugs

L is for Lush Llama

And be sure to follow me on Facebook and Pinterest to see our latest recipes and crafts!  .

Have fun!

Roaming Rosie Signature

Letter K: Free Alphabet Worksheets for Kids

Here is a list of links for all of my free worksheets for Letter K Day.

Letter K Printables

If you’re new here, please read the Introduction to the Alphabet Activities first!

Here are all of the printable PDFs for the Letter K.  They are free for home and classroom use, but please don’t sell them.

K is for Kangaroo and Kin

K is for Kangaroo Kisses

K is for Karate

K is for Kitten Knitting

K is for Koi

K is for Kooky Kites

Follow me on Facebook and Pinterest to see my latest posts.

Have fun!

Roaming Rosie Signature

Free Animal Matching Worksheets for Preschoolers


This is a cute matching worksheet that I recently pinned because I thought my daughter would enjoy it.

She seems to like worksheets like this, and I like it because these are free and there’s a whole line of them that you can find at Turtle Diary: Match Animals Worksheets.

There are a lot of resources on the site, actually, so I suggest exploring the site to see if there’s anything else your kids would enjoy. I know this certainly won’t be the only activity I use from there!

{{{This was originally posted at roamingrosie.blog.com, but I’ve since transferred my blog here}}}