Bloody Worms in Jack O’ Lantern Peppers

Bloody Worms in Jack O Lantern Peppers for Halloween

Last year I made Spicy Spaghetti Worms in Jack O’ Lantern Pepper Pumpkins.  

And since Halloween is right around the corner, I made them again.

My girls really love these things.  Granted, they didn’t actually eat the peppers – and I knew they wouldn’t.  The good thing about this, is you can still rinse the spaghetti sauce off the pepper when dinner is over and reuse the beloved “pumpkins” in an omelet or fajita at a later meal.

But there’s something special about being served a bowl of bloody (tomato sauce) worms (fettuccine) in a jack o’ lantern (carved pepper).

Bloody Worms in Jack O Lantern Peppers for Halloween

The peppers themselves were just carved with a small paring knife in much the same design I would do on a pumpkin.  And for the meal, you can totally just throw some bottled spaghetti sauce over some noodles (I used fettuccine because they’re thicker), or you could try out my spicy version by printing this free PDF:

Spicy Spaghetti Worms in Pepper Jack O’ Lanterns

As a side note, I also threw in some chunks of pepperoni into this batch, which is totally optional (but delicious).

Happy Halloween!

Roaming Rosie Signature


The Curious Case of the Pumpkin Pizzas and the Disappearing Ghosts

Pumpkin Shaped Pizzas with Ghost Cheese for Halloween

If you search the web for Halloween-themed dinner ideas, there are plenty of ideas for ghost pizzas.  Things like cutting cheese into the shape of ghosts and placing it on red sauce of the pizza to make the ghosts pop.

Well, I wanted to do something a little different.

And, boy, did I.

My intention had been to create cute little pumpkin-shaped and pumpkin-colored pizzas that would have little cheese-ghosts kind of floating over them.

I would make the pumpkin shapes with cookie cutters, like I made my Autumn Leaf or my Dinosaur Pizzas, and I would then “color” my pumpkins appropriately with shredded cheddar.  Orange shredded cheddar.  Sharp, in fact.

Pumpkin Shaped Pizzas with Ghost Cheese for Halloween 2

It seemed like a wonderful idea when I came up with it.  It still seemed like a wonderful idea when I was chasing my flour-covered children around the kitchen.  But once the pizzas were comfortably in the oven… well, I realized I’d made an error in judgement.

The white mozzarella cheese ghosts melted right into the orange cheddar pumpkins and, thus, my cute little ghosts disappeared from sight.

The up side?  They still tasted awesome.

And I was even afforded the additional benefit of incorporating a science lesson into dinner.

And since I’m a literature major and not a scientist, it went something like this:  “The ghosts disappeared!  Like magic!”

Pumpkin Shaped Pizzas with Ghost Cheese for Halloween 3

Either way, pizza is always a blast to make and a wonderful, wonderful thing to eat.  And would have made a wonderful experiment, too, if I’d made some pizzas without the Cheddar and only the ghosts.  Oh well.  Next time.

Just remember, when things don’t go the way you planned, always use that opportunity to present it as a learning experience.  Or, you know, pour yourself a big glass of wine and eat your way through it.  Because pizza makes everything better.

Easy Pizza Dough 4

For the step-by-step photos and directions on how I make my homemade pizzas, see my post about How to Make Easy Pizza Dough {And Proof Yeast}, and to print the free PDF of the recipe, click here:

Easy Pizza Dough

Happy Eating!

Roaming Rosie Signature

Autumn Leaf-Shaped Mini Pizzas

Autumn Leaf Shaped Pizzas

This is going to be somewhat of an image-heavy post since these cute, little Autumn Leaf Shaped Mini Pizzas are actually easier to explain with photos.

This was a fun dinner we did one night.  The girls helped me out.  And I’ve done this before, for example with dinosaurs, but I used our leaf cookie cutters this time to give it an autumn spin.

And to make the pizzas from scratch, you follow my Easy Pizza Dough Recipe.  Except, once you roll out the dough, you cut out leaf shapes instead of transferring the whole thing to a large pan.

For the cheese topping, I used three kinds:  colby jack, cheddar, and mozzarella cheeses.  I used the sliced versions they sell at the store that are meant for sandwiches and burgers because they’re easier to cut with cookie cutters.  And the extra cheese left over after cutting out my “leaves” went into some macaroni and cheese the next night.

I used 3 flavors of cheese to give it more of a colorful fall-leaf feel, and even if you’re hesitant about doing this, I can assure you – all of the flavors taste amazing on the pizzas.

How To Make Autumn Leaf Shaped Pizzas

As you can see in the photos, I used the cookie cutters to cut out both the dough and the cheese.  I topped the dough with tomato sauce, spices (especially garlic), Parmesan cheese, and then a leaf shaped slice of cheese.

It is a little difficult to get the dough to keep it’s precise shape and to fit the cheese over the dough with the shapes lining up in with an exact perfection… but that’s okay.  Really, one of my favorite parts of these little pizzas is the cheese that drips over the side of the crust onto the pan and mixes with the extra garlic powder and Parmesan and gets all crispy and delicious.

If you’re not into that, this may not be the recipe for you.

Here is the Wilton Leaves and Acorns 9-Piece Aluminum Cookie Cutter Set, in case you want to use the same ones I did:

 Wilton Leaves and Acorns 9-Piece Aluminum Cookie Cutter Set

And another pic of the yummy finished pizzas:

Autumn Leaf Shaped Pizzas

As I said, I used my Easy Pizza Dough Recipe to make this, which you can also print as a free PDF by clicking here:  Easy Pizza Dough.

Enjoy!

Roaming Rosie Signature

Smoked Gruyere Mac and Cheese with Capicola

Smoked Gruyere Mac and Cheese with Capicola

In case you didn’t notice with recipes like Sausage and Gouda Mac and Cheese, I’m a huge mac and cheese fan.

And I like to experiment a little.  Change things up.

Sure, I keep some box mac and cheese mixes on hand for days when I’m feeling super lazy, but macaroni and cheese is not a complicated dish.  One of the things I love about it is the casserole nature of the baked mac and cheese that allows me to wash up all the dishes and such while it’s baking.  Which means easy cleanup after dinner.

For me, easy cleanup = easy dinner.

Smoked Gruyere Mac and Cheese with Capicola

Anyway, here are the ingredients for this dish.

I chose Gruyere, which is something I used to eat more of when I lived in Germany, so I like to use it occasionally.

The Capicola is a spicy ham that we put in our cold cut pies around Easter.  Apparently this is an Italian thing.  Either way, I like the ham.

But it CAN be spicy.  And the spice is intensified a little when you fry it, which is why you can see that I only added a small amount to the top of my dish right before serving.  You don’t need a lot.

Smoked Gruyere Mac and Cheese with Capicola

I don’t always use heavy cream when making mac and cheese, but usually just because I don’t have it on hand.

It adds a nice thickness.

Whether you use it or just straight milk, though, your roux should reach a point of being thick enough that the cheese doesn’t fall straight to the bottom when you sprinkle it in.

To get to that point, bring your roux JUST to a boil, stirring frequently.

Smoked Gruyere Mac and Cheese with Capicola

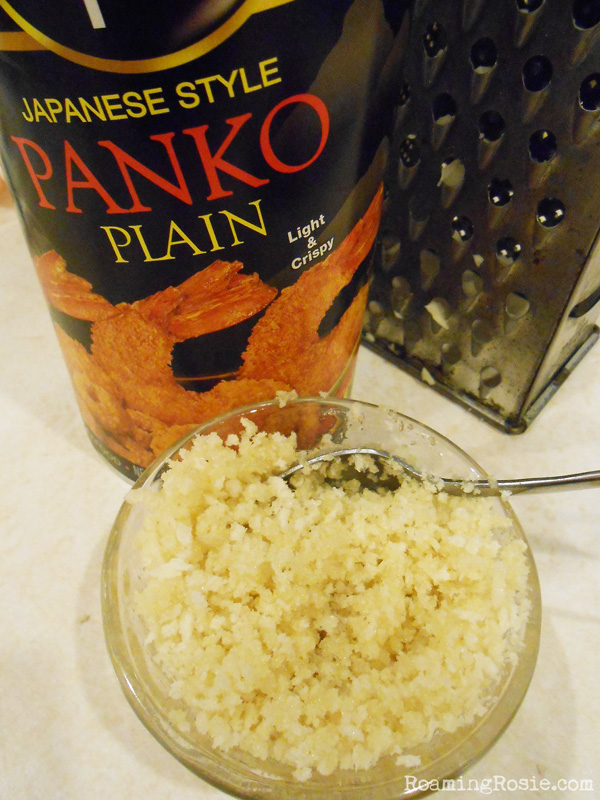
I switch between Panko and regular bread crumbs.  Whatever I’m in the mood for.

In this recipe, I used Panko.

Smoked Gruyere Mac and Cheese with Capicola

Doesn’t that look awesome?

It’s the cooked noodles mixed into the cheese sauce before it’s baked.  You do want it to look a little soupy, because the sauce will thicken up in the oven.

Smoked Gruyere Mac and Cheese with Capicola

Here are the bread crumbs before baking.

Smoked Gruyere Mac and Cheese with Capicola

I used a 1/4 lb. of Capicola, slicing it rather thinly.

You could use more:  it shrinks significantly when you fry it (like bacon), but, like I said, you don’t really need a lot.

It’s just an accent.

Smoked Gruyere Mac and Cheese with Capicola

I threw the Capicola into the pan with just a touch of olive oil to help keep it from sticking.

Fry until nice and dark, but not quite burnt.

Then drain it on paper towels and serve separately.

Smoked Gruyere Mac and Cheese with Capicola

Doesn’t that look good??

If your bread crumbs don’t brown enough during the last few minutes of baking, go ahead and broil it for two or three minutes – just keep a close eye since it can burn.

Smoked Gruyere Mac and Cheese with Capicola

And there’s the finished product:  scooped into a bowl with a pinch of the crispy, spicy ham.

Serve with some salad and you got a meal.

Smoked Gruyere Mac and Cheese with Capicola

 Smoked Gruyere Mac & Cheese with Fried Capicola

Serves: 6+

Ingredients:

3 cups Rigatoni pasta
2 Tbs. butter
2 Tbs. flour
2 cups whole milk
1 cup heavy cream
2 cups Smoked Gouda, shredded
1/2 cup Swiss, shredded
1 tsp. pepper
1 tsp. paprika
1/4 to 1/2 lb. Capicola

For Breadcrumbs:

3 Tbs. butter, melted
1/2 cup Panko breadcrumbs

Preheat oven to 350°F.

Cook the pasta until al dente, or one minute less than the recommended cooking time.

In a medium saucepan, melt the 2 Tbs. of butter. Stir in the flour to create a roux. Whisk in the milk and heavy cream. Cook over medium to medium high heat until just boiling, stirring frequently. Once it starts to boil, remove from heat and stir in the cheeses and spices. Continue to stir over low heat until the cheese has melted.

Mix the 3 Tbs. of butter with the breadcrumbs.

Stir the pasta into the cheese sauce. Pour into an 8 x 8 inch or a 9 x 13 inch pan. Sprinkle breadcrumbs over the top. Cover pan with foil.

Bake for 20 minutes. Uncover and bake for 5 to 10 minutes more, or until the cheese sauce is bubbling around the edges. If the breadcrumbs are not browned, broil for 2 or 3 minutes, watching closely.

Meanwhile, while the macaroni is baking, slice the Capicola thinly and fry over medium heat. Add a touch of olive oil if it seems to be sticking. Once the ham is crispy, drain on paper towels. Serve in a separate dish, to be used as a topping.

[Note: if you use a different shape of pasta, you may need to adjust the amount. Also, the ham is only meant as an accent. If you want a significant portion in your macaroni, use 1/2 to 1 lb.]

*****

Click here to print the free PDF version:  Smoked Gruyere Mac and Cheese with Capicola

Enjoy!

Roaming Rosie Signature

Spinach Stuffed Shells

Spinach Stuffed Shells

I always loved stuffed shells growing up.

We didn’t have them that often, mostly because of the steps involved in making them.  They’re easy to make, but take a bit of preparation.  But the end result of gooey cheese smothered tomato sauce makes the effort well worthwhile.

And to spice things up a bit, I like to add in some spinach these days.

My kids like spinach and will eat it with just some spices, but I like to mix it into other dishes, too, like Easy Spinach Alfredo with Chicken, just to change things up now and then.

Spinach Stuffed Shells

The basic recipe consists of a bunch of cheese mixed together, stuffed into shells, and surrounded by tomato sauce.

Nothing bad about that, right??

{I mean, except that the only Ricotta I could get at a last minute’s notice was the Wal-mart brand, but that’s beside the point.  It worked.}

In the past, I didn’t usually use Mascarpone, but the recipe on the Barilla box included it, and I wanted to try it.

I’m glad I did.

It adds a nice soft, creamy texture and slight tang that makes a subtle but noticeable difference to the normal Ricotta and Mozzarella mix.  If you can’t find it, it’s not essential, but I suggest trying it.

Spinach Stuffed Shells

After mixing all the cheese and spices together, then you’ll add in the spinach.

But the most important part of prepping the spinach is to make sure you completely drain it of water.

Spinach Stuffed Shells

Spinach tends to hold a lot of water.  The water will make your recipe wet.  Wet means the cheese will be slippery and the tomato sauce won’t stick.  Not what you want.

I’ve tried a lot of different ways to drain it, but I favor just putting the spinach in a mesh colander and pressing it with a fork until no more water drips out.

Spinach Stuffed Shells

After cooking the macaroni, lay them out for a few minutes so that they’ll be cool enough to handle.

Spinach Stuffed Shells

Fill the shells with the cheese mixture and lay them in a pan whose bottom has been generously layered with tomato sauce and spices.

Spinach Stuffed Shells

Doesn’t that look beautiful?

But you’re not done yet.  Most recipes will just put cheese on top, but I like a little extra moisture from the tomato sauce, so I put some of that on top, too.

Spinach Stuffed Shells

Now it really looks good, right?

Just wait until it’s baked…

Spinach Stuffed Shells

Oh, and since I had a few extra shells I cut them into slices and covered them with extra sauce.  This went into the fridge and served as a simple lunch the next day.

Spinach Stuffed Shells

And:  the finished product.  Warm, gooey, cheesy, delicious!

Scoop it into your plate and enjoy it by itself or with some crusty bread and a salad.

Spinach Stuffed Shells

Spinach Stuffed Shells

Ingredients:

1 box (12 oz.) Jumbo Shell pasta (I used Barilla)
1 jar or can (15 to 28 oz.) tomato sauce
1 1/3 cup ricotta cheese
8 oz. mascarpone cheese
1 cup parmesan cheese, grated or shredded
2 cups (8 oz.) mozzarella cheese, shredded
1 package (10 oz.) frozen chopped spinach, thawed
1/2 tsp. each salt, pepper, and garlic powder

Preheat the oven to 400°F.

Cook the Jumbo Shells according to directions until they are al dente (about one minute less than the recommended time). Drain and set aside.

Squeeze all of the water from the thawed spinach.

In a large bowl, combine ricotta, mascarpone, half of the parmesan, half of the mozzarella, and the spices. Stir in the spinach.

In a 9 x 13 inch pan, generously cover the bottom with tomato sauce. Sprinkle with more spices if desired.

Fill each of the cooked shells with a scoop of the cheese filling. After you fill each shell, place it on top of the tomato sauce in the prepared pan.

Once you have filled all the shells and the pan is full, add a teaspoonful of tomato sauce to the top of each shell. Then sprinkle the remaining parmesan and mozzarella over the top.

Cover with foil and bake for 30 minutes.

[Note: If you can’t find mascarpone cheese, you can leave it out and increase the ricotta to 3 cups.]

*****

To print the free PDF, click here:  Spinach Stuffed Shells

Enjoy!

Roaming Rosie Signature