Lemon Scented Play Dough

Lemon Scented Play Dough

I came up with this recipe because my 4yo was asking to make play dough and I’d just found an extra lemon hanging out in our kitchen.

So:  lemon scented play dough.

Because scented sensory play is fun for everyone, including moms.

Seriously.  I love playing with this stuff.

Lemon Scented Play Dough

Anyway, the ingredients are pretty basic.

And it’s easy to put together – you just throw everything in a pot:

Lemon Scented Play Dough

Then you keep stirring it over medium heat until it looks like this:

Lemon Scented Play Dough

And then you knead it to make it smooth.

As you can see in the blurry photo below, my daughter was already grabbing pieces of it to play with before I had a chance to knead it.  :)

Just be careful, because it will be hot.  I kinda like digging my hands into the warm dough, tho.

Lemon Scented Play Dough

My girls like to roll it out and cut out shapes with cookie cutters, or cut it using a small angled spatula.

Here are a few pics of them playing with the deliciously scented dough:

Lemon Scented Play Dough

Lemon Scented Play Dough

Oh – and playing with it on their easy-to-clean Jake placemats, of course!

Lemon Scented Play Dough

Lemon Scented Play Dough

Lemon Scented Play Dough

Ingredients:

1 cup lemon juice (or water added to squeezed lemon juice to equal 1 cup)
1 cup flour
1/4 cup salt
Zest from one lemon
1 Tbsp. vegetable oil
2 tsp. cream of tarter
1 tsp. lemon extract
Yellow food coloring

Begin by zesting and juicing one lemon.

Squeeze the juice of the lemon into a glass measuring cup. If it is less than one cup, add water until it reaches the 1 cup line.

Mix all ingredients in a medium sauce pan, adding enough food coloring to reach your desired color.

Cook over medium heat, stirring constantly, until the mixture comes together into a ball.

Remove from heat and knead until smooth.

Store covered.  Will keep for about two weeks.

[Note: even though all of the ingredients are technically edible, please don’t let your kids ingest this. Also, if your child is going to help with the kneading, please remember that the dough will still be hot when you first remove it from the pan. If stored in a sealed container, this will last many months.]

********

To print the free PDF of this recipe, click here:

Lemon Scented Play Dough

Happy Crafting!

Roaming Rosie Signature

Letter A: Free Alphabet Worksheets for Kids

FREE Printable Letter A Alphabet Activities Worksheets

If you’re new here, please read the Introduction to the Alphabet Activities first!

Here are all of the printable PDFs for the Letter A.  They are free for home and classroom use, but please don’t sell them.

A is for Aardvarks

A is for Alligator and Asparagus

A is for Apple {tracing}

A is for Apples {color matching}

A is for Avocado

And don’t forget to check out all of our Letter A Alphabet Activities.

Follow me on Facebook and Pinterest to see my latest posts.

Have fun!

Roaming Rosie Signature

Letter A: Alphabet Activities for Kids

Letter A: Alphabet Activities for Kids at RoamingRosie.com

Letter A Day was our first Alphabet Activities day.

My OCD really wouldn’t have let it happen any other way.  :)

Anyway, if you haven’t read the Introduction to the Alphabet Activities, you should really start there.

And don’t forget to check out the Letter A:  Free Alphabet Worksheets for Kids, too!

A is for American Flag {Alphabet Activities at RoamingRosie.com}

One of the first letter projects we ever did was an American flag.

And it really stuck with her.

To this day, my daughter points out the flags, excitedly shouting, “An American flag!”

The project itself was simple:  I cut out red stripes, a blue rectangle, and punched out some white stars ahead of time.  Then I showed my daughter a flag and she copied it in paper.

There are plenty of other flags you could do, too.  Just to name a few:  Austria, Australia, Argentina, and Afghanistan.  Also, Alabama, Arizona, Alaska, and Arkansas.

Letter Sorting: A is for Apple Trees {Alphabet Activities at RoamingRosie.com}

I always do a letter sorting project where I print out both capital and lowercase letters ahead of time.

These letters were cut into apple shapes.  {Don’t laugh at my apple trees!}

You could easily hand write the letters instead.  Honestly, my printer gives me more trouble with construction paper…

Letter A Apple Slices {Alphabet Activities at RoamingRosie.com}

This was a fun snack.

I cut some thin slices in an apple and used an A cookie cutter to make little apple ‘A’s.

And I ate all the scraps, too.  :)

Letter A is for Mini Apple Pies {Alphabet Activities at RoamingRosie.com}

I’ve made these a bunch of times, usually for potlucks.

I’m not posting a recipe since it was all ready-made supplies {or you could substitute with your favorite homemade recipes}.

Check out the step-by-step photos:

Letter A is for Mini Apple Pies {Alphabet Activities at RoamingRosie.com}

I used a 2-inch flower shaped cookie cutter to cut pieces out of store bought pie crust.  I placed the flower crusts in greased muffin tins.  Then I scooped a few apples from a can of apple pie filling into the crust.  I topped it with a generous sprinkle of my Cinnamon and Sugar Mix, and baked them according to the pie crust directions.

These little pies are always a hit.

Letter A is for Chocolate Acorns {Alphabet Activities at RoamingRosie.com}

Chocolate is a favorite in our house, so these chocolate acorns, it should go without saying, were also a hit.

The great thing is that they also work well for autumn-themed projects.  I’m thinking of making them again around Thanksgiving.

Letter A is for Chocolate Acorns {Alphabet Activities at RoamingRosie.com}

As you can see in the photos, the ingredients are Hershey’s Kisses, mini Fudge Stripe cookies, and miniature chocolate chips.

I melted some chocolate chips in a baggy to act as the “glue” to hold it all together.  Then we stuck the flat end of the Kisses onto the bottom of the cookies and let them sit for a minute to set.  Then I put a drop of melted chocolate on the top of the cookies, and my daughter attached the kiss to the top.

Store covered… if you have any left.

Click here to get the free printable Letter A:  Free Alphabet Worksheets for Kids.

And here are some of the supplies I’ve mentioned in this post, including the star punch, letter A cookie cutter, and fudge stripe cookies:

Star Craft Punch 101 Cookie Cutters Keebler Fudge Stripe Cookies Mini

I’d love for you to share if you’ve done any of these projects with your little ones!

Follow me on Facebook and Pinterest to see my latest posts.

Have fun!

Roaming Rosie Signature

Introduction to the ALPHABET ACTIVITIES for Kids {Start Here}

Alphabet Activities A to Z at RoamingRosie.com

Welcome to my Alphabet Activities section!

My kids and I have been practicing the alphabet through Letter Days, exploring one letter a day through food, games, activities, and worksheets.

I originally began posting about them on Squidoo (which is now HubPages), and posted about half of the alphabet there.  But that site keeps changing their format, so it’s just easier for me to redo everything here, to start from scratch.  Besides, I’ve created new worksheets and edited the format of the old worksheets to make printing easier.  Not only that, there’s new stuff here you won’t find there – which is why I didn’t include the links to the old articles.

For each letter, I’ll be posting about activities and recipe ideas and also a list of all the free worksheets I’ve made.  The worksheets posted below are all in PDF format and are free for home and classroom use – so enjoy!

What is a Letter Day?

I would usually spend one full day doing projects on a letter, or spread it out over a few days.  Although even if we did just one Letter Day, we’d still continue discussing that letter for the next couple of days.

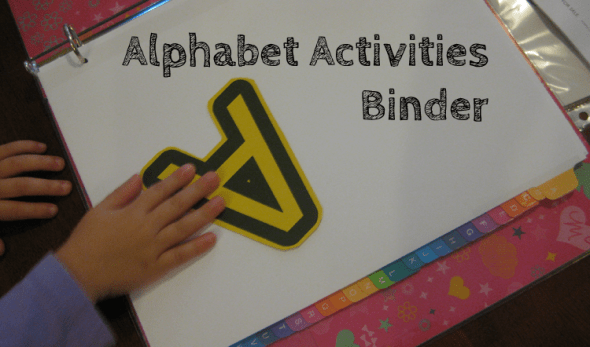
To begin each Letter Day, we glue a letter into our alphabet binder.  We have two binders that are quite full, with all of the paper activities separated by A-Z dividers.

Alphabet Activities Binder

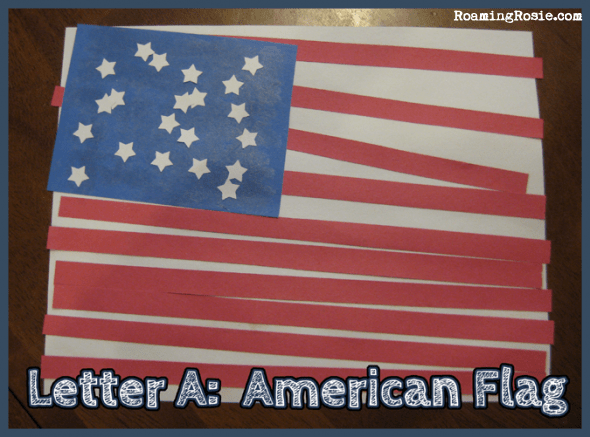
I almost always do at least two construction paper crafts that include making a letter into something (an H into a horse or a Q into a queen, for example) and a letter sorting activity where my girls need to separate capital from lowercase letters onto two shapes.

I do cut the paper down, though, before we do the projects.  I make them 8.5″ by 11″ and then use a 3 hole punch after we’re done to help them fit in the binder.

I used to cut out the construction paper pieces ahead of time, too, and just let my girls glue them on and sort the pieces however they liked.  My girls are older now, though, so they can cut more of the pieces themselves.  It’s up to you how you’d like to do it, depending on the age of your children.

Letter F Activities

We also do worksheets that include tracing letters, tracing lines, mazes, color matching, letter searches, and much more.

Alphabet Activities A-Z Free Printable Worksheets

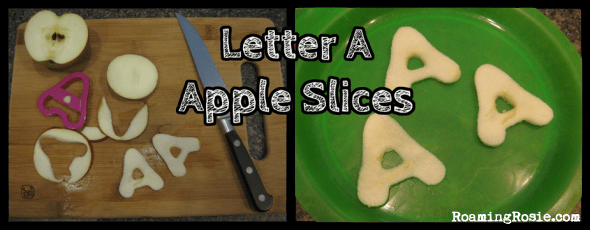
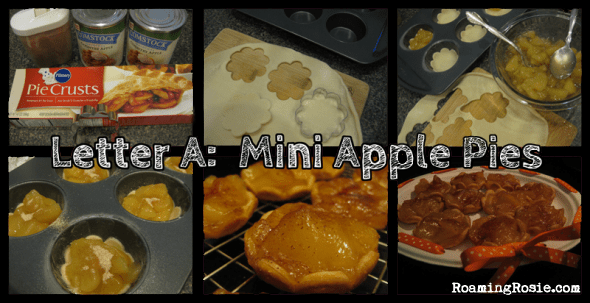
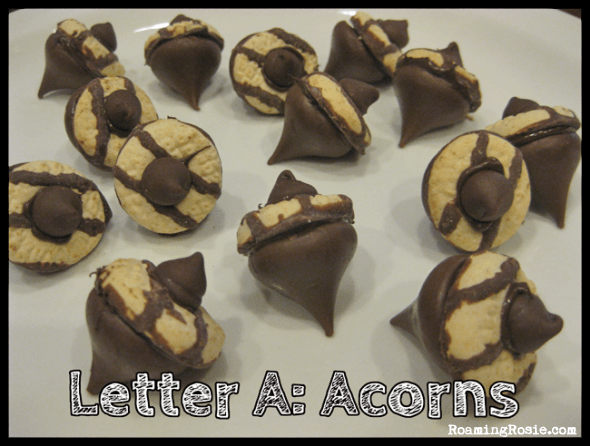
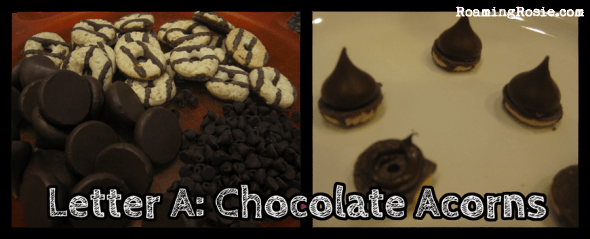
Sometimes we do a traditional craft indoors, sometimes we run around outside and dig in the dirt.  And we pretty much always cook and/or bake something.

But whatever game we play or whatever food we eat, we always talk about the letters.  If we’re eating gnocchi because it’s Letter G day, we take the time to find the letter G on the gnocchi package.

Alphabet Activities for Kids

We usually do collages, too.  But not always, so I don’t plan on including them in each post.  When we started, my daughter wasn’t able to cut out shapes yet, so I spent some time cutting pictures out of magazines after she went to bed.

The finished collages looked like this:

Alphabet Activities Letter Collages

We used apples, angels, artichokes, and an accordion for letter A; a bison, butterflies, babies, and bells for letter B; and cars, camera, cherries, and cats for letter C.  Now that she’s cutting out shapes quite well on her own, though, I’m considering starting the project all over again, but letting her cut out the pictures this time.

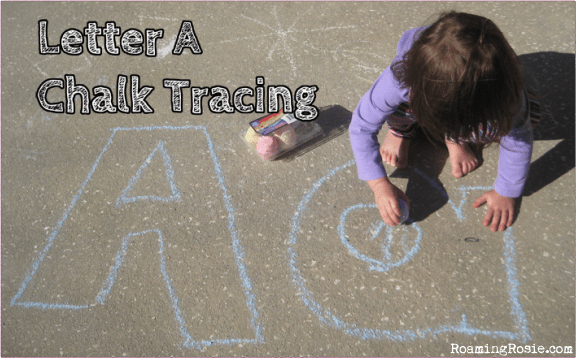
Plus, since my girls love being outside and drawing with chalk, we also practice our letters with tracing and coloring in chalk:

Alphabet Activities: Chalk Tracing

Most of these projects use supplies that we have around the house or that are easy to find.  Construction paper is a biggie.

Here are some of the things I’ve mentioned in this post, including construction paper, a paper cutter, a 3 hole punch, and page dividers:

Construction Paper Paper Cutter 3 Hole Punch A-Z Dividers

But where do I find all of these projects and worksheets that you’ve mentioned?

I’m so glad you asked!

They’ll all be listed right here and under the Alphabet Activities category.  I haven’t finished editing all the photos yet, but they’ll be listed here as I post them.  Plus, at one point my old computer died and I lost a lot of photos.  So now my oldest is a great deal older when than when I started these projects with her, and since we’ve had to redo some of them for the photos (and it’s taken me awhile to get around to posting them) you may notice some age gaps between the photos of my various blog posts.  But taking three or so years to post something is just an everyday part of #momlife, right?  Right??

Anyway, this is the best page to bookmark (or Pin) if you want to take full advantage of everything, since this is where you’ll find the list to all of the Letter Day activities and worksheets.

… and drum roll please …

The Alphabet Activities and Worksheets

Letter A:  Alphabet Activities for Kids

Letter A:  Free Alphabet Worksheets for Kids

Letter B:  Alphabet Activities for Kids

Letter B:  Free Alphabet Worksheets for Kids

Letter C:  Alphabet Activities for Kids

Letter C:  Free Alphabet Worksheets for Kids

Letter D:  Alphabet Activities for Kids

Letter D:  Free Alphabet Worksheets for Kids

Letter E:  Alphabet Activities for Kids

Letter E:  Free Alphabet Worksheets for Kids

Letter F: Alphabet Activities for Kids

Letter F: Free Alphabet Worksheets for Kids

Letter G: Alphabet Activities for Kids

Letter G: Free Alphabet Worksheets for Kids

Letter H: Alphabet Activities for Kids

Letter H: Free Alphabet Worksheets for Kids

Letter I: Alphabet Activities for Kids

Letter I: Free Alphabet Worksheets for Kids

Letter J: Alphabet Activities for Kids

Letter J: Free Alphabet Worksheets for Kids

Letter K:  Alphabet Activities for Kids

Letter K:  Free Alphabet Worksheets for Kids

*more soon*

Follow me on Facebook and Twitter and Pinterest to see my latest posts.

Enjoy!

Roaming Rosie Signature

Painting Birdhouses With The Kids

painting birdhouses

My kids were SO excited about this project.

I hadn’t realized that picking up a couple of $1 wooden birdhouses at the store could make a day so very eventful.

It was pretty awesome.

Anyway, the reason we even went looking for birdhouses was because of this book that was given to us by a neighbor:

Birds First Discovery Book

This First Discovery book about Birds was something I thought looked kind of fun, but I wasn’t sure how my kids would respond to it.

Surprisingly, it’s been requested over and over again at bedtime.

Even though it’s a learning book and not a story book, both my 4yo and 2yo enjoy reading it.

This is partially because they love all kinds of books where they get to discover things (the 4yo often requests a book that spells out the life cycle of butterflies) but also because of the fun way they allow kids to “discover” the facts about their subject matter.

This series of books includes transparent pages.

The transparent pages are printed with pictures on both sides and “hide” part of the page that’s underneath it.  When you turn the page it reveals the hidden image.

My daughter calls these the “puzzle pages.”

And, from looking at the pictures of others in the series on the back cover, she’s already ardently requested that we get the ladybug book.

Thus, a ladybug and a dinosaur book are in a box on the way to my house right now.  And I will be buying more in the future.

If you think your kids would love this kind of interactive learning, too, here are a few others in the series for you to view:

Do you own any of these books already? Which are your kids’ favorites? Your favorite?

Roaming Rosie Signature

Practice Measuring with Rice

Pretend Cooking And Practice Measuring With Rice Activity For Kids

This is one of those activities I love:  easy to set up, great for learning, and free.

That’s a hard-to-beat combination.  :)

Anyway, while busy in the kitchen/laundry room, I set this up for my girls and was amazed at how involved they became.  We’ve done similar things with dried pasta, but we hadn’t used rice for anything in awhile.

I put two large, two medium, and two small bowls on an old cookie sheet.  I provided two small measuring cups and two measuring spoons, and dumped some rice into the two big bowls.  Then I stepped back.

There was measuring, scooping, pouring, touching, and a general sense of busyness.

And silence.

It was so strange.  I’m not used to my 2yo and 4yo sitting so quietly together for so long.  But they were involved in their project.  There wasn’t even any arguing.  No “she’s touching me!”

Just concentration.

It didn’t last forever, of course.  Eventually the 2-year-old discovered that the rice made a neat sound as it sprinkled out over the tile floor, and so I wasn’t really able to keep and reuse most of the rice as I’d hoped.

But it was worth it.

Roaming Rosie Signature

Put Cinnamon In Your Sandbox To Keep The Bugs Away

Mix cinnamon into your kid's sandbox to keep bugs out of it this summer!

Did you know that cinnamon mixed into a sandbox keeps bugs away?

I can’t remember where I first heard this tip, but boy am I glad I followed it!

I’ve spent so much time over the years scooping various bugs and spiders out of my kids’ sandbox, that I was rather reluctant to ever let them play with it.

When my oldest was younger we had a large one she could sit in, but after we moved, we got a tabletop set that works with water or sand or both.  (We have this adjustable sand and water table.  It has just sand in it right now.)

My girls love it, but it was always infested with bugs.

Then I remembered the tip about bugs not liking cinnamon.

So I generously sprinkled the spice over the sand in the sandbox and mixed it in with a toy rake.

The smell was AMAZING.

Seriously.

We even found some {really} old cinnamon sticks in the pantry that weren’t really any good for baking any more, so I gave my girls two of them to play with.  They’d use them to stir the sand or pretend they were sticks or flag poles, etc.

The point is:  the bugs went away.

And they stayed away.

I also gave the girls some empty spice containers to play with.  They love filling them with sand and “cooking” with them.

Just be careful about letting your kids shake actual cinnamon into the sandbox, since it can easily get into their eyes and be inhaled.  You don’t want that.

But they helped me to stir it into the sand, and, ever since, the sandbox smells like crumb cake or cinnamon rolls.

Sweet, bug-free cinnamon rolls.

Mix cinnamon into your kid's sandbox to keep bugs out of it this summer!  (They can even play with the old spice containers!)

Roaming Rosie Signature

Spinkle Cookies

Sprinkle Cookies

Don’t those look deliciously fun?

Seriously, these sprinkle cookies were a super easy way to give my girls a fun project in the kitchen.

First of all, they love sprinkles.  LOVE.  Them.

So when I put tiny paper plates full of colorful sprinkles in front of them, there were many squeals of joy.

Making Sprinkle Cookies With The Kids!

We used a box cookie mix for this {thanks to Publix BOGO}.

So it was just a basic sugar cookie and piles of whatever sprinkles we had in the pantry.

The girls rolled the cookies in the sprinkles, creating wonderfully colorful cookies, and we baked them according to the package directions.

Sprinkle Cookies

Look at how pretty they were even before baking:  like little sparkly jewels!

They certainly made movie night even more exciting.  :)

Roaming Rosie Signature

Our Easter Resurrection Garden

Easter Resurrection Garden

The Easter Resurrection Garden is a craft that’s been floating around Pinterest for awhile, and this year, I decided to make one with my girls.

They love gardening, and physical, interactive representations of stories are a great teaching tool.

Ever since we made the Garden, my daughter has been talking about it and asking me to tell Jesus’ story every time we to out into the backyard.

Plus, it gave them an opportunity to get their hands dirty.  Pretty much an “all win” in my book.

So, here is our version of the Easter Resurrection Garden:

Easter Resurrection Garden

There are a lot of variations of this on the Net, and most of them include grass.  We used flowers instead.

That may not make it geographically correct, but it matched our garden.

Anyway, the tools (which you see above) are pretty simple:  some sort of large flower pot, a tiny flower pot, a rock, potting soil, and whatever embellishment you’re going to use, be it flowers or grass seed.

Fill your large pot with the soil, dig a bit of a hole to make room for the tiny pot, lay the tiny pot on its side, and cover it with the soil so that only the top of the pot is showing.  This represents the cave.  Place the rock near the mouth of the cave and add your embellishments.

Easter Resurrection Garden

My oldest daughter added even more flowers to her Resurrection Garden.  She wanted some pink in there to go with the purple.

But, no matter how you decorate your garden, the main point is that you can use it to illustrate Jesus’ resurrection by removing the rock to show the empty “cave.”

I suggest reading a few Easter books, too, which is what we did.  It was nice to go back and forth from our Garden to the colorful illustrations of the Easter story.  Like these:

Have you tried this craft?  Please share your stories with us!

Roaming Rosie Signature

Crackled and Marbled Easter Egg Decorating Tips

Easter is almost upon us!

So I wanted to post a couple of photos of some out-of-the-box egg decorating I did with my girls in the past:  Crackled Easter Eggs and Marbled Easter Eggs with Shaving Cream.

1. Crackled Easter Eggs

Crackled Easter Eggs

These looked pretty awesome.  And they’re super easy.

Here’s the process:  take some cooled hard boiled eggs and gently roll them on the counter to produce cracks all around while making sure the shell does not fall off of the egg.

Put the cracked egg in a little baggy and add a few drops of liquid food coloring.  Make sure the color covers the entire egg and let sit for a half hour.

Peel the egg and rinse it in a colander, splashing it with a bit of white vinegar to help the color set.

That’s it!

And they’re perfectly safe to eat, which is kind of fun, too.  My daughter really loved these; called them “dinosaur eggs.”

2. Marbled Easter Eggs with Shaving Cream

Marbled Easter Eggs with Shaving Cream

These are also a ton of fun for kids to make.

To create them, fill a pan with shaving cream and drop some liquid food color into the pan (I did red and blue in one pan and yellow and green in another).  Gently swirl the colors with a toothpick or skewer, then roll the eggs in the shaving cream until covered.

Let the eggs sit on a paper plate or paper towel for 15 or 20 minutes, then wipe off the shaving cream.

That’s it!

Both projects are simple but fun.  The only thing you have to watch out for is getting food coloring on your clothing, because it stains.  I suggest having your kids wear aprons.

Happy Crafting!

Roaming Rosie Signature