Valentine’s Day Free Printable Tags for Pens & Pencils

FREE Valentine's Day Tags for Pens and Pencils

I recently posted some Printable Valentine’s Day Tags for Bubbles, which were the treats my kids handed out to their classes for Valentine’s Day.

Then I realized that their teachers may not want bubbles as a present….

And as I browsed the shelves, looking at everything from candy to candles, I wandered into the school supply aisle and spied some colorfully decorated gel pens.

I thought they looked fun, and teachers always need pens…..

Free Printable Valentine's Day Tags for Pens and Pencils

So I picked up the pens and made some printable tags for them.

The tags have an illustration of a pen on them, which is light so you can write over it, and after you cut them out, you just need to use a hole punch to add a hole to the one side.

I made them in both red and blue, so you can pick whichever you like best, and I tied them onto the pens with some bakers twine.

The gel pens actually make a really cute gift for older kids as well, and it’s a great non-candy option.

Here are the two tags in printable PDF form:

Valentine’s Day Printable Tags for Pens and Pencils (Blue)

Valentine’s Day Printable Tags for Pens and Pencils (Red)

Enjoy!

Roaming Rosie Signature

Valentine’s Day Printable Tags for Bubbles

Free Printable Valentine's Day Tags for Bubbles

These are the Valentine’s Day treats that my kids will be giving to their class this month.

I chose bubbles because I really wanted to avoid adding even more sugar to the student’s pile of what was sure to be a large load of candy.

And bubble are always a hit with kids.

So I looked around and found these adorable mini bubbles at Target in the holiday section of the store.  I then found the Valentine’s colored bakers twine in the bargain section near the front of Target.

Of course, you can also sometimes find colorful bakers twine in the baking section of stores, and I’ve sometimes found fun colors of bakers twine in the craft section of my local Dollar Tree.

And if you’re having trouble finding mini bubbles, I’ve found that Party City usually has a large supply of colorful bubbles as party favors.

Free Printable Valentine's Day Tags for Bubbles

Anyway:  back to the tags!

I made these heart-shaped tags in red and pink, after playing around with other color combinations like red and blue or red and purple.  I found I liked the way these looked best.

And they probably would have looked even better for my photos if my printer hadn’t started running out of ink…..

I made two versions.  The first has both a “to” and “from” on it, and the second {seen in the photos} only has “from.”

I did this because my girls are in preschool and it just seemed easier on everyone if we only wrote their names on the Valentines instead of the names of all of their classmates, too.  But older kids might want to write who they’re for, so I made that an option.

Valentine's Day Printable Tags for Bubbles

To assemble the Valentines, I first wrote my girls’ names on the heart and cut them out.  Then I punched a hole in the heart with a hole punch on the left side of the top of the heart.

Next, I cut a piece of bakers twine about 10 inches long and tied it around the neck of the bubble bottle.  I double knotted it so it wouldn’t go anywhere.  Then I strung the heart onto one piece of the tied bakers twine and tied another double knot to secure the heart to the bubbles.

You could stop there, I guess, but I went ahead and tied a bow to make them look a little nicer.  I double knotted the bow as well, so it wouldn’t come undone.

I then packed all the bubbles into a heart-shaped basket we already had to make it easy for my girls to bring them to school

To open the free printable PDFs, click on the link below for the one you want:

Valentine’s Day Printable Tags for Bubbles  {with “To” and “From”}

Valentine’s Day Printable Tags for Bubbles  {with “From” only}

Happy Crafting!  And please share your photos with me here or on Facebook if you make these!!

Roaming Rosie Signature

Mini M&M Chocolate Chip Cookies

Mini M&M Chocolate Chip Cookies at RoamingRosie.com

I love tiny cookies.  They’re just so much fun.

And I had a bunch of mini M&Ms left over from our Rice Krispies Christmas Trees, so I decided to bake with them, instead of just devouring the bag in a single sitting.

Thus was born:  Mini M&M Chocolate Chip Cookies.

Because the mini M&Ms weren’t enough:  I really felt we could use some mini chocolate chips, too.  :)

Mini M&M Chocolate Chip Cookies at RoamingRosie.com

It’s a pretty basic chocolate chip cookie recipe, and a variation of the one I normally make.

One difference is that I usually make chocolate chip cookies with dark brown sugar.

But we were out.

So I used light brown – which is fine.  It’s just not quite as dark in color or as sweet.

But still good.

Mini M&M Chocolate Chip Cookies at RoamingRosie.com

Doesn’t that look amazing??

I mean – the colors – the ooey gooey-ness!!

*drooling now*

Mini M&M Chocolate Chip Cookies at RoamingRosie.com

To make the cookies miniature, just scoop the dough out with teaspoons, not quite filling them up all the way.

Mini M&M Chocolate Chip Cookies at RoamingRosie.com

If you prefer, you could also make giant cookies, but I liked the way they look small.

Besides, I added these to some Christmas cookie platters, so small was convenient.

And cute.  Did I mention cute??

Mini M&M Chocolate Chip Cookies at RoamingRosie.com

Mini M&M Chocolate Chip Cookies

Ingredients:

1 cup flour
1/2 teaspoon baking soda
1/2 teaspoon salt
1/2 cup (1 stick) butter, softened
1/2 cup granulated sugar
1/2 cup brown sugar, packed
1 teaspoon vanilla extract
1 large egg
1 cup miniature chocolate chips
1 cup miniature M&M candies

Preheat oven to 350°F (180°C).

Combine flour, baking soda, and salt in a small bowl.

Either with a mixer or by hand, blend softened butter, granulated sugar, brown sugar, and vanilla until creamy. Add egg, beating well until combined. Gradually beat in the flour mixture. Stir in the chocolate chips and M&Ms.

Drop about a half-teaspoon to a teaspoonful of dough onto ungreased baking pans. Bake for 9 to 11 minutes, or until edges are just beginning to brown.

Cool on wire racks. Store covered.

Makes about 5 dozen.

[Note: you can use either light or dark brown sugar for this recipe. I used light brown sugar here, which has a milder flavor. If you use dark brown, the cookies will be a little darker in color, as well as a little sweeter.]

**********

And click here for the free printable PDF version:  Mini M&M Chocolate Chip Cookies

Enjoy!

Roaming Rosie Signature

“Thanks a Latte” Teacher Christmas Gift Tags

Thanks a Latte Gift Tag for Teachers:  FREE PRINTABLE from RoamingRosie.com

This is really one of those posts that should have been finished waaaaaaaay before Christmas, but, well … it wasn’t.  Things are, you know:  busy.

I’m sure you know.

And there will totally still be some Christmas-themed posts appearing after Christmas, too………

Anyway, when I was shopping around for a gift for my daughter’s teachers, I was having a hard time deciding what to do.

I thought a Christmas themed mug filled with coffee would be nice… but what if they didn’t drink coffee?

I kept the mug idea, but added some tea and hot cocoa to the coffee.  And candy, of course.

But what about a gift tag?

There are a ton online, but none said exactly what I wanted.

So I made my own.

Thanks a Latte Gift Tag for Teachers:  FREE PRINTABLE from RoamingRosie.com

Here you can see that I got these adorable snowman mugs {at Target} and filled them with Starbucks VIA Christmas Coffee packs, a couple flavors of individually wrapped tea bags, and some hot cocoa mix {with mini marshmallows}.

I also stuck in a couple of candy canes and 3 or 4 Lindt chocolate balls.

Then I put the whole thing into a “cookie bag” and tied it off with some curled ribbon, tying the tag onto one of the ribbon strands.

It looked pretty cute, and I’m kinda kickin’ myself for forgetting to photograph the finished gift.

Thanks a Latte Gift Tag for Teachers:  FREE PRINTABLE from RoamingRosie.com

Anyway, if you need a tag that mentions “latte” {for coffee} and “tea,” then these are for you!

Thanks a Latte Teacher Christmas Gift Tags

Oh, and I purposely didn’t add an outline shape to the tags on the PDF printable.  That way you can cut them out in the same shape I did, or as squares or circles or whatever compliments your gift.

Enjoy!

Roaming Rosie Signature

Soft Sugar Cookie Recipe {Iced Autumn Leaves}

Soft Iced Sugar Cutout Cookie Leaves

I am looooooving these amazing cookies!

I’ve been meaning to try a new Soft Sugar Cookie recipe for awhile and I’ve been browsing a bunch of sites and recipes, trying to get plenty of tips.

I settled on a recipe that incorporates sour cream and I rolled the dough thicker than I normally do, and cooked it a little less.

Pretty darn perfect.  :)

I typed up the recipe suggesting either vanilla or almond extract.  I prefer the almond, but my kids seemed to prefer the batch I made with vanilla.  Both were good, though.  The only thing to remember is that in the icing, you can use more vanilla than almond extract.  Most people seem to prefer it when the almond isn’t overpowering.

I used my royal icing for the cookies because it dries hard and shiny – which makes them easy to stack when storing/displaying/gifting – and because it’s easy to dip them right into the icing to make the whole ordeal quicker.

Soft Iced Sugar Cutout Cookie Leaves

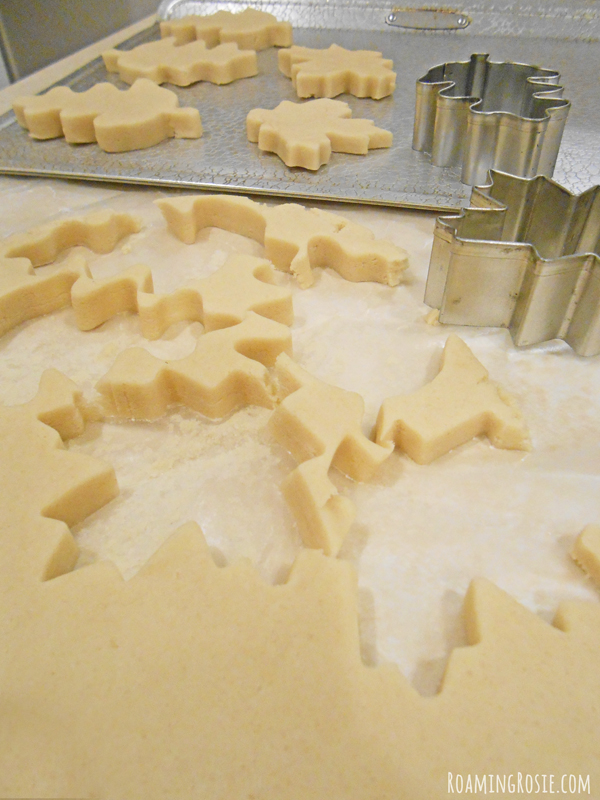
I liked rolling it out between the waxed paper because it was easy to transfer to the fridge on the back of a cookie sheet, and then I could just pull it out and cut out my cookies.

Soft Iced Sugar Cutout Cookie Leaves

Re-rolling the dough {and having to add the flour to re-roll it} makes the cookies slightly tougher, or less soft, but I didn’t find the difference noticeable, really.

And I’m not about to throw out excess cookie dough.

Soft Iced Sugar Cutout Cookie Leaves

Make sure they’re nice and thick and that you don’t over bake them.  They should NOT be browning on the edges before you take them out – that will eliminate the softness you’re looking for.  In fact, they should look slightly underdone when you take them out.

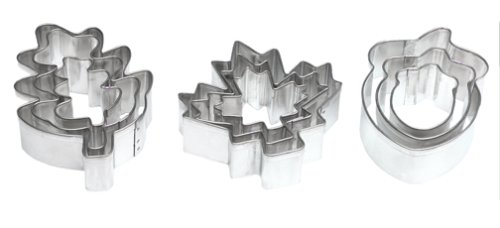
You can use just about any cookie cutter shape you like.  Here are the Wilton Leaves and Acorns 9-Piece Aluminum Cookie Cutter Set that I used:

 Wilton Leaves and Acorns 9-Piece Aluminum Cookie Cutter Set

Oh, and the recipe called for parchment lined pans.  I did bake the cookies on parchment paper when I used my regular pans, but what is pictured above are my aluminum Doughmakers Biscuit Sheets, which are textured and so the cookies don’t stick.  If you don’t have pans like these, use the parchment paper.

Soft Iced Sugar Cutout Cookie Leaves

I made the icing while the cookie dough was in the fridge and just set it to the side until later.

For best results:  cover with plastic wrap when not in use, and make sure to stir it often when dipping the cookies in it.

Soft Iced Sugar Cutout Cookie Leaves

You can see that I used plenty of gel coloring to make the icing bright and bold.

Soft Iced Sugar Cutout Cookie Leaves

You can put the icing into a plastic baggy or decorating bag and draw it onto the cookies instead {kind of like my Chocolate Almond Mummy Cookies} but I had been seeking a different method.  I found a few places – and a video – where people were suggesting that you just dip the cookies into the icing.

It worked.  Rather well.

I found that it worked best if you stirred the icing often, even between each dip, and if the cookies were thick enough, you didn’t even get any icing on your fingers.

If the icing was too thick, the cookie may stick a little, and you chance it breaking.  If your icing feels too thick and is pulling back when you try to lift out the cookie, sprinkle in a few DROPS of water and stir to thin it just a bit.  Not too much.

And I’ve tried both a skewer and a fork to scrape off the extra icing.  I prefer using the fork because it’s better than the skewer at efficiently stirring the color into the icing and re-stirring it every few minutes while icing the cookies.

When you lift up the cookie and scrape off the extra icing, don’t actually touch the cookie with the fork.  While still holding the cookie upside down, or tilted to the side, move the fork through any globs of icing that are above the surface of the cookie.  If there’s too much icing on them, it will drip over the sides and leave little puddles around the edges.

Then just let them sit on some wire racks until the icing hardens.  It will harden on the outside thinly at first, so don’t pack them away or plate them right away if you have the time to wait.  Let them sit for at least an hour, but a few hours is ideal.  Just in case.  You don’t want crushed/smudged icing after doing all that work.

And I might say, “all that work,” but, really, it’s easy to do.  It can take awhile due to all the steps, but it is SO worth it.

Because:  yum!

Soft Iced Sugar Cutout Cookie Leaves

Soft Sugar Cookies with Icing

Ingredients:

1 cup (2 sticks) butter, softened
1 cup sugar
1 large egg
1 teaspoon vanilla (or almond) extract
1/3 cup sour cream
3 cups flour
1/2 teaspoon salt
1 1/2 teaspoons baking powder

Icing:
2 cups confectionery sugar
1 1/2 tablespoons meringue powder
1 teaspoon vanilla (or 1/2 teaspoon almond) extract
3 to 4 tablespoons water

Cream together the butter and sugar with a mixer until light and fluffy. Mix in the egg, sour cream, and extract until smooth. In a small bowl, combine the flour, salt, and baking powder, then slowly mix into the wet ingredients until just combined. Do not over mix. Separate the dough in half and roll each piece out between two sheets of waxed paper to a thickness of about 1/2 inch. Refrigerate dough for an hour.

Preheat oven to 350°F (180°C). Remove dough from refrigerator and cut out desired shapes with cookie cutters. Gently gather scraps and reroll on a floured surface. Place cookies an inch apart on parchment lined cookie sheets and bake for 9 to 11 minutes. Do not over bake! Take them out when they appear just about to be done, and before they brown. Let cool completely on a wire rack before icing.

Mix all of the icing ingredients together with a fork. Start with 3 tablespoons of water and add more, about a 1/2 teaspoon at a time, until you reach a consistency where a thick line of icing slowly and smoothly drips off of the fork when lifted from the bowl. Dye it your desired color, dividing it between separate bowls first if using multiple colors.

Dip the tops of the completely cooled cookies into the icing. Gently pull out the cookie and use a fork or skewer to scrape off excess icing without touching the cookie itself. Set cookie on top of a wire rack that’s positioned over waxed paper or foil and allow to harden completely, letting the cookies sit for at least an hour. Store covered.

**********

And click here to print the free PDF version of the recipe:  Soft Sugar Cookies with Icing

Enjoy!

Roaming Rosie Signature

New Books and Bookworms {with free printable}

Free Bookworm Sign Printable for Gummy Worms

So, I have been SUPER busy lately….. and totally neglecting this blog.  I’ve got over a dozen half-finished posts, but I just can’t seem to find the time to sit down and edit photos and finish the posts.

And I wish I could say it’s because NaNoWriMo has taken over my life and I’ve just completed the next great American novel………

But, alas, that isn’t the reason.  It is book related, though.  And also pretty awesome.

I’ve been spending a lot of my time absorbed in the world of Usborne.

Usborne Books & More is an amazing company that has been the leading publishers of children’s nonfiction for the last two years.  They make reading and learning FUN, the books are incredible, AND….. here’s the awesomest part:  you can sign up to be a consultant and make a living giving away free books and spreading literacy and the love of reading!

Really.  Not just a sales pitch.  This is really, truly, the best thing I have seen in a long time.  It’s like throwing Tubberware or Pampered Chef parties – but with BOOKS.  {my favorite thing in the world}

I’m really excited about it, and I’ll certainly be posting more about the books in the future.  And about other books, too:  I looked back over my blog and realized that I hadn’t posted many book reviews recently, and, because of a series of nasty, goopy, throat-clogging viruses, I’d also stopped making videos for Roaming Rosie Reads.

I plan to change that.  Spreading a love of reading is very important to me.  People tell me things like, “well, your kids love books….” but really, ALL kids love books – if they have the right books.  Everyone loves reading, if they’re reading the right books.

I want to help people find books they’ll love.

And, you know, I also joined with Usborne to get tons of free and super-discounted books for my family.  Can’t beat that.  :)

{You can see a pic of my kids attacking the new box of books on Instagram.}

I wanted to add a little something to this rambling, though, so I’m also including the printable sign I used to serve up some gummy worms at my last book party:

Printable Bookworms Sign

The banners are in two sizes because when I made it, I wasn’t sure what size bowl I was going to be using.

I just cut out the banner and used tape to attach it to the bowl.

Using gummy worms as “bookworms” is a totally cute idea for book parties, back to school parties, book club meetings, and more, so I wanted to share it to make it easy for people to have fun with the idea!

Make sure to check out my new book website:  BooksWithRosie or follow me on Facebook at RoamingRosieRemix {for blog stuff} and UsborneBooksWithRosie {for book stuff}!

Enjoy the sign!

Roaming Rosie Signature

Free Autumn Clifford Printable Maze

Free Autumn Clifford Printable Maze

We have a lot of Biscuit books.

And a lot of Clifford books.

So when I found this Free Printable Clifford Maze, I instantly thought of Biscuit Visits the Pumpkin Patch.  It seemed like a wonderful match.

My kids both love the Biscuit book, and we tend to read it more often in the fall.

It’s a short – and very simple – story, but entertaining.  I read it slowly and always take the time to ask who is hiding when we get to the page where there are bunny ears sticking out from behind one of the pumpkins.

And because my girls also love Clifford, they were excited when I printed out the maze for them.  So I wanted to share it.

Enjoy!  :)

Roaming Rosie Signature

Letter B: Free Alphabet Worksheets for Kids

FREE Printable Letter B Alphabet Activities Worksheets

If you’re new here, please read the Introduction to the Alphabet Activities first!

Here are all of the printable PDFs for the Letter B.  They are free for home and classroom use, but please don’t sell them.

B is for Bat and Banana

B is for Bears

B is for Bluebird

B is for Boomerang

B is for Bowling

B is for Brachiosaurus

And don’t forget to check out all of our Letter B Alphabet Activities.

Follow me on Facebook and Pinterest to see my latest posts.

Have fun!

Roaming Rosie Signature

Smoked Gruyere Mac and Cheese with Capicola

Smoked Gruyere Mac and Cheese with Capicola

In case you didn’t notice with recipes like Sausage and Gouda Mac and Cheese, I’m a huge mac and cheese fan.

And I like to experiment a little.  Change things up.

Sure, I keep some box mac and cheese mixes on hand for days when I’m feeling super lazy, but macaroni and cheese is not a complicated dish.  One of the things I love about it is the casserole nature of the baked mac and cheese that allows me to wash up all the dishes and such while it’s baking.  Which means easy cleanup after dinner.

For me, easy cleanup = easy dinner.

Smoked Gruyere Mac and Cheese with Capicola

Anyway, here are the ingredients for this dish.

I chose Gruyere, which is something I used to eat more of when I lived in Germany, so I like to use it occasionally.

The Capicola is a spicy ham that we put in our cold cut pies around Easter.  Apparently this is an Italian thing.  Either way, I like the ham.

But it CAN be spicy.  And the spice is intensified a little when you fry it, which is why you can see that I only added a small amount to the top of my dish right before serving.  You don’t need a lot.

Smoked Gruyere Mac and Cheese with Capicola

I don’t always use heavy cream when making mac and cheese, but usually just because I don’t have it on hand.

It adds a nice thickness.

Whether you use it or just straight milk, though, your roux should reach a point of being thick enough that the cheese doesn’t fall straight to the bottom when you sprinkle it in.

To get to that point, bring your roux JUST to a boil, stirring frequently.

Smoked Gruyere Mac and Cheese with Capicola

I switch between Panko and regular bread crumbs.  Whatever I’m in the mood for.

In this recipe, I used Panko.

Smoked Gruyere Mac and Cheese with Capicola

Doesn’t that look awesome?

It’s the cooked noodles mixed into the cheese sauce before it’s baked.  You do want it to look a little soupy, because the sauce will thicken up in the oven.

Smoked Gruyere Mac and Cheese with Capicola

Here are the bread crumbs before baking.

Smoked Gruyere Mac and Cheese with Capicola

I used a 1/4 lb. of Capicola, slicing it rather thinly.

You could use more:  it shrinks significantly when you fry it (like bacon), but, like I said, you don’t really need a lot.

It’s just an accent.

Smoked Gruyere Mac and Cheese with Capicola

I threw the Capicola into the pan with just a touch of olive oil to help keep it from sticking.

Fry until nice and dark, but not quite burnt.

Then drain it on paper towels and serve separately.

Smoked Gruyere Mac and Cheese with Capicola

Doesn’t that look good??

If your bread crumbs don’t brown enough during the last few minutes of baking, go ahead and broil it for two or three minutes – just keep a close eye since it can burn.

Smoked Gruyere Mac and Cheese with Capicola

And there’s the finished product:  scooped into a bowl with a pinch of the crispy, spicy ham.

Serve with some salad and you got a meal.

Smoked Gruyere Mac and Cheese with Capicola

 Smoked Gruyere Mac & Cheese with Fried Capicola

Serves: 6+

Ingredients:

3 cups Rigatoni pasta
2 Tbs. butter
2 Tbs. flour
2 cups whole milk
1 cup heavy cream
2 cups Smoked Gouda, shredded
1/2 cup Swiss, shredded
1 tsp. pepper
1 tsp. paprika
1/4 to 1/2 lb. Capicola

For Breadcrumbs:

3 Tbs. butter, melted
1/2 cup Panko breadcrumbs

Preheat oven to 350°F.

Cook the pasta until al dente, or one minute less than the recommended cooking time.

In a medium saucepan, melt the 2 Tbs. of butter. Stir in the flour to create a roux. Whisk in the milk and heavy cream. Cook over medium to medium high heat until just boiling, stirring frequently. Once it starts to boil, remove from heat and stir in the cheeses and spices. Continue to stir over low heat until the cheese has melted.

Mix the 3 Tbs. of butter with the breadcrumbs.

Stir the pasta into the cheese sauce. Pour into an 8 x 8 inch or a 9 x 13 inch pan. Sprinkle breadcrumbs over the top. Cover pan with foil.

Bake for 20 minutes. Uncover and bake for 5 to 10 minutes more, or until the cheese sauce is bubbling around the edges. If the breadcrumbs are not browned, broil for 2 or 3 minutes, watching closely.

Meanwhile, while the macaroni is baking, slice the Capicola thinly and fry over medium heat. Add a touch of olive oil if it seems to be sticking. Once the ham is crispy, drain on paper towels. Serve in a separate dish, to be used as a topping.

[Note: if you use a different shape of pasta, you may need to adjust the amount. Also, the ham is only meant as an accent. If you want a significant portion in your macaroni, use 1/2 to 1 lb.]

*****

Click here to print the free PDF version:  Smoked Gruyere Mac and Cheese with Capicola

Enjoy!

Roaming Rosie Signature

Spinach Stuffed Shells

Spinach Stuffed Shells

I always loved stuffed shells growing up.

We didn’t have them that often, mostly because of the steps involved in making them.  They’re easy to make, but take a bit of preparation.  But the end result of gooey cheese smothered tomato sauce makes the effort well worthwhile.

And to spice things up a bit, I like to add in some spinach these days.

My kids like spinach and will eat it with just some spices, but I like to mix it into other dishes, too, like Easy Spinach Alfredo with Chicken, just to change things up now and then.

Spinach Stuffed Shells

The basic recipe consists of a bunch of cheese mixed together, stuffed into shells, and surrounded by tomato sauce.

Nothing bad about that, right??

{I mean, except that the only Ricotta I could get at a last minute’s notice was the Wal-mart brand, but that’s beside the point.  It worked.}

In the past, I didn’t usually use Mascarpone, but the recipe on the Barilla box included it, and I wanted to try it.

I’m glad I did.

It adds a nice soft, creamy texture and slight tang that makes a subtle but noticeable difference to the normal Ricotta and Mozzarella mix.  If you can’t find it, it’s not essential, but I suggest trying it.

Spinach Stuffed Shells

After mixing all the cheese and spices together, then you’ll add in the spinach.

But the most important part of prepping the spinach is to make sure you completely drain it of water.

Spinach Stuffed Shells

Spinach tends to hold a lot of water.  The water will make your recipe wet.  Wet means the cheese will be slippery and the tomato sauce won’t stick.  Not what you want.

I’ve tried a lot of different ways to drain it, but I favor just putting the spinach in a mesh colander and pressing it with a fork until no more water drips out.

Spinach Stuffed Shells

After cooking the macaroni, lay them out for a few minutes so that they’ll be cool enough to handle.

Spinach Stuffed Shells

Fill the shells with the cheese mixture and lay them in a pan whose bottom has been generously layered with tomato sauce and spices.

Spinach Stuffed Shells

Doesn’t that look beautiful?

But you’re not done yet.  Most recipes will just put cheese on top, but I like a little extra moisture from the tomato sauce, so I put some of that on top, too.

Spinach Stuffed Shells

Now it really looks good, right?

Just wait until it’s baked…

Spinach Stuffed Shells

Oh, and since I had a few extra shells I cut them into slices and covered them with extra sauce.  This went into the fridge and served as a simple lunch the next day.

Spinach Stuffed Shells

And:  the finished product.  Warm, gooey, cheesy, delicious!

Scoop it into your plate and enjoy it by itself or with some crusty bread and a salad.

Spinach Stuffed Shells

Spinach Stuffed Shells

Ingredients:

1 box (12 oz.) Jumbo Shell pasta (I used Barilla)
1 jar or can (15 to 28 oz.) tomato sauce
1 1/3 cup ricotta cheese
8 oz. mascarpone cheese
1 cup parmesan cheese, grated or shredded
2 cups (8 oz.) mozzarella cheese, shredded
1 package (10 oz.) frozen chopped spinach, thawed
1/2 tsp. each salt, pepper, and garlic powder

Preheat the oven to 400°F.

Cook the Jumbo Shells according to directions until they are al dente (about one minute less than the recommended time). Drain and set aside.

Squeeze all of the water from the thawed spinach.

In a large bowl, combine ricotta, mascarpone, half of the parmesan, half of the mozzarella, and the spices. Stir in the spinach.

In a 9 x 13 inch pan, generously cover the bottom with tomato sauce. Sprinkle with more spices if desired.

Fill each of the cooked shells with a scoop of the cheese filling. After you fill each shell, place it on top of the tomato sauce in the prepared pan.

Once you have filled all the shells and the pan is full, add a teaspoonful of tomato sauce to the top of each shell. Then sprinkle the remaining parmesan and mozzarella over the top.

Cover with foil and bake for 30 minutes.

[Note: If you can’t find mascarpone cheese, you can leave it out and increase the ricotta to 3 cups.]

*****

To print the free PDF, click here:  Spinach Stuffed Shells

Enjoy!

Roaming Rosie Signature