Mint Chocolate Cheesecake Bars

Mint Chocolate Cheesecake Bars

Annnnnd….. now that it’s almost Easter, I’ve noticed that I’ve completely forgotten to post our St. Paddy’s Day dessert.  So here it is!  ;)

We made these Mint Chocolate Cheesecake Cookie Bars based off of the Lemon Cheesecake Bars that I love so much.  But we made these green (and mint) to celebrate St. Patrick’s Day.

They were a hit with both my kids and my coworkers, so I may try other variations in the future, since the recipe is flexible.

Mint Chocolate Cheesecake Bars 2

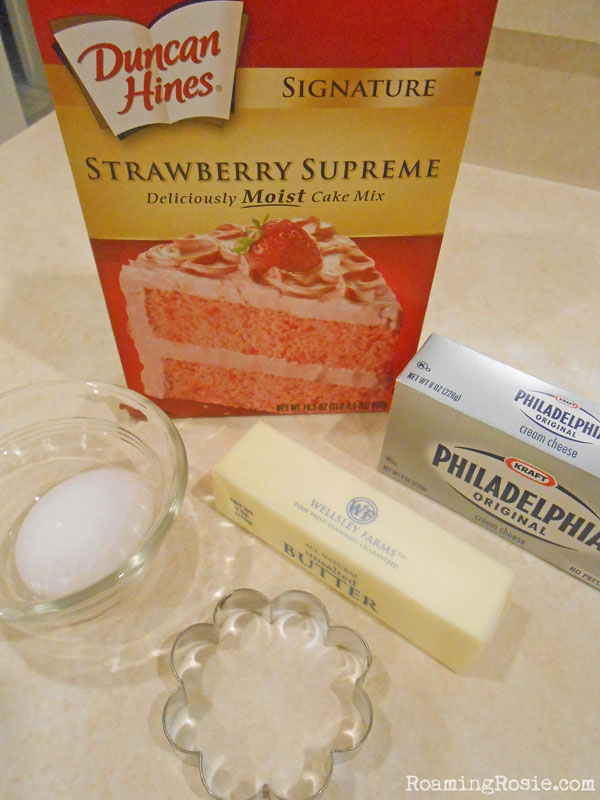
The ingredients are pretty easy to pull together, especially if you already happen to have cream cheese on hand.

The base for it is a box of cake mix, which makes it a speedy dish to throw together.

Mint Chocolate Cheesecake Bars 3

The crust will seem a little dry at first, but massaging the ingredients together will help.

If your kids like to get messy, this is a great job for them to help with.

Mint Chocolate Cheesecake Bars 4

You’ll reserve some of the mix for the crumbles that go over the top, but the rest gets pressed into the bottom of the pan.  This is also a good task for little hands.

The crust will seem very thin but don’t worry, it will rise a little as it bakes.  Just be sure you spread it out to cover the entire bottom surface of the pan.

Mint Chocolate Cheesecake Bars 5

I add the food coloring to the cheesecake ingredients before blending, so the mixer brings it all together evenly.

The more you use the deeper the color will be.  I was going for bright and bold because it was a themed dessert for St. Patrick’s Day, but if you’re going for a subtler minty look, start with only a little color.

Mint Chocolate Cheesecake Bars 6

You can see tiny chunks of cream cheese in my cheesecake mixture because it wasn’t fully at room temperature when I mixed it.

This is okay, though.  It will still bake up just fine.

Mint Chocolate Cheesecake Bars 7

Sprinkle the crumbles over the top for a fun look.  They also add a nice texture to the finished dessert.

Mint Chocolate Cheesecake Bars 8

You can technically cut them into any shape you’d like, but I favor the rectangles.  I cut it twice lengthwise, and then cut those three rows into pieces about an inch thick.

This gives me 30 pieces, which makes it a great recipe for sharing!

Don’t eat these when they first come out of the oven and are still warm – chill them for the best results.  They can be enjoyed at room temperature too, but because of the cream cheese, you’ll want to be sure to store leftovers in the refrigerator.

Mint Chocolate Cheesecake Bars 9

Mint Chocolate Cheesecake Bars

Ingredients:

1 box chocolate cake mix (15 to 18 oz.)
2 large eggs, separated
1/3 cup vegetable oil
1 package (8 oz.) cream cheese, softened
1/3 cup sugar
1/2 teaspoon peppermint extract
Green food coloring, gel or liquid

Preheat oven to 350°F (180°C).

In one bowl, combine the cake mix, one egg, and the vegetable oil.  You may need to use your fingers to help it all come together.

Spray a 13” x 9” baking pan with nonstick spray.  Reserve about 3/4 cup of the chocolate crumb mixture for later use, and press the remaining batter into the pan.  It will be thin but should cover the entire bottom of the pan.

In another bowl, beat the cream cheese with an electric mixer until smooth.  Then mix in the other egg, the sugar, extract, and a little food coloring.  Beat until smooth, adding more food coloring if needed until you reach your desired color.

Spread the cream cheese mixture over the chocolate crust in the pan.  Sprinkle the reserved crumb mixture evenly over the cream cheese.

Bake for 25 to 28 minutes, or until a toothpick inserted into the center comes out clean or with dry crumbs.  Cool on a baking rack until it reaches room temperature, then slice.  Make two cuts lengthwise and then cut into ten pieces across to make 30 pieces that measure approximately one by three inches.  Cover and refrigerate overnight before serving for best results.

**********

For the free printable PDF version of this recipe, click the link below:

Mint Chocolate Cheesecake Bars

Happy Baking!

Roaming Rosie Signature

Mini Pumpkin Cheesecake Muffins

Mini Pumpkin Cheesecake Muffins Recipe

These Mini Pumpkin Cheesecake Muffins are incredibly moist and flavorful.

A combination of pumpkin puree and virgin coconut oil, blended with a healthy helping of cinnamon, give these muffins a layered dimension of flavor in every bite.

And, really, these mini muffins can function as one giant bite apiece, but I suggest savoring them.

Especially with coffee.

I’ve been wanting to create a pumpkin muffin recipe for a while, and I wanted to incorporate coconut oil.  I’m really glad I did, because I feel that the coconut oil was what pushed these over the edge of awesomeness and made them totally irresistible.

mini-pumpkin-cheesecake-muffins-2

Above are of some of the ingredients.

The cream cheese goes towards the cheesecake filling that is used to top these muffins with a deep swirl of melt-in-your-mouth smoothness.

I used more cinnamon that I find is called for in similar recipes.  I like to taste my spices.

But there’s no nutmeg.  I know people often put it in pumpkin recipes, but I do NOT eat nutmeg.  It’s too strong and, at least for me, it distracts from the other flavors.  I find that cinnamon is a wonderful compliment for pumpkin, but if you really, really love nutmeg, then you can toss in a smidgen.  If you must.  But it’s unnecessary.  (Don’t do it.)

Plus, you can use vegetable oil if you don’t have coconut oil handy, but the coconut oil adds so much flavor that it’s worth the effort to pick some up if you don’t already have it on hand.  Like I said, it’s the turning point for intense flavor and moisture.

Virgin or extra virgin coconut oil will have a stronger coconut taste and aroma, so that’s the best to use.

mini-pumpkin-cheesecake-muffins-4

And you do lose some health benefits by melting the oil (which is solid at room temperature) in the microwave, but when I’m baking while heating something for dinner after working a full day… I take shortcuts.  Didn’t feel like washing a saucepan.

Just make sure if you melt the oil in the microwave, that you do it on 50% and for no longer than necessary.  About 30 seconds at a time.

mini-pumpkin-cheesecake-muffins-3

Sift together the flour, baking soda, salt, and cinnamon with a fork or whisk until the colors are completely combined and the cinnamon is evenly distributed.

mini-pumpkin-cheesecake-muffins-5

Mix together the sugars and wet ingredients.

I just used a fork.  (Shortcuts means not pulling out the mixer.)

mini-pumpkin-cheesecake-muffins-6

This time, I actually blended the sugars and pumpkin first, then added the oil and eggs, but you could throw all of it together at the same time, too.

As long as it’s all well blended.

Then you’ll gradually add in the flour mixture.  Do not overmix it, though.  It should be smooth, but if you beat it too much the muffins may be tough.

mini-pumpkin-cheesecake-muffins-7

Here are the filling ingredients.

Again:  just mixed it with a fork.

mini-pumpkin-cheesecake-muffins-8

I had considered layering the pumpkin mix, then cream cheese mix, and then more pumpkin, but I’m glad I decided against it.  This method was easier and, as long as you swirl it, the cream cheese mixture still makes it into the center of the muffin.

Fill the mini cupcake liners about 3/4 full with pumpkin batter, then dollop about a teaspoon of the cream cheese mix on top.

mini-pumpkin-cheesecake-muffins-9

Next, you’ll swirl a toothpick through the muffins, which will drag the cheesecake portion over the top and mix it into the center, too.

Don’t over do it.  You’ll want some large chunks of cheesecake, so don’t swirl it to the point of thinning it out so much you can barely see the cream cheese any more.

mini-pumpkin-cheesecake-muffins-10

Doesn’t that look AMAZING???

And they taste even better.

You can eat them right out of the oven, but I prefer them at room temperature.  They should be stored in the refrigerator, because of the cream cheese, but can be left our for a while without spoiling.  (I ate a few of the ones I’d brought into work and left out in the break room all afternoon, before putting them back in the fridge at the end of the day.  They were fine.)

I suggest serving them at room temperature, but they’re also good cold right out of the fridge.

I haven’t tried freezing them.  They were gone in a few days!  ;)

mini-pumpkin-cheesecake-muffins-11

Mini Pumpkin Cheesecake Muffins

Ingredients:
1 3/4 cups all-purpose flour
1 tablespoon ground cinnamon
1 teaspoon baking soda
1/4 teaspoon sea salt
1 (15 oz.) can pumpkin puree
1 cup granulated sugar
1/2 cup dark brown sugar, packed
2 large eggs
1/2 cup melted coconut oil, room temperature
1 tablespoon vanilla extract

Cheesecake filling:
8 oz. cream cheese
1/4 cup granulated sugar
1 large egg yolk
1 teaspoon vanilla extract

Preheat oven to 375° F (190° C).  Prepare mini muffin pans with 5 dozen mini cupcake liners.

In a small bowl, mix flour, cinnamon, baking soda, and salt with a whisk or fork.  In a large bowl, use a mixer or a fork to cream together pumpkin, granulated and brown sugar, eggs, oil, and vanilla.  Gradually incorporate the flour into the pumpkin mixture until batter is smooth.  Do not overmix.

Make the cheesecake filling by creaming together the cream cheese, sugar, egg yolk, and vanilla extract.

Fill each cupcake liner 3/4 full with pumpkin batter.  Top each with approximately a teaspoon of cheesecake filling.  Combine by gently swirling a toothpick through the batter.

Bake for 14 to 18 minutes, or until a toothpick inserted in the center comes out clean.  Let sit in pan for two minutes, then transfer to a rack to cool completely.

Store covered in the refrigerator.  Serve at room temperature.

[Note:  I use virgin coconut oil because it has wonderful taste and aroma of coconut that compliments the muffins, but you can substitute vegetable oil if you need to.]

Here is the free printable PDF:

Mini Pumpkin Cheesecake Muffins Recipe

Happy Baking!

Roaming Rosie Signature

Save

Easter Bunny Spiced Sandwich Cookies {take two}

Spiced Easter Bunny Sandwich Cookies

These Easter Bunny Spiced Sandwich Cookies were a lot of fun to hand out on Easter!

They were HUGE, though.

I totally didn’t realize how big the Wilton Comfort-Grip Bunny Cookie Cutter was when I bought it.

Still cute.  Just huge.

And since I used the same recipe I made last year, you can see how I also used a smaller cookie cutter the last time I made these Spiced Easter Bunny Sandwich Cookies.

Spiced Easter Bunny Sandwich Cookies

There are only a few ingredients, and you’re really just mixing everything together in a big bowl, so you wind up with something that looks like you spent a TON of time in the kitchen even though it’s easy to put together.

And I looooooooove making these with the spice cake mix.

Makes the finished cookie taste kind of like gingerbread men.  But not exactly.  More cinnamon-y.

Which is also why I add cinnamon to the cream cheese icing that goes in the middle of the cookies.

Spiced Easter Bunny Sandwich Cookies

Here is the butter and cream cheese all mixed together {above}.

It’s best if these are at room temperature before you start mixing them, to ensure creaminess.

Spiced Easter Bunny Sandwich Cookies

The cookie dough will be a little soft, so you need to form it into a disc, wrap it in plastic wrap, and keep it in the fridge for at least a half hour before rolling it out.

You could keep it in the fridge overnight, but it may need to sit on a counter for a few minutes before rolling, if that’s the case.

And you need plenty of flour on your prep space and on the rolling pin.  So the dough doesn’t stick.

Spiced Easter Bunny Sandwich Cookies

The cookies should be baked on parchment paper.

I use textured aluminum pans that cookies don’t stick to, so I don’t always bother with the paper if I’m feeling lazy.

Spiced Easter Bunny Sandwich Cookies

I usually mix the icing while the cookies are cooling.  But you could do it earlier if you wanted to.

The important part is to make sure the cookies are fully cooled before you add the icing.

Otherwise it’ll melt.

Spiced Easter Bunny Sandwich Cookies

You’ll want to add plenty of icing to the inside of the cookies.

Don’t be stingy!  ;)

And press down the top cookie over the icing, firmly but gently, to be sure it will stick.

Spiced Easter Bunny Sandwich Cookies

Don’t those look gorgeous?

I drew on some whiskers with melted white chocolate and added a pink M&M for a nose.

I guess I could have gone further and done eyes and ears, too, but what I was looking for was simplicity.

You don’t even really need to add the extra decoration if you don’t want to.

Spiced Easter Bunny Sandwich Cookies

And in case you missed where I posted it earlier, here’s the link to my recipe:

Spiced Easter Bunny Sandwich Cookies

Spiced Easter Bunny Sandwich Cookies

Enjoy!

Roaming Rosie Signature

Lemon Cheesecake Bars

Lemon Cheesecake Bars

It’s been awhile since I’ve made these, so I had to come up with an excuse for needing them again.

Luckily, there was a potluck party this weekend.

I used that.

But these crumb cake-like, cream cheesy bars don’t really demand an excuse.  They work great even for a random weeknight dessert.

Especially since they’re so easy to make.

{If you keep up with my blog, you know easy=awesome in my book.}

Lemon Cheesecake Bars

Anyway, these bars start with a cake mix.

And you could probably use real lemon juice/zest, but I’ve only tried it with the extract.

Lemon Cheesecake Bars

Once you make the cake mix batter that serves as both the crust of the bars and as the crumb topping, you’ll need to set aside a cup of it.

That cup of crumbs will go on top.

What you’re left with won’t look like enough to cover the bottom of a 13×9 baking dish – but it will.

It rises as it bakes, so it’s okay that it’s really thin.

Just go ahead and press it out to cover the entire bottom.

Lemon Cheesecake Bars

Here it is with the yummy cream cheese mixture spread over the cake crust.

Lemon Cheesecake Bars

And here it is with the cake-ish crumbs sprinkled over the top, just before baking.

Be careful not to let the edges brown too much.  The finished bars should still look a little moist in the center.

But even if the edges cook a little too much, you can always slice them off when cutting the bars to serve.  And, you know, throw them in a bowl and devour them by the forkful when your kids aren’t watching.

Lemon Cheesecake Bars

Lemon Cheesecake Bars

Ingredients:

1 box (18 oz.) yellow cake mix
8 oz. cream cheese, softened
2 eggs, separated
1/3 cup vegetable oil
1/3 cup sugar
1 tsp. lemon extract

Preheat oven to 350°F.

In a large bowl, combine the cake mix, one egg, and the oil until it reaches a crumbly consistency.

In a medium bowl, use a mixer to beat the cream cheese until smooth. Add in the remaining egg, sugar, and lemon extract and continue beating until fully incorporated.

Reserve one cup of the cake mix batter, and press the remaining batter into the bottom of a greased 13 x 9 inch baking dish. It will be thin.

Spread the cream cheese mixture over the cake mix batter.

Sprinkle the reserved cake mix batter over the cream cheese.

Bake for 25 minutes or until the edges are just golden brown.

Cool completely before cutting.

************

To PRINT your free PDF of this recipe click here:  Lemon Cheesecake Bars

Enjoy!

Roaming Rosie Signature

Strawberry Cream Cheese Sandwich Cookies

Strawberry Cream Cheese Sandwich Cookies

These are amazing.

Even though I probably said that about the Easter Bunny Spiced Sandwich Cookies, too.  But that’s only because it’s true.

I developed this recipe when I made the Bunny cookies because I wanted to incorporate cream cheese into both the cookie itself and the icing.  And the results were sooooooooooo good.

Strawberry Cream Cheese Sandwich Cookies

Above are most of the ingredients.  Just add a little confectionery sugar and vanilla extract for the icing, and that’s all you need.

Simple, right?

Strawberry Cream Cheese Sandwich Cookies

When you cream together the butter, cream cheese, and egg for the cookie dough, it should look nice and creamy like this.

Then mix in the cake mix and extra flour.

Strawberry Cream Cheese Sandwich Cookies

It’s a soft dough, so you’ll need to refrigerate it before rolling it out.

And if it’s still a little too soft to handle, just knead in a bit of flour.

Strawberry Cream Cheese Sandwich Cookies

Sprinkle some flour over your counter generously before rolling out the dough.

And be sure to keep the dough a little thick.  The cookies need to be thick and just-ever-so-slightly undercooked so that you can bite through them and the icing without the icing squirting out all over the place.

Strawberry Cream Cheese Sandwich Cookies

Once the cookies are cool, you can add the icing.

I usually make the icing while the cookies are cooling.

Then I like to add a little decoration to the top with some melted chocolate.  I used Wilton’s Bright White Candy Melts here to mimic the shape of the cookies.

Ain’t they just adorable??

Strawberry Cream Cheese Sandwich Cookies

Strawberry Cream Cheese Sandwich Cookies

Cookie Ingredients:

1 box (16.5 oz.) strawberry cake mix
1/4 cup all-purpose flour
4 ounces cream cheese, softened
1/3 cup butter, softened
1 tsp. vanilla extract
1 large egg

In a large bowl, use a mixer to cream together the butter and cream cheese. Add egg and vanilla and blend until fluffy.

Slowly sprinkle in the cake mix and flour and blend until combined.

Shape cookie dough into a flattened disc, wrap in plastic wrap and refrigerate for at least a half hour.

Preheat oven to 375°F. Roll out dough to a 1/4 inch thick on a lightly floured surface. (If you want to make a sandwich cookie with a cutter that is not symmetrical, then make sure you cut out an equal number of matching cookies, using both sides of the cookie cutter.)

Bake on parchment lined cookie sheets for 5 to 8 minutes, depending on the size and thickness of your cookies. They should not yet be noticeably browning on the edges. Do not overcook them or your sandwiches will be difficult to eat.

Allow cookies to rest on the hot pan for a few minutes, then remove to cooling racks. Cool cookies completely before adding icing.

Icing:

4 ounces cream cheese, softened
3 Tbsp. butter, softened
1 tsp. vanilla extract
2 cups confectioners sugar
White chocolate chips or candy melts (optional)

With a mixer, cream together the butter and cream cheese. Mix in the vanilla. Add in the sugar a half cup at a time, blending well.

Put icing in a decorating bag or a baggy with the corner cut off, and squeeze it onto the bottoms of half of the cooled cookies. Place another cookie on top of the icing and press down gently.

If desired, melt some white chocolate chips to draw a pattern on top of the cookie.

************

To PRINT the free PDF, click here:  Strawberry Cream Cheese Sandwich Cookies

Enjoy!

Roaming Rosie Signature

Easter Bunny Spiced Sandwich Cookies

Easter Bunny Spiced Sandwich Cookies

These cookies are AMAZING!

Seriously.  I love spice cookies.  And I love cream cheese.  And these are spicy and silky and gooey and sweet… *sigh*

But the most exciting part?  These can be adapted to every holiday.  Just change the shape of the cookie cutter and possibly the flavor of cake mix.

I’m drooling just thinking about it.

Easter Bunny Spiced Sandwich Cookies

Anyway, I used spice cake for these.  Cake mix cookies are usually pretty soft and these were no exception.

I also used cream cheese because I thought it would compliment the spice flavor, but I’m going to try these again with other cake flavors and still stick with the cream cheese.

Incidentally, I used both butter and cream cheese in both the cookies and the icing, and the total amount used between the two was one stick of butter and one 8 oz. package of cream cheese.  Makes things easier.

Oh, and speaking of easy – do you see that photo?  Four ingredients.  Four.  (Technically it becomes six if you add in the vanilla and sugar from the filling, but that still qualifies as super easy in my book.)

Easter Bunny Spiced Sandwich Cookies

Here are all the cookie ingredients, except for the cake mix, creamed together.

Easter Bunny Spiced Sandwich Cookies

Isn’t that beautiful?  Off to the fridge!

Easter Bunny Spiced Sandwich Cookies

Remember:  if your cookie cutter is not symmetrical (like mine isn’t), you’re going to have to use both sides of the cutter to make cookies that will fit together when the icing is sandwiched in between them.

The shape I used it available in this set and this set.

Easter Bunny Spiced Sandwich Cookies

So, cut out one cookie, then flip over the cutter to make the next one.

Easter Bunny Spiced Sandwich Cookies

You don’t want your cookies to get brown around the edges.

And yes, mine are already brown from the spices, but I mean “browned” as in crispy.

The finished cookies need to still be soft if you want to eat them sandwich-style without your icing flying out the sides when you bite into them.

Easter Bunny Spiced Sandwich Cookies

And this is the icing.  I waited until the cookies were cooled before I made it.  It only takes a minute.

Easter Bunny Spiced Sandwich Cookies

I used a baggy in lieu of a decorating bag to draw on the cookie icing.

The easiest way to fill a baggy full of icing is by placing it in a cup with the top of the bag folded open over the edge of the cup.

Easter Bunny Spiced Sandwich Cookies

Before adding the icing, I lined up the cookies to make sure I had the right number of tops and bottoms.

You can see that I didn’t add a large amount of icing to the inside of the cookies.

I was happy with this amount, but could have put more.  I had handful left over, but it also makes an awesome dip for pretzels and fruit, so I just stuck the extra in the fridge.

Easter Bunny Spiced Sandwich Cookies

Then, I melted some white chocolate chips (in the microwave for 30 seconds at a time at half power) and drew on some bunny tails.

Store the cookies in a closed container.

Oh, and this recipe makes about a dozen large sandwich cookies (so, 24 3-inch cookies).

Easter Bunny Spiced Sandwich Cookies

Easter Bunny Spiced Sandwich Cookies

Cookie Ingredients:

1 box (16.5 oz.) spice cake mix
1/4 cup all-purpose flour
4 ounces cream cheese, softened
1/3 cup butter, softened
1 tsp. vanilla extract
1 large egg

In a large bowl, use a mixer to cream together the butter and cream cheese. Add egg and vanilla and blend until fluffy.

Slowly sprinkle in the cake mix and flour and blend until combined.

Shape cookie dough into a flattened disc, wrap in plastic wrap and refrigerate for at least a half hour.

Preheat oven to 375°F. Roll out dough to a 1/4 inch thick on a lightly floured surface. If you want to make a sandwich cookie with a cutter that is not symmetrical (like in the photo), then make sure you cut out an equal number of matching cookies, using both sides of the cookie cutter.

Bake on parchment lined cookie sheets for 5 to 8 minutes, depending on the size and thickness of your cookies. They should not yet be noticeably browning on the edges. Do not overcook them or your sandwiches will be difficult to eat.

Allow cookies to rest on the hot pan for a few minutes, then remove to cooling racks. Cool cookies completely before adding icing.

Icing:

4 ounces cream cheese, softened
3 Tbsp. butter, softened
1 tsp. vanilla extract
1/2 tsp. ground cinnamon
2 cups confectioners sugar
White chocolate chips (optional)

With a mixer, cream together the butter and cream cheese. Mix in the vanilla. Add in the sugar a half cup at a time, and then the cinnamon.

Put icing in a decorating bag or a baggy with the corner cut off, and squeeze it onto the bottoms of half of the cooled cookies. Place another cookie on top of the icing and press down gently.

If desired, melt some white chocolate chips to draw on a bunny tail.

*****

To get the printable PDF, click here:  Easter Bunny Spiced Sandwich Cookies

Enjoy!

Roaming Rosie Signature