Construction Paper Mummies Halloween Craft

Halloween Construction Paper Mummy 1

Another project we had some fun with around Halloween was making some Construction Paper Mummies.

These were great for letting the girls get creative with patterns.

Halloween Construction Paper Mummy 2

While they were in school I cut out some basic body shapes out of black paper and some strips of white paper that were only about as wide as the body.

You could also let your kids do this part, if you prefer.

Halloween Construction Paper Mummy 3

Then I just handed over some glue and some googly eyes and let them go to town.

We did it on an opened Whole Foods bag, to keep the extra glue off the floor.  And they used their scissors to trim down some of the white strips too.

Halloween Construction Paper Mummy 4

My girls also decided they’d like to color the mummies, so we pulled out some colored pencils.

Ignore the golf ball, tho.  I don’t know how that ended up there.  :)

Happy Crafting!

Roaming Rosie Signature

I’m a Dirty Dinosaur Book Review

I'm a Dirty Dinosaur Book ReviewThis is a fun book to read.  It has lots of sounds, or onomatopoeias, which kids enjoy.  And you can kind of dance about while reading it, or, you know, maybe leave the dancing around to the kiddos.

Either way, this dinosaur may be dirty, but he does wind up taking a bath at the very end.  Before the bath comes along, though, the kids will have a lot of fun with the stomping and shaking and snuffing about over the pages of simple illustrations mixed with bright colors.

Real mud was used in creating the illustrations, so that’s something that would be fun to incorporate into crafts with your own kids.

Watch my video review to see inside the book:

And you can read a little more about it on my book website:

I’m a Dirty Dinosaur

Is your kid/grandkid/niece/nephew a BIG dinosaur fan?  Because then you really should check out some of these awesome titles, too:

That's Not My Dinosaur Books Great Dinosaur Search Book

The Usborne Big Book of Big Dinosaurs  Dinosaur Activity Pack

Dinosaur Excavation Kit  Dinosaur Coloring and Sticker Book 

Dinosaurs - nonfiction books   Lift the Flap Dinosaur Questions and Answers

Happy Reading!  (Roar)

Roaming Rosie Signature


Letter G: Free Alphabet Worksheets for Kids

FREE Printable Letter G Alphabet Activities Worksheets at RoamingRosie.com

If you’re new to our Alphabet Activities, please read the Introduction to the Alphabet Activities first!

Here are all of the printable PDFs for the Letter G.  They are free for home and classroom use, but please don’t sell or reproduce them.  Click on each link to download or print the worksheet.

G is for Giraffes Gazing at Gardenias

G is for Gorilla

G is for Grasshopper and Guitar

G is for Green Glitter

G is for Green Grapes

G is for Green Grass

And don’t forget to check out all of our Letter G Alphabet Activities!

Follow me on Facebook and Pinterest to see my latest posts!!

Have fun!

Roaming Rosie Signature

Letter G: Alphabet Activities for Kids

Alphabet Activites for Kids:  Letter G {Learning the Alphabet with Roaming Rosie}

Welcome to Letter G Day!

If you haven’t read the Introduction to the Alphabet Activities, you should start there.

Don’t forget to check out the Letter G:  Free Alphabet Worksheets for Kids, too!

G is for Giraffe paper craft {Alphabet Activities for Kids at Roaming Rosie}

For our construction paper letter, we made a giraffe with a letter G body, four legs with attached feet and a little head I had cut out.

I used a hole punch to make a bunch of “spots” out of brown paper, which was a lot of fun to attach.  One of these days I may even remember to buy and easier-to-use hole punch so my daughter can help me out with things like this!

G is for Guitars letter sorting paper craft  {Alphabet Activities for Kids at Roaming Rosie}

For our letter sorting, I made two guitars, and my daughter placed the lowercase Gs on one and the uppercase on the other.

I later realized this would have looked better if I’d cut out the Gs as little music notes.  Next time.

G is for Green Glitter printable worksheet {Alphabet Activities for Kids at Roaming Rosie}

Is there anything better than glitter?

Not if you’re a toddler/preschooler/anybody!

The supplies for this included glue and green glitter.  Easy + fun = awesome!

You can print the worksheet from my post Letter G: Free Alphabet Worksheets for Kids

G is for Green Grass printable worksheet {Alphabet Activities for Kids at Roaming Rosie}

For this I cut a bunch of small pieces of “grass” out of construction paper ahead of time, that my daughter attached with glue.

But later, I let her use her little scissors to practice cutting grass, which we used for a different project.

You can print the worksheet from my post Letter G: Free Alphabet Worksheets for Kids

G is for Green Goo {Alphabet Activities for Kids at Roaming Rosie}

It’s GOOOOOOOOO!

This stuff is great.  And boy, did my girls love playing with it!

It’s a little wet at first, but it dries out pretty quickly.  Either way, I don’t advise playing with it on carpet.

And you can store it in a closed container for awhile.  Depending on how much time they spend playing with it each time you take it out of the container, it might last a few weeks.

G is for Green Goo {Alphabet Activities for Kids at Roaming Rosie}

The recipe is easy, although you may have to help your Little Ones squeeze out ALL of the glue.

You’ll need:

1.  8 oz. white glue {we used 2-4 oz. bottles of Elmer’s}

2.  1 teaspoon Borax {found in the laundry detergent aisle}

3.  food coloring {optional}

4.  water

First, empty the glue into a large bowl.  Add a tablespoon or so of water to the glue bottle and shake it well to help loosen the rest of the glue.  Pour that into the bowl, too.  Stir in some food coloring.

Mix the Borax with 1/2 cup warm water until dissolved, then add it into the glue and stir.

This will produce a slimy substance within a puddle of water.  Pull the goo out of the water and knead it a bit to squeeze out some of the excess water.

It’s pretty much done at this point.  A little more water will probably leak out as the kids start to play with it, so I suggest playing on a mat or plastic tablecloth or something similar the first time, to help catch the extra water.

We stored ours for a few weeks, playing with it now and then.  After a while, it became stiffer and pieces would break off that we could then knead back into it.  But my girls enjoyed both the slimy and stiffer versions.

G is for Green Glitter Goo {Alphabet Activities for Kids at Roaming Rosie}

Green Glitter Goo is a combination of

1.  clear hair gel {from the dollar store}

2.  green glitter {sometimes available at the dollar store}

3.  a few drops of green food coloring {optional}

Mix up all that stuff in a plastic gallon-size freezer baggy {freezer bags are sturdier} and let the kids go at it.  We traced all kinds of letters and shapes in the goo.

It lasted quite a while, too, before I even worried about it leaking.  Just make sure no one jumps on it or anything, and it should last at least a few weeks, if not more.

G is for Gears  {Alphabet Activities for Kids at Roaming Rosie}

They spent some time playing with their Melissa & Doug Caterpillar Gear Toy. 

While they were playing, we talked about how gears starts with the letter G.

G is for Gardening with Grandma {Alphabet Activities for Kids at Roaming Rosie}

My girls do a LOT of gardening with Grandma.

Today we pointed out how all of those words start with G.

G is for Gnocchi with Garlic and Gruyere {Alphabet Activities for Kids at Roaming Rosie}

For dinner, we made some Gnocchi.  I love me some gnocchi.

Anyway, since it was letter G day, we made it with Gruyere and garlic.

My girls like to help with shredding the cheese – at least for a minute or two – and also with using the garlic press.

G is for Gnocchi {Alphabet Activities for Kids at Roaming Rosie}

Gnocchi with Garlic and Gruyere

Ingredients:

1 lb. gnocchi
6 oz. shredded Gruyere cheese
2 to 4 cloves pressed or diced garlic
2 tablespoons butter
2 tablespoons flour
1 cup milk

In a small saucepan, melt the butter. Add the flour and stir until smooth.
Add the garlic and let cook on low for a few minutes. Don’t let it burn because it will become bitter.

Add the milk and let it come just to a boil over medium to high heat, stirring occasionally. As soon as it starts to bubble, stir in the cheese (except for a handful) and turn to low.

Cook the gnocchi according to directions in a separate pot. Once done, drain and stir into cheese sauce.

Place in a serving bowl and top with reserved cheese.

Note: the garlic taste is strong. If you don’t like garlic, you can reduce the amount or omit it altogether.

Here is the free printable PDF of the recipe:

Gnocchi with Garlic and Gruyere

G is for Ginger Spice Cookies {Alphabet Activities for Kids at Roaming Rosie}

I loooooove spice cookies!

SO much awesome food at one time!

Anyway… we used my Norwegian Spice Cookie recipe, but added in some extra ginger in the form of ginger crystals.

I liked the taste of the extra ginger, although I’ll probably just stick to the normal recipe when I usually make them in the future.

If you want to add in a little crystallized ginger, crush it up a little and throw about a tablespoon or two in when mixing in the other spices.

And, as you can see in the photo below, we not only made traditional gingerbread men, but also some letter Gs with out alphabet cookie cutters.

G is for Ginger Spice Cookies {Alphabet Activities for Kids at Roaming Rosie}

I’d love for you to share if you’ve done any of these projects with your little ones!

Don’t forget to follow me on Facebook and Pinterest to see all of our latest crafts and recipes!

Have fun!

Roaming Rosie Signature

Elsa’s FROZEN Cracked Ice Easter Eggs

Elsa's FROZEN Cracked Ice Easter Eggs

We had actually purchased a regular FROZEN Easter egg dye kit from the supermarket, and we did use it.

We used the egg wraps and cardboard Olaf egg stands and Elsa and Anna stickers….

But we made our own version of FROZEN Easter eggs, too.

We’ve made these cracked eggs before, and called them dinosaur eggs, but this year we called them Elsa’s Cracked Ice Easter Eggs.

Because we can never have too much Disney in our lives.  :)

Elsa's FROZEN Cracked Ice Easter Eggs

The process is surprisingly easy:

1.  Make hard-boiled eggs.  Cool completely.

2.  Crack egg shell all around by gently rolling the egg on the counter with just enough pressure to cause cracking without causing the shell to detach or the egg inside to break or split.  (Admittedly, the eggs my 3yo did definitely split through – but don’t worry, they’re still totally edible.)

3.  Put the eggs with their cracked shells into a plastic baggie.  Generously add food coloring in your color choice (blue is best for “ice”) until the shell is covered in the food coloring.

4.  Allow to sit for a few minutes.

5.  Dump the colored eggs, along with their still-attached shells, into a mesh colander and rinse with cool water in the sink until the excess food coloring is washed off and the water runs clear.

6.  Splash the eggs in the colander with a little white vinegar (optional) to help the color set.

7.  Gently peel the eggs.

You’re done!  Except that I usually rinse them again, just to make sure I’ve actually removed all of the little shell pieces.

Store them in the refrigerator and eat them within 4 or 5 days for the best freshness.

Elsa's FROZEN Cracked Ice Easter Eggs

Peeling off the shell and revealing the cracked pattern underneath is really fun for kids.

My 3yo didn’t want to touch the eggs, but watched with great interest as her 5yo sister and I peeled them.

Even the inside of the removed shell looks amazing!

And they taste just like regular hard boiled eggs.  The food coloring doesn’t change the taste or anything.  I’ve eaten them just like that, with a little salt, for breakfast, and also made them into deviled eggs.

Elsa's FROZEN Cracked Ice Easter Eggs

Have fun!

And check out some of my other Easter crafts and recipes:

Easter Empty Tomb Resurrection Rolls

Top 50 Non Candy Easter Basket Gift Ideas

50 Easter Things to Make and Do

Easter Resurrection Garden

Easter Bunny Spiced Sandwich Cookies

Roaming Rosie Signature

Easter Resurrection Rolls Recipe

How to Make Easter Resurrection Rolls

I’ve seen Easter Resurrection Rolls done a lot of different ways.

They’ve been made out of cookies, biscuits, crescent rolls…

And when I decided to make some with my girls this year, I went with crescent rolls for a couple of reasons.  For one, I like the taste.  They also pair well with cinnamon.  And I felt they were a better representation of the cloth that Christ was wrapped in.

The point of the resurrection rolls is to demonstrate to kids how Jesus was buried in the tomb, but when they opened the tomb, it was empty because He had risen.  And the marshmallow melts while it bakes, but not until it gives the rolls support so the dough doesn’t flatten.  Then the rolls are empty inside.

So, the marshmallow represents Jesus, rolling it in the butter and the cinnamon sugar mixture represents the oils and spices that were used to preserve dead bodies back in His day, and the roll represents the tomb.

Though, I kinda explained it as the rolls representing the cloth that Jesus was wrapped in.  Before we baked it.  Then the cooked rolls were the tomb which was empty.

It’s not an exact science.

But it is an incredibly delicious way to incorporate Jesus’ story into some Easter baking!

How to Make Easter Resurrection Rolls

There are only a few ingredients, so it’s an easy baking project to throw together in between other activities.

How to Make Easter Resurrection Rolls

Rolling the marshmallow in melted butter and spices and wrapping it in dough CAN be a tad messy – but that’s what makes it interesting and fun.

I used a fork to turn it in the butter and scoop it into the cinnamon, but you still gotta get in there with your fingers to wrap it in the dough.

How to Make Easter Resurrection Rolls

Try pinching shut all the openings as best you can, but don’t worry if you miss a few.

Even if the rolls deflate a little, they’re still all hollow inside once baked.

Oh, and I sprinkled our extra cinnamon sugar over the rolls before baking.  It adds a nice touch.

How to Make Easter Resurrection Rolls

Technically, I should have used two pans.

I didn’t feel like it.

Some of our rolls stuck together, but that really wasn’t a big deal.

A few leaked melted marshmallow all over.

Again:  not a big deal.

But you know what WAS a big deal?  The awesome taste.

Seriously.  These things did not hang around long.

How to Make Easter Resurrection Rolls

And, of course, to go along with this project, we also read a book about the Easter Story.

Here’s one more fun graphic, which shows all the steps together:

How to Make Easter Resurrection Rolls

Easter Resurrection Rolls

Ingredients:

2 cans (8 rolls each) crescent rolls
16 large marshmallows
4 tablespoons butter, melted but cooled
1/4 cup sugar
1/2 teaspoon cinnamon

To assemble the resurrection rolls, lay out the crescent rolls and separate them.

In a small bowl, combine the sugar and cinnamon.

Dip a marshmallow in the melted butter, rolling it around to cover it completely. (The butter can be warm but not very hot. You don’t want to melt the marshmallow.)

Then roll the buttered marshmallow in the cinnamon and sugar mix.

Place the cinnamon marshmallow in the center of a roll and wrap the dough around it, sealing any openings.

Put the rolls on a baking pan with raised sides, sprinkle with any extra cinnamon and sugar if desired, and bake according to package directions for the rolls.

Allow the rolls to cool on a wire rack before serving to children. Remember that the melted marshmallow inside will be very hot when they first emerge from the oven.

**********

To print the PDF of the recipe, click here:

Easter Resurrection Rolls

Enjoy!

And check out our Resurrection Garden, too:

Easter Resurrection Garden

Roaming Rosie Signature

Book Review: 50 Easter Things to Make and Do

50 Easter Things to Make and Do

This craft book, 50 Easter Things to Make and Do, is a really great thing to have on hand in springtime.

The title may say “Easter” and it’s certainly focused on Easter-type things, but it’s got a lot of wonderful craft ideas that are generally themed around the season of spring.

And while the crafts themselves are super cute, there are other things about the book that I also absolutely LOVE.

For example, it has the spiral binding, so it lays flat – which is handy when you’re looking from it to your project and back again.

Plus, the projects themselves have step-by-step instructions, which is great for showing children the progression of the craft from start to finish.

It’s also a great size to fit inside an Easter basket – which is how my daughter will be receiving it this year.  And since, like I mentioned, many of the projects are great to do all throughout spring and not just for Easter, we’ll be working on some of these adorable crafts all through the season.

You can get a better look at the book in my video review:

The book is out of print on my Usborne Books & More site, but you can still find used copies on Amazon.

Happy Crafting!

Roaming Rosie Signature

Save

Victorian Valentines

Victorian Valentines

This was such a cute project that I just HAD to share it – even though Valentine’s Day has already past.

I found a couple of packs of old fashioned looking stickers {kinda like this or this or this} while browsing scrapbooking supplies and I just couldn’t pass them up.

I wasn’t sure what to do with the stickers at first, but when I pulled out the heart shaped doilies for Valentine’s Day, I realized they would be a perfect pair!

Thus were born our “Victorian Valentines!”

Victorian Valentines

We cut out some pink and red hearts from construction paper to fit within the “lace” and glued them down.  Then they added stickers to the heart.

We kept these to use as decorations, but if you wanted to give them as actual Valentines, there’s plenty of room on the back to write a nice message!

Happy Crafting!

Roaming Rosie Signature

Letter F: Alphabet Activities for Kids

Alphabet Activities for Kids - Project Ideas - Free Worksheets - at RoamingRosie.com

Welcome to Letter F Day!

If you haven’t read the Introduction to the Alphabet Activities, you should start there.

Don’t forget to check out the Letter F:  Free Alphabet Worksheets for Kids, too!

F is for Flamingo {Alphabet Activities at RoamingRosie.com}

This F is for Flamingo paper craft is really one of my favorite letters.

It must be a Floridian thing.  I have a special place in my heart for flamingos.  :)

Anyway, to make this, I cut out a lowercase F ahead of time and some feet, wings, and a beak, then gave my daughter those pieces and a googly eye and let her assemble the bird.

I also cut out that cute itty bitty flamingo in the bottom corner.  Just ’cause.

F is for Fish Letter Sorting  {Alphabet Activities at RoamingRosie.com}

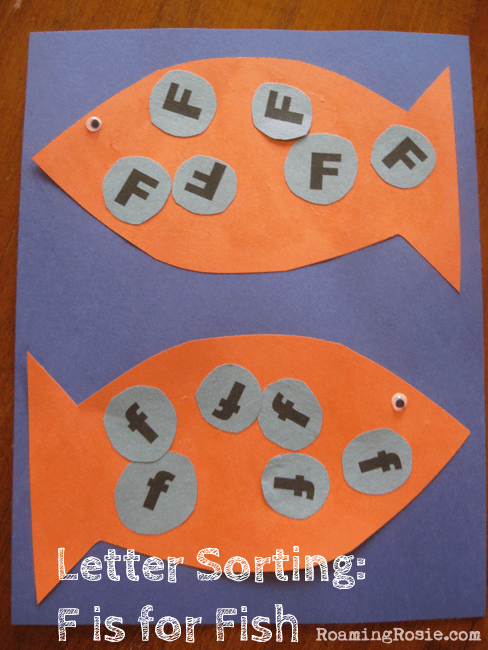
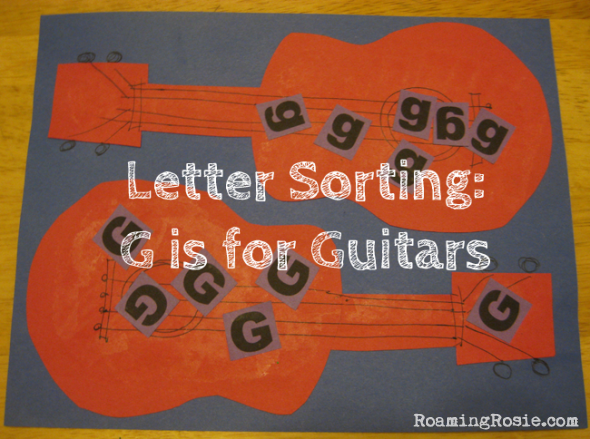
For our letter sorting activity, I cut out two fish and cut out the letters on light blue paper in the shape of circles to represent bubbles.

F is for Finger Flower Puppets  {Alphabet Activities at RoamingRosie.com}

These flower fingers were inspired by a similar idea I found in a craft book dating from my childhood.

What I did was cut out some green paper to resemble the shape of uppercase T.  That “top” of the letter T would get wrapped around our fingers and the rest would function as the flower’s stem.

I also cut out some flower and leaf shapes, and we glued them all together to form our flowers.  Then, after letting the glue dry for a few minutes, we taped that “top” part of the T that I mentioned into a circle so that we could slide that part over our fingers.

Of course, the flower petal part of our finger puppets were a little heavy.  They drooped a bit, but, really, the girls didn’t mind.  It was still a lot of fun for them.  To fix that particular problem, though, you could use thicker paper (card stock instead of construction paper) or add a Popsicle stick or something for support.

F is for Footprints  {Alphabet Activities at RoamingRosie.com}

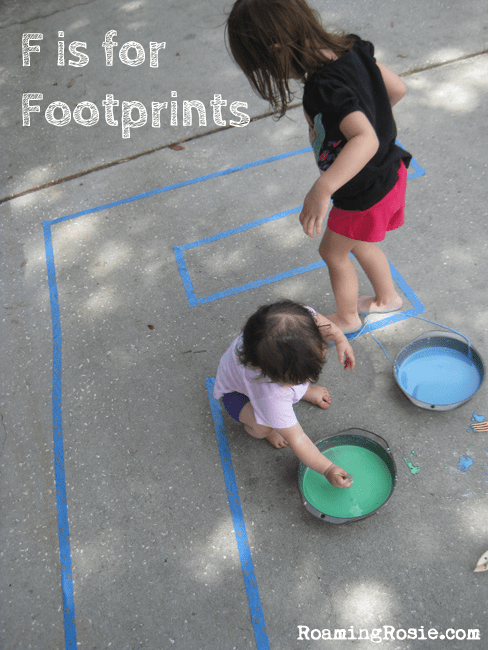
Now, this F is for Footprints project was a really, really huge hit.

And super simple.

One of my favorite combinations.  :)

Cornstarch Paint  {Alphabet Activities at RoamingRosie.com}

To make the paint for the footprints, you simply combine 1/2 cup cornstarch with a 1/2 cup of water, and mix it together with a fork.  Then drop in a bit of food coloring.

{If you’re using a nonstick pan to make the paint, be sure to mix it with a plastic fork.}

I made two colors in two cake pans, because the cake pan was big enough to hold my kids’ feet.  But they were both pretty young the first time we did this – so be sure to check your pan/bowl against your kid’s feet.

F is for Footprints

Anyway:  throw the cornstarch paint container out onto a driveway or sidewalk or deck, let the kids step in the paint and then trek colorful footprints everywhere.

And to really highlight the letter of the day, I made an outline of a giant F on the driveway with painters tape.  The girls had fun filling the F with messy footprints.

Oh:  and you may need to stir the paint occasionally.  That’s why you see my daughter carrying around forks in the photo.  The paint IS – technically – edible.  But I wouldn’t suggest testing out the taste.  Ick!

F is for Foam Frames

Okay, okay … this was kind of cheating.

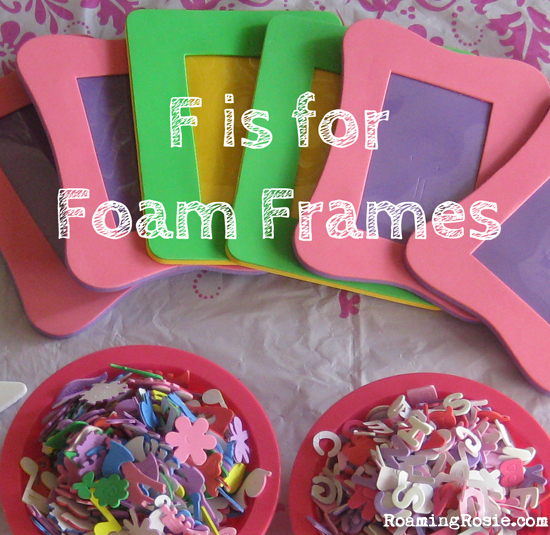
We had some foam frames and foam stickers left over from a birthday party craft … so I just let the girls go ahead and make another frame apiece.

I guess you could get really into the alphabet thing and just stick letter Fs all over the frame, but we kinda just added this into our activities as a fun little project, putting their names at the bottom of the frame and going to town with the flower, animal, and instrument stickers over the rest.

Another option, however, would be to just use the foam flower stickers.  Which would also look nice.

F is for Feathers {Alphabet Activities at RoamingRosie.com}

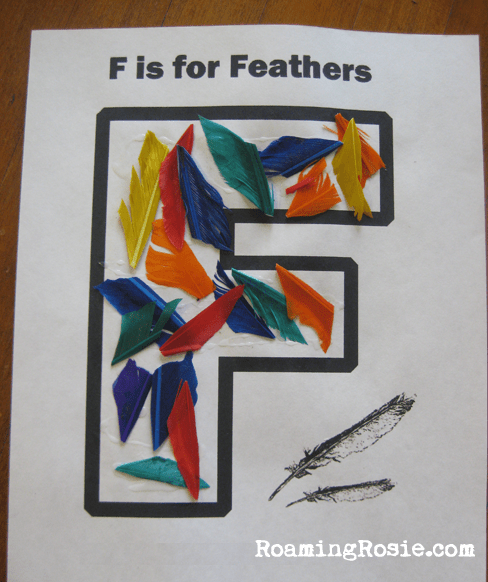
This worksheet was really fun for them.

I picked up some feathers at my local dollar store, but they were kind of long.  Longer than the letter F if you laid them horizontally on the paper.  So I cut them into pieces for this project.

That may have something to do with my OCD, though.  You could also just use 3 feathers to make an F.

This is one of the free printable worksheets I made, which you can download at Letter F:  Free Alphabet Worksheets for Kids.  If you have feather stickers or a stamp, you could use that instead, but I find that the texture of the craft feathers is part of what made it really interesting.

F is for Florida's Flag  {Alphabet Activities at RoamingRosie.com}

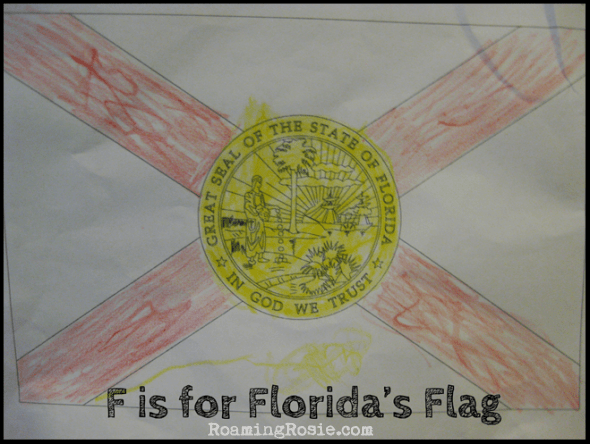
As you may have noticed, we live in Florida.

So, coloring Florida’s Flag was a natural for Letter F Day.  But you could also do Finland, Fiji, and/or France instead, if you preferred.

Either way, you can get some printable flag coloring pages at World Free Printable Flags, including the Florida Flag.

F is for Letter F Sound Box {Alphabet Activities at RoamingRosie.com}

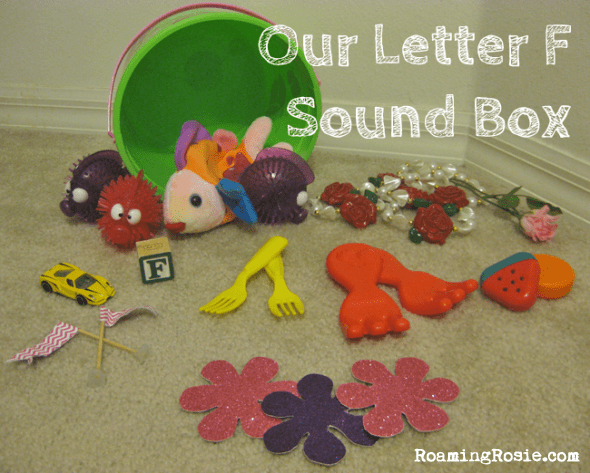
We don’t actually make Sound Boxes for every letter.

We probably should, but the reason we did it for F is because F is a big letter for us.  It’s the first letter of my oldest daughter’s name.  So it’s a pretty exciting letter in our house.

Our F Sound Box included flowers, forks, fruit, fish, an F alphabet block, some paper flags, and a Ferrari.

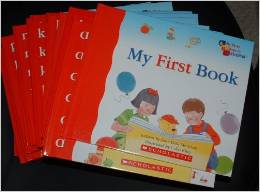
Our Sound Box was inspired by the “Sound Box” books the series by Jane Belk Moncure.  They’re kind of hard to find now, so I’m glad I picked up a couple when I did years ago, although you can still sometimes find them on Amazon:

Sound Box Books by Jane Belk Moncure

F is for Food  :)

F is for Fish French Toast {Alphabet Activities at RoamingRosie.com}

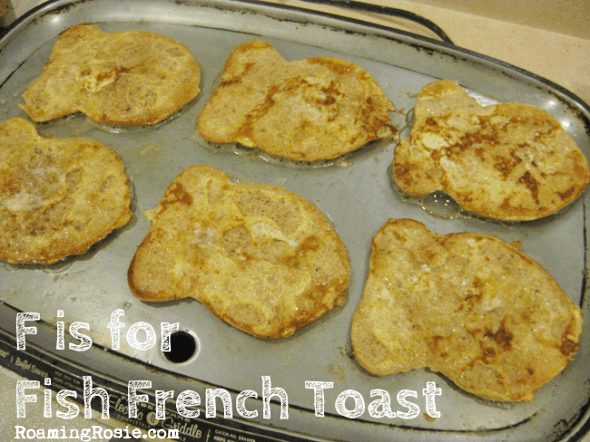
We used the Pepperidge Farm Goldfish Honey Whole Wheat Bread.  You COULD get it on Amazon, which is what I linked to, but it’s kinda seriously pricey, so I suggest checking your local stores first.  I only include the link because it helps me to visualize what I’m looking for if I can see it first.

What I actually suggest is – if you can’t find the Goldfish bread in the store – just use fish shaped cookie cutters to make your own fish shaped bread, kind of like when I made Fall French Toast in the shape of Autumn leaves.

F is for Fruit and Franfurters {Alphabet Activities at RoamingRosie.com}

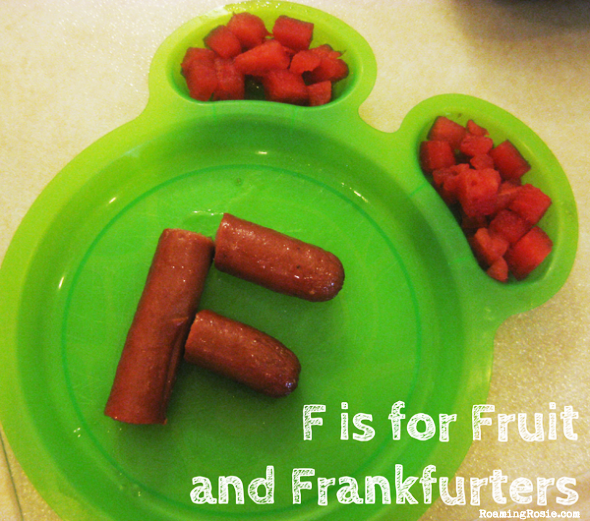
This was a simple lunch.  I warmed up some frankfurters {turkey dogs count!}, sliced them into three pieces, and formed an F with the pieces on the plate.

Then I added some fruit.  A mixture of fruit would have been nice, but the only fresh fruit we had that day was watermelon, so that’s what we ate.

F is for Fish Sticks and French Fries {Alphabet Activities at RoamingRosie.com}

Since we did so many activities for Letter F Day, dinner was also {like lunch} simple.

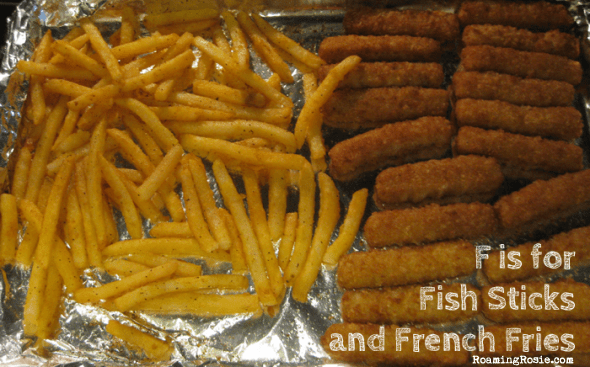
I threw some frozen french fries and frozen fish sticks on a cookie sheet and baked them up while I made a salad.  {A “fresh” salad??}

Anyway, this particular meal is always a hit with my kids, but before we ate it, I made sure to make a game out of searching for all of the letter Fs on the boxes of the fries and fish sticks.

F is for Fairy Fudge {Alphabet Activities at RoamingRosie.com}

This was a pretty dessert, but also super, super sweet.

Why is it called “Fairy Fudge?”  Well, I named it for Fairy Bread, which is a slice of white bread covered with butter and colorful sprinkles.  But what we did here was make white chocolate fudge and cover IT with colorful nonpareil sprinkles.  My kids LOVE sprinkles.

The fudge pictured above was from a rather unsuccessful recipe {waaaay to sweet and not the right texture at all}, but I’ve come up with my own recipe for Vanilla Fairy Fudge which is SO much better!

Vanilla Fairy Fudge Recipe

Okay – that’s it for Letter F Day, except for my Letter F:  Free Alphabet Worksheets for Kids, of course!

And don’t forget to follow me on Facebook and Pinterest to see my latest posts!

Have fun!

Roaming Rosie Signature

“Chalkboard” Valentine’s Day Hearts

"Chalkboard" Valentine's Day Hearts Activity for Kids

This is a fun little activity I did with my girls to celebrate Valentine’s Day.

I cut some hearts out of black construction paper and drew on them with white and silver colored pencils to show my girls how it looked.

The fun mini hearts look like little chalkboards and my girls were delighted with how the light colors looked so vibrant on the dark hearts.

They spent quite a while drawing on the hearts and experimenting with different colors {though mostly after I took the photograph}.

The picture shows just a few of the hearts, but one of the things I also made sure to do was to cut out hearts in varying sizes.

And next time I’ll probably let them help me cut them out, but this time they were too busy coloring.  :)

Roaming Rosie Signature