Halloween Spider’s Eggs Brownies

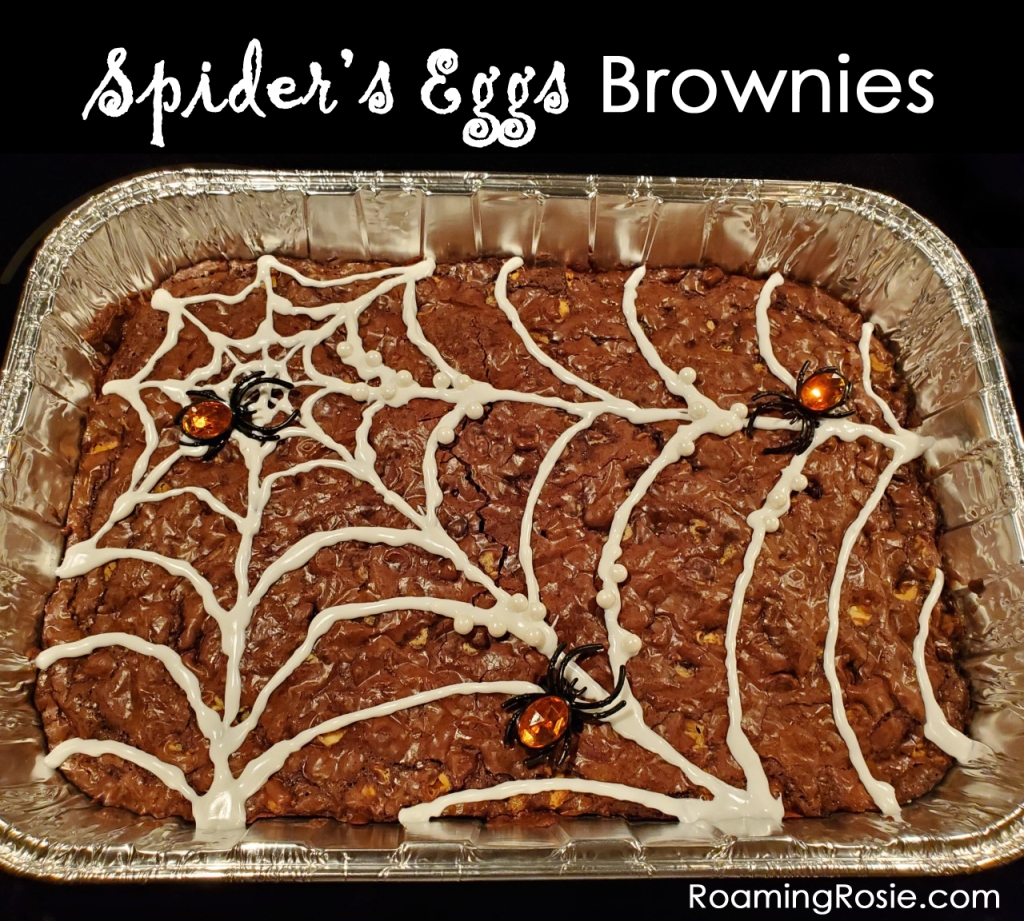
Roaming Rosie Halloween Spiders Eggs Brownies

This is the type of Halloween dessert I love – satisfyingly spooky but quick to put together. Because let’s face it, I make a lot of Halloween-themed meals all month long, and I can’t spend hours and hours on each one!

These Spider’s Eggs Brownies were constructed with an easy shopping list and can be made ahead of time. In this case, I brought these brownies to a potluck. They’re really easy to travel with (don’t forget something to cut them!) but you could always make them in a more permanent pan just as easily.

Here’s the shopping list:

1 box brownie mix (plus ingredients listed on box)
1 cup white chocolate chips
1 tube white cookie icing
1/4 cup sugar pearls
1 package Halloween toy spider rings
1 disposable foil cake pan (optional)

(These items should be readily available in your local grocery/big box/dollar store around Halloween, but if they’re not, try the links posted above.)

As you can see from the photos above, I wanted to fill these brownies full of delicious spider eggs! Mixing in those white chocolate chips really helps to highlight this.

Instructions:

  1. Make the brownies according to the instructions on the box.
  2. Mix the white chocolate chips into the batter.
  3. Pour batter into pan of choice and bake according to instructions on the box.
  4. Allow cooked brownies to cool completely.
  5. Draw a spider web on top of cooled brownies with cookie icing.
  6. Before icing dries, sprinkle sugar pearls over the icing so they stick.
  7. Add in a few spider rings by pressing them into the top.
  8. Freak out your friends and coworkers!

I’ve found brownies to be a pretty safe bet for satisfying the greatest amount of people at a party. I do have a tried-and-true homemade brownie recipe, but if I’m in a rush, I mix a few chocolate chips into a box mix.

And, if it’s Halloween, I spookify it.

Share some of your brownie creations with me on Facebook!

Happy Baking!

Lemon Poppy Seed Bread

We’re into summer now but I’m still enjoying this spring treat. And really, who says we can’t eat Lemon Poppy Seed Cake all year anyway?

Of course, I’m a sucker for lemon flavored desserts (hehehe, but no seriously, I am).

That’s why I’ve made things like:

Lemon Cheesecake Bars

Lemon Oatmeal Cookies

Easy Iced Lemon Cake Mix Cookies

and even Lemon Scented Play Dough

However, I recently realized that I’d never actually made my own lemon poppy seed bread or muffins. So I went on a search.

Often I like to play around with food and develop my own recipes, but in this case I found one that I really loved, so the only actual change I made was doubling (okay, maybe it was double-and-a-halving) the icing.

I know the photos look all crumbly, moist, and delicious but, oh my, I wish you could smell it! Yum.

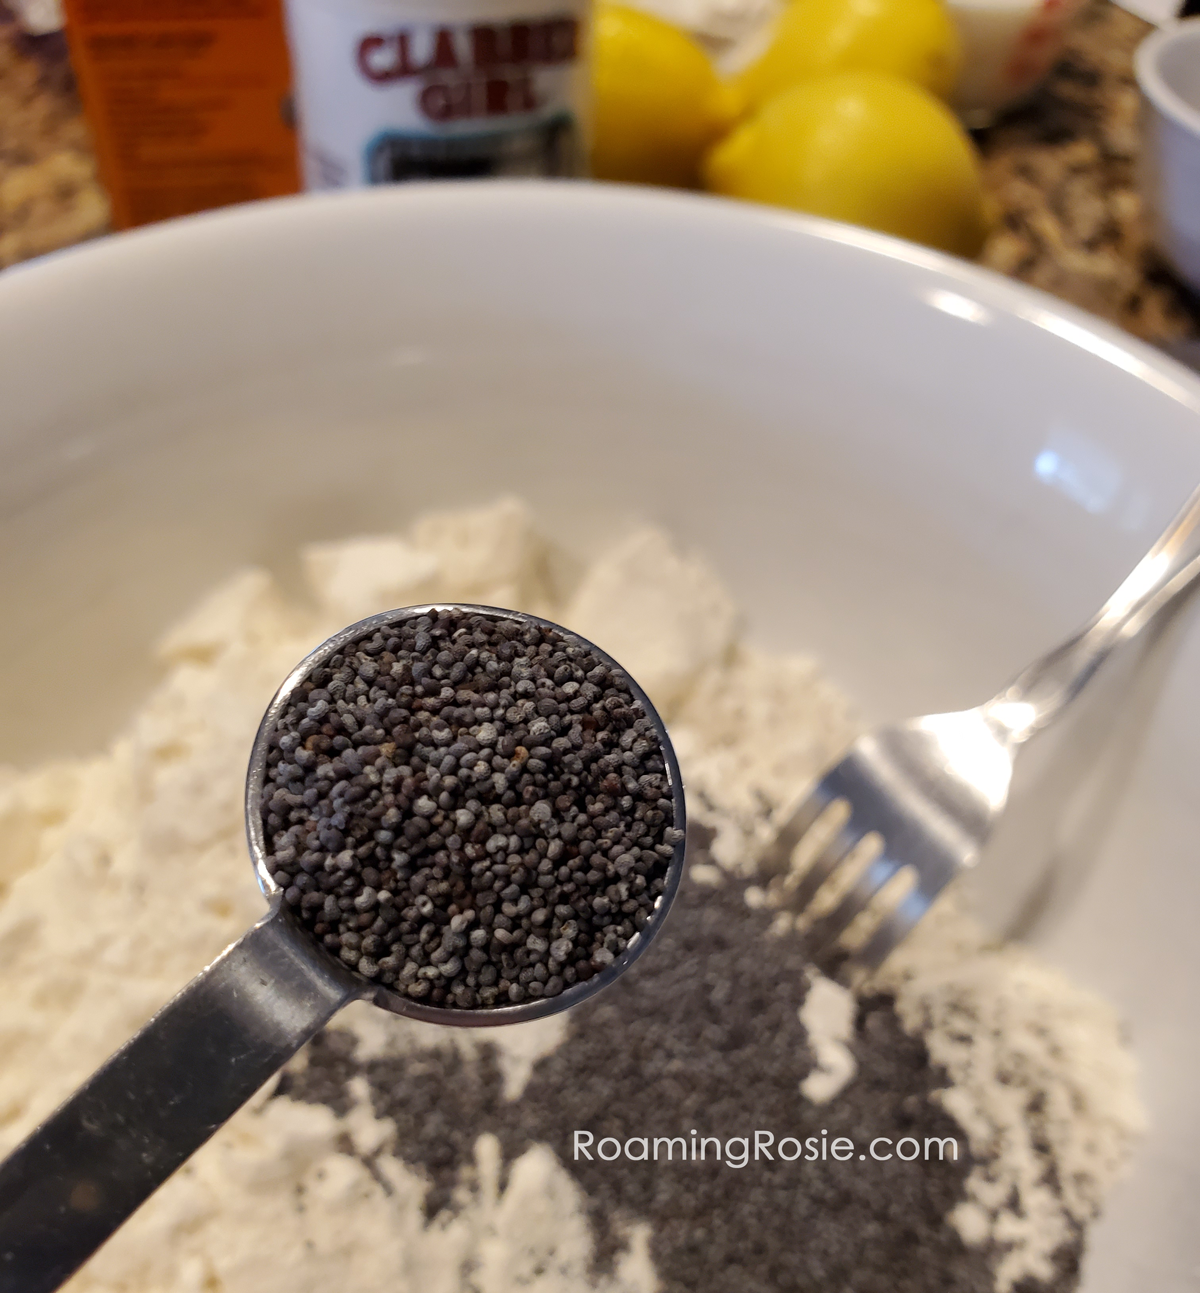
Look at all those incredible ingredients coming together.

*drool commencing*

And then you pull this gorgeous creation out of the oven…

I actually had some waxed paper under that while I drizzled the icing allllll over it. (Just a tip. Much easier to clean.)

Gorgeous, no? Yes.

The recipe is Lemon Poppy Seed Bread from Sally’s Baking Addiction. If you’re a fan of lemon breads and desserts like me, I recommend checking it out!

Okay, can’t stop looking at the pretty bread. One more pic…

If you have any other lemon treats you enjoy and recommend, I’d love to hear about it!

Happy Baking!

Spiderweb Cinnamon Rolls

spiderweb cinnamon rolls

This is one of those recipes that’s so stinkin’ cute but also super easy.

Halloween is a time of year when we eat a lot of “fun” foods.

(Yeah I said “time of year.”  It ain’t just a single day in this family – we celebrate for at least a month … but I’m always up for something spooky.)

So I like to spruce up meals and snacks when I can.  Which means some are quite elaborate and others… well, are like this!

This dish that has essentially two ingredients:  a can of cinnamon rolls and a bag of chocolate chips.

spiderweb cinnamon rolls 2

To get this platter of spookiness, bake the cinnamon rolls according to package directions and place the finished rolls in a circle on a plate.

Melt some candy melts or chocolate chips.  Candy melts are smoother but I didn’t have any on hand.  If you melt the chocolate chips in the microwave, do it at half power 30 seconds at a time.

Put the melted chocolate into a piping bag or a baggie with the corner cut off, and squeeeze out the chocolate into a big and little circle for a spider’s body, along with eight legs, onto one of the rolls.

Then draw a web over the rest.  I did this with the straight lines first and then spiraled around to make it look like a web. And don’t worry if it doesn’t look perfect – it’ll be gobbled up soon anyway!

Happy Early Halloween!

Roaming Rosie Signature

Jack Skellington Rice Krispies Treats

I love me some Nightmare Before Christmas.

So Jack Skellington recipes are kind of a given.  This Halloween treat is made with a Rice Krispies base and decorated with candy melts.  The pattern in black and white is striking and it really pops on a platter.

It’s a fun project to make, with (or even without) kids.

To start, make a batch of Original Rice Krispies Treats (links to recipe from Kellogg’s site). I often throw in a splash of vanilla extract to the melted marshmallow mixture for a nice touch of extra flavor.

Once you have your pile of sticky cereal, spread it out on a large pan or cookie sheet that’s been prepped with non-stick spray.  Flatten it with your fingers (spraying them with non-stick as well) until it’s as smooth as you can get it.

Then cut out circles with round cookie cutters like these or these, or whatever else you have lying around.

Dip the circles in a shallow bowl of melted white candy melts, and shake them a bit to make sure the candy isn’t too thick before you set it back down to set.  I recommend doing all this on top of waxed or parchment paper.

Instead of the white candy melts, you could also use an icing like this one that I made for my Chocolate Almond Mummy Cookies.

Next, melt some black (or dark chocolate) candy melts in a piping bag (or a baggie with the corner snipped) and draw on those smiling faces.

It’s great because the faces are easy to make.  A couple of large eyes, small nose dots, and a string with lines for teeth and voila!

jack skellington rice krispie treats 3

This was the display I brought into work.  I loved the way the Jack Skellington faces stood out.  Actually all of the treats pop – even in the recycled take out containers!

Yummy AND cute!

The spiderwebs on the right are tiny Peppermint Patties.  You can see the larger version of them that I did on this post.  Another super simple recipe that makes a big visual impact – my fave.

And for the pumpkins in the middle, I tried out something new for my kids.  Specifically the youngest who is obsessed with Nutella.

I took some silicone pumpkin molds (not really sure which store I picked them up at) and coated the inside of the mold with some melted orange candy melts.  Once that set, I put a tiny scoop of Nutella into the center of the mold, then drizzed more of the orange candy melts over to cover the Nutella.

The pumpkins took a little more time and effort to get right, but were definitely worth a try.  Plus, they’re filling so a few go far in a party setting.

jack skellington rice krispie treats 2

Sooo much sweetness in this post!

I love it though.

Of course, this is also why I make so many savory Halloween dishes – to balance out the sugar!

I’m not sure what Halloween is going to look like this year, when it comes to trick-or-treating or parties, but I sure know one thing:  we’ll have some eerily festive food.  ;)

Follow me on Pinterest for more recipes!

Happy Early Halloween!

Roaming Rosie Signature

Mint Chocolate Cheesecake Bars

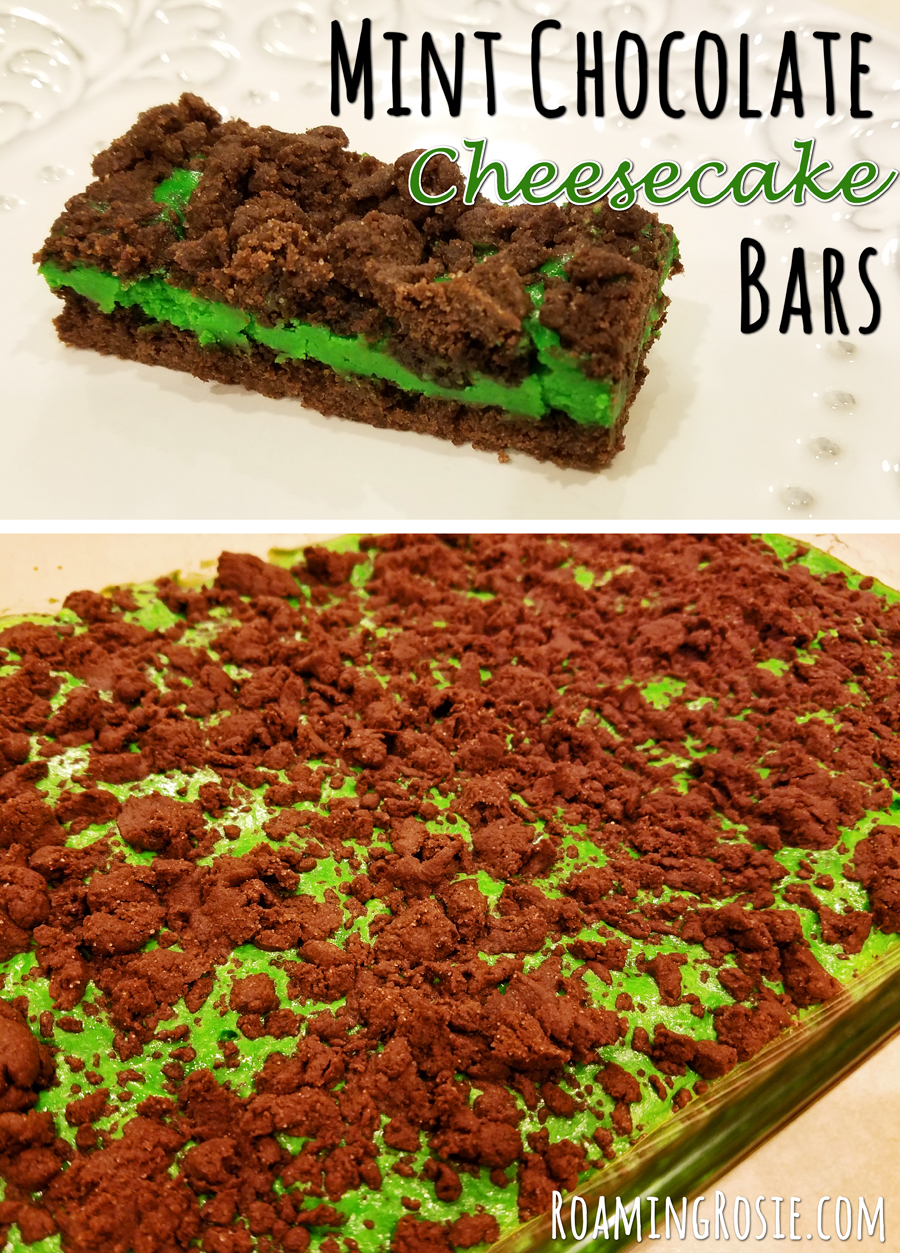
Mint Chocolate Cheesecake Bars

Annnnnd….. now that it’s almost Easter, I’ve noticed that I’ve completely forgotten to post our St. Paddy’s Day dessert.  So here it is!  ;)

We made these Mint Chocolate Cheesecake Cookie Bars based off of the Lemon Cheesecake Bars that I love so much.  But we made these green (and mint) to celebrate St. Patrick’s Day.

They were a hit with both my kids and my coworkers, so I may try other variations in the future, since the recipe is flexible.

Mint Chocolate Cheesecake Bars 2

The ingredients are pretty easy to pull together, especially if you already happen to have cream cheese on hand.

The base for it is a box of cake mix, which makes it a speedy dish to throw together.

Mint Chocolate Cheesecake Bars 3

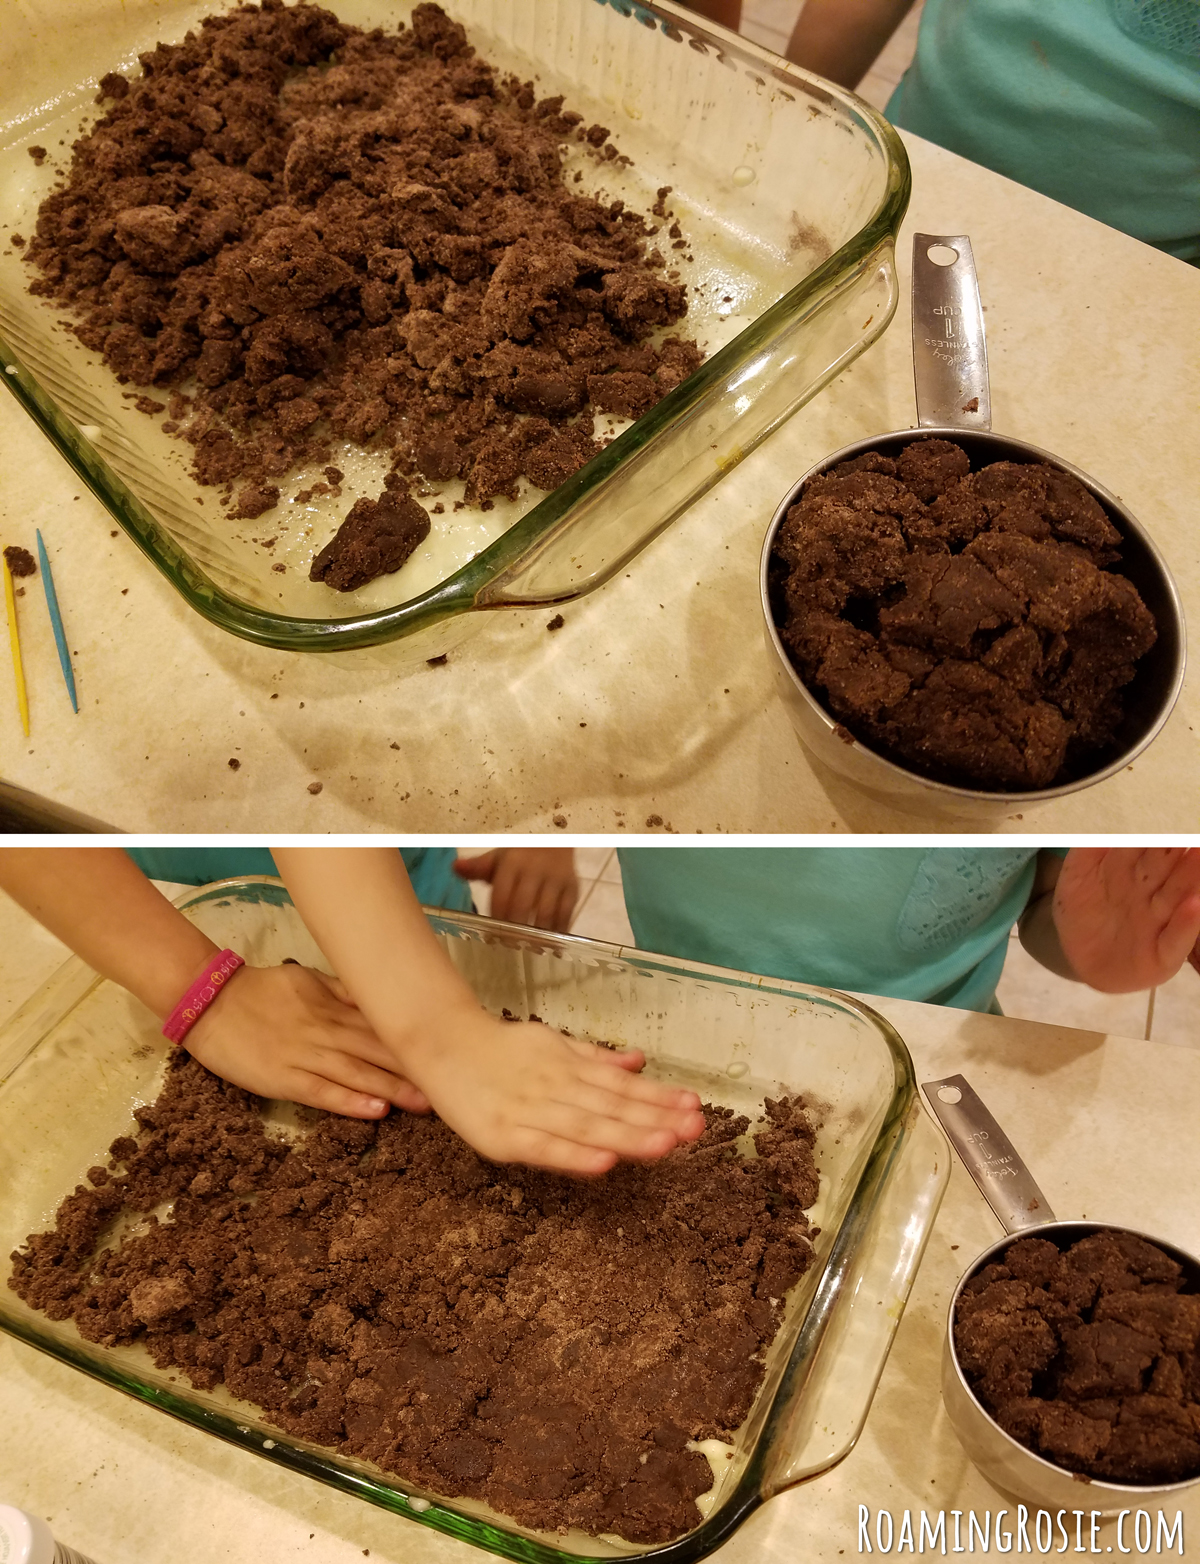
The crust will seem a little dry at first, but massaging the ingredients together will help.

If your kids like to get messy, this is a great job for them to help with.

Mint Chocolate Cheesecake Bars 4

You’ll reserve some of the mix for the crumbles that go over the top, but the rest gets pressed into the bottom of the pan.  This is also a good task for little hands.

The crust will seem very thin but don’t worry, it will rise a little as it bakes.  Just be sure you spread it out to cover the entire bottom surface of the pan.

Mint Chocolate Cheesecake Bars 5

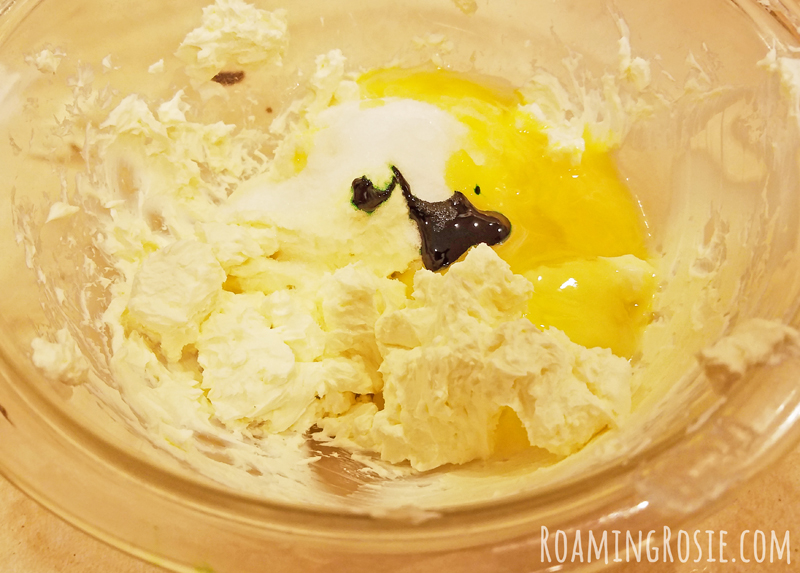
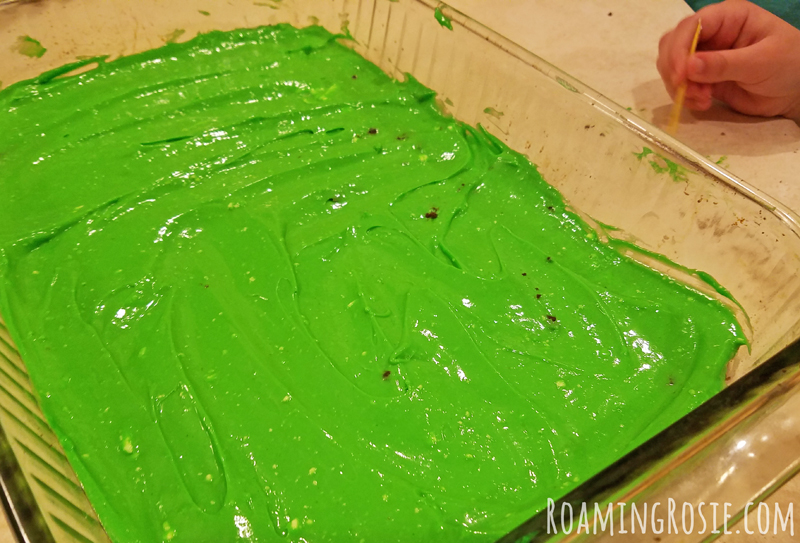
I add the food coloring to the cheesecake ingredients before blending, so the mixer brings it all together evenly.

The more you use the deeper the color will be.  I was going for bright and bold because it was a themed dessert for St. Patrick’s Day, but if you’re going for a subtler minty look, start with only a little color.

Mint Chocolate Cheesecake Bars 6

You can see tiny chunks of cream cheese in my cheesecake mixture because it wasn’t fully at room temperature when I mixed it.

This is okay, though.  It will still bake up just fine.

Mint Chocolate Cheesecake Bars 7

Sprinkle the crumbles over the top for a fun look.  They also add a nice texture to the finished dessert.

Mint Chocolate Cheesecake Bars 8

You can technically cut them into any shape you’d like, but I favor the rectangles.  I cut it twice lengthwise, and then cut those three rows into pieces about an inch thick.

This gives me 30 pieces, which makes it a great recipe for sharing!

Don’t eat these when they first come out of the oven and are still warm – chill them for the best results.  They can be enjoyed at room temperature too, but because of the cream cheese, you’ll want to be sure to store leftovers in the refrigerator.

Mint Chocolate Cheesecake Bars 9

Mint Chocolate Cheesecake Bars

Ingredients:

1 box chocolate cake mix (15 to 18 oz.)
2 large eggs, separated
1/3 cup vegetable oil
1 package (8 oz.) cream cheese, softened
1/3 cup sugar
1/2 teaspoon peppermint extract
Green food coloring, gel or liquid

Preheat oven to 350°F (180°C).

In one bowl, combine the cake mix, one egg, and the vegetable oil.  You may need to use your fingers to help it all come together.

Spray a 13” x 9” baking pan with nonstick spray.  Reserve about 3/4 cup of the chocolate crumb mixture for later use, and press the remaining batter into the pan.  It will be thin but should cover the entire bottom of the pan.

In another bowl, beat the cream cheese with an electric mixer until smooth.  Then mix in the other egg, the sugar, extract, and a little food coloring.  Beat until smooth, adding more food coloring if needed until you reach your desired color.

Spread the cream cheese mixture over the chocolate crust in the pan.  Sprinkle the reserved crumb mixture evenly over the cream cheese.

Bake for 25 to 28 minutes, or until a toothpick inserted into the center comes out clean or with dry crumbs.  Cool on a baking rack until it reaches room temperature, then slice.  Make two cuts lengthwise and then cut into ten pieces across to make 30 pieces that measure approximately one by three inches.  Cover and refrigerate overnight before serving for best results.

**********

For the free printable PDF version of this recipe, click the link below:

Mint Chocolate Cheesecake Bars

Happy Baking!

Roaming Rosie Signature

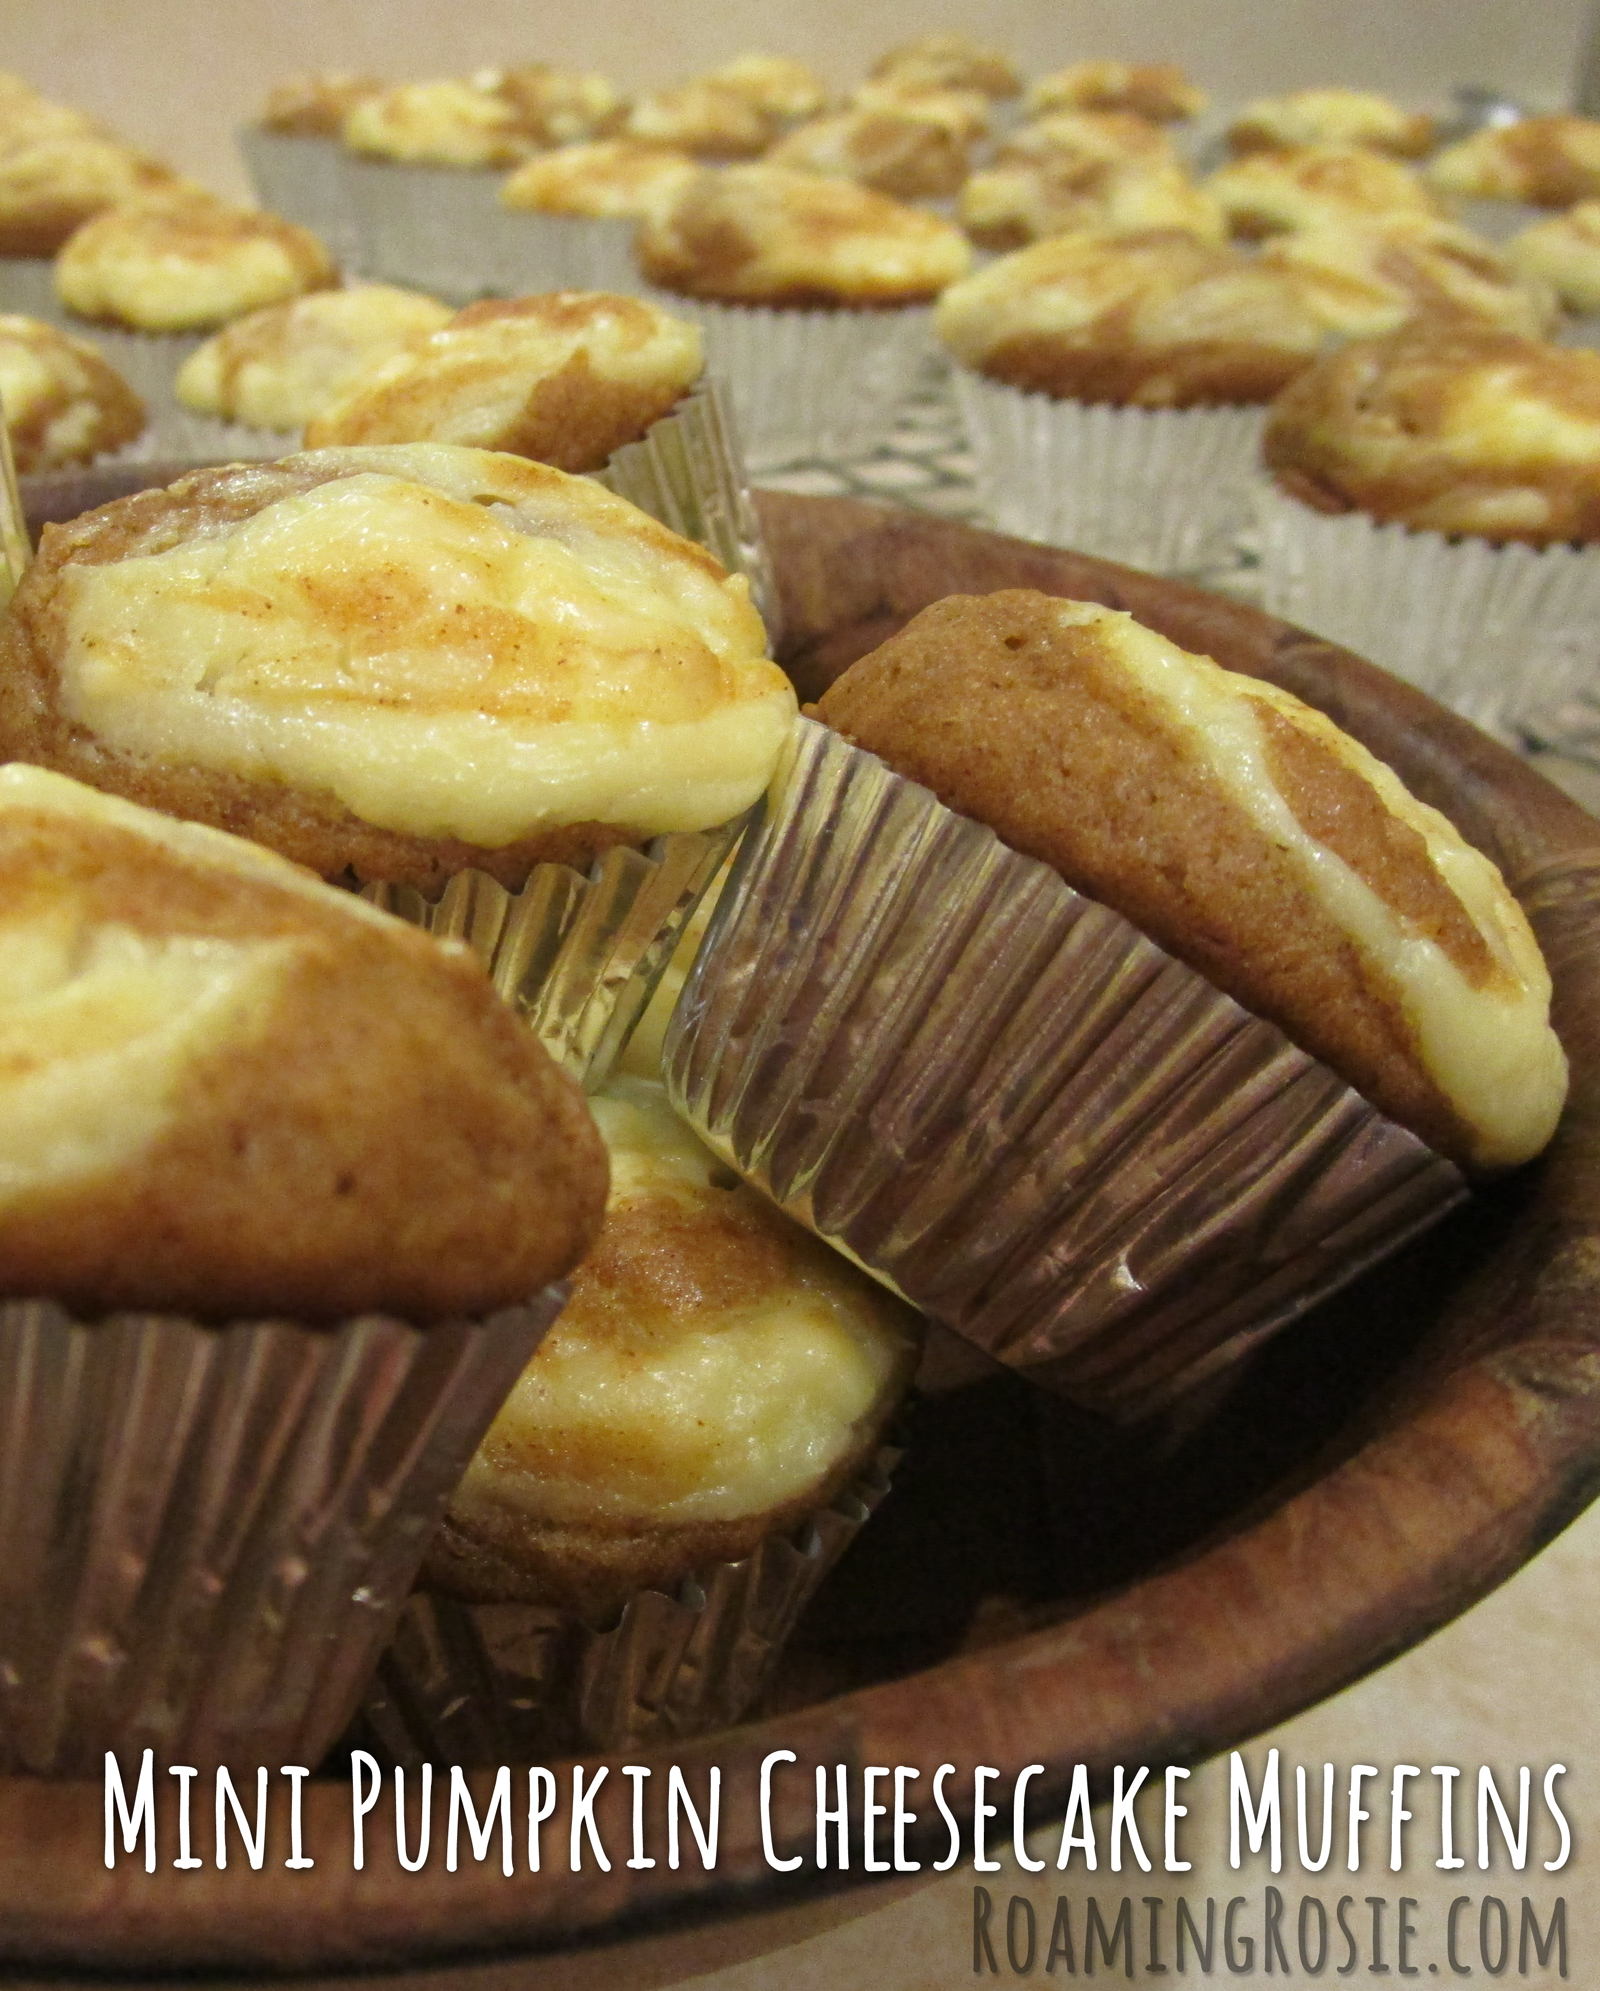
Mini Pumpkin Cheesecake Muffins

Mini Pumpkin Cheesecake Muffins Recipe

These Mini Pumpkin Cheesecake Muffins are incredibly moist and flavorful.

A combination of pumpkin puree and virgin coconut oil, blended with a healthy helping of cinnamon, give these muffins a layered dimension of flavor in every bite.

And, really, these mini muffins can function as one giant bite apiece, but I suggest savoring them.

Especially with coffee.

I’ve been wanting to create a pumpkin muffin recipe for a while, and I wanted to incorporate coconut oil.  I’m really glad I did, because I feel that the coconut oil was what pushed these over the edge of awesomeness and made them totally irresistible.

mini-pumpkin-cheesecake-muffins-2

Above are of some of the ingredients.

The cream cheese goes towards the cheesecake filling that is used to top these muffins with a deep swirl of melt-in-your-mouth smoothness.

I used more cinnamon that I find is called for in similar recipes.  I like to taste my spices.

But there’s no nutmeg.  I know people often put it in pumpkin recipes, but I do NOT eat nutmeg.  It’s too strong and, at least for me, it distracts from the other flavors.  I find that cinnamon is a wonderful compliment for pumpkin, but if you really, really love nutmeg, then you can toss in a smidgen.  If you must.  But it’s unnecessary.  (Don’t do it.)

Plus, you can use vegetable oil if you don’t have coconut oil handy, but the coconut oil adds so much flavor that it’s worth the effort to pick some up if you don’t already have it on hand.  Like I said, it’s the turning point for intense flavor and moisture.

Virgin or extra virgin coconut oil will have a stronger coconut taste and aroma, so that’s the best to use.

mini-pumpkin-cheesecake-muffins-4

And you do lose some health benefits by melting the oil (which is solid at room temperature) in the microwave, but when I’m baking while heating something for dinner after working a full day… I take shortcuts.  Didn’t feel like washing a saucepan.

Just make sure if you melt the oil in the microwave, that you do it on 50% and for no longer than necessary.  About 30 seconds at a time.

mini-pumpkin-cheesecake-muffins-3

Sift together the flour, baking soda, salt, and cinnamon with a fork or whisk until the colors are completely combined and the cinnamon is evenly distributed.

mini-pumpkin-cheesecake-muffins-5

Mix together the sugars and wet ingredients.

I just used a fork.  (Shortcuts means not pulling out the mixer.)

mini-pumpkin-cheesecake-muffins-6

This time, I actually blended the sugars and pumpkin first, then added the oil and eggs, but you could throw all of it together at the same time, too.

As long as it’s all well blended.

Then you’ll gradually add in the flour mixture.  Do not overmix it, though.  It should be smooth, but if you beat it too much the muffins may be tough.

mini-pumpkin-cheesecake-muffins-7

Here are the filling ingredients.

Again:  just mixed it with a fork.
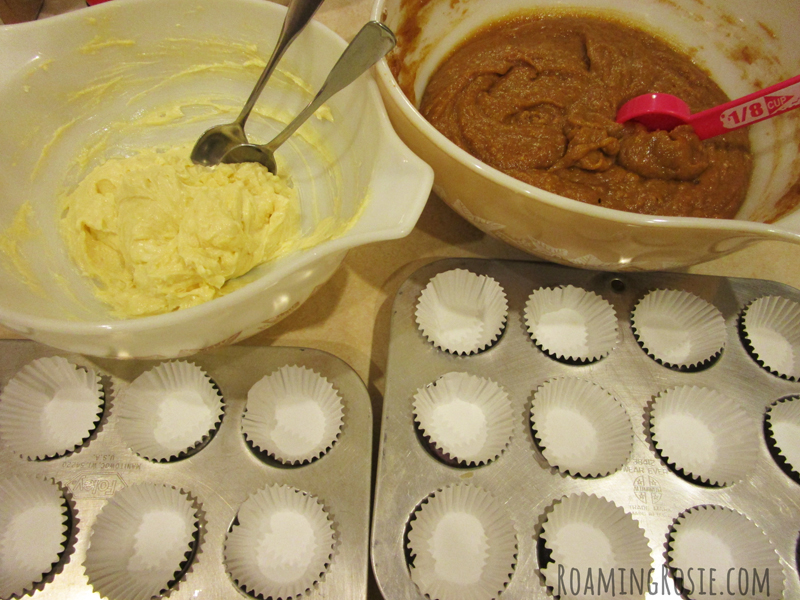
mini-pumpkin-cheesecake-muffins-8

I had considered layering the pumpkin mix, then cream cheese mix, and then more pumpkin, but I’m glad I decided against it.  This method was easier and, as long as you swirl it, the cream cheese mixture still makes it into the center of the muffin.

Fill the mini cupcake liners about 3/4 full with pumpkin batter, then dollop about a teaspoon of the cream cheese mix on top.
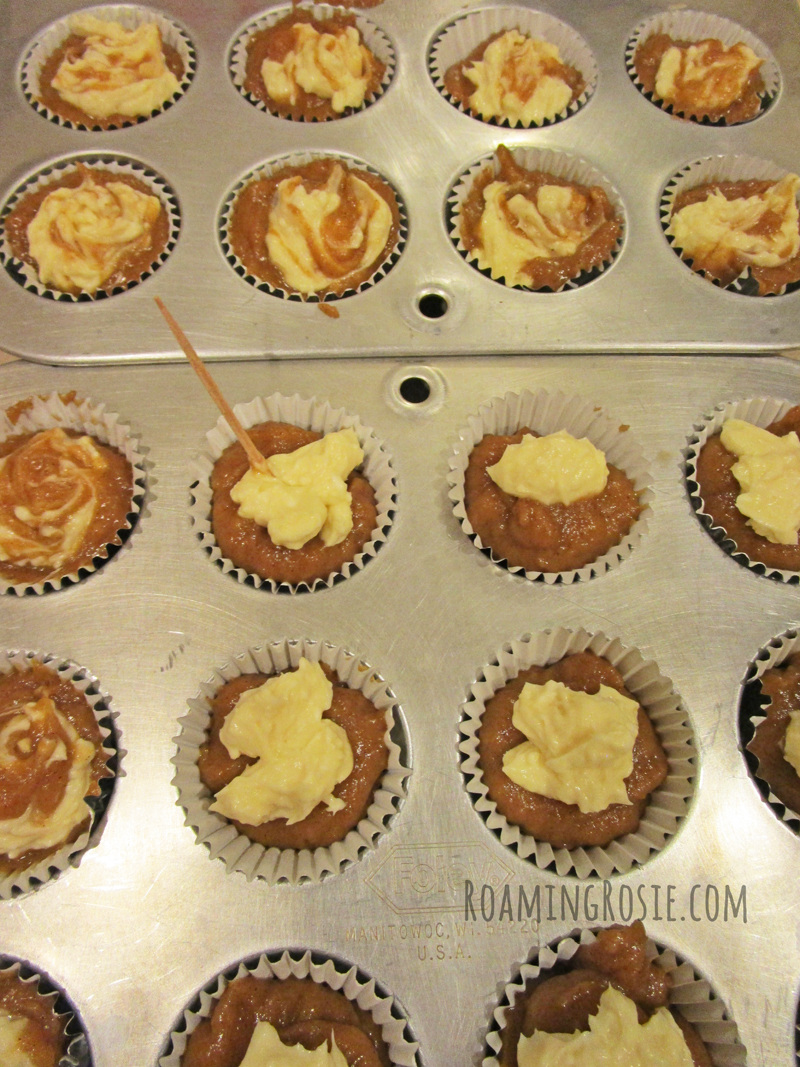
mini-pumpkin-cheesecake-muffins-9

Next, you’ll swirl a toothpick through the muffins, which will drag the cheesecake portion over the top and mix it into the center, too.

Don’t over do it.  You’ll want some large chunks of cheesecake, so don’t swirl it to the point of thinning it out so much you can barely see the cream cheese any more.

mini-pumpkin-cheesecake-muffins-10

Doesn’t that look AMAZING???

And they taste even better.

You can eat them right out of the oven, but I prefer them at room temperature.  They should be stored in the refrigerator, because of the cream cheese, but can be left our for a while without spoiling.  (I ate a few of the ones I’d brought into work and left out in the break room all afternoon, before putting them back in the fridge at the end of the day.  They were fine.)

I suggest serving them at room temperature, but they’re also good cold right out of the fridge.

I haven’t tried freezing them.  They were gone in a few days!  ;)

mini-pumpkin-cheesecake-muffins-11

Mini Pumpkin Cheesecake Muffins

Ingredients:
1 3/4 cups all-purpose flour
1 tablespoon ground cinnamon
1 teaspoon baking soda
1/4 teaspoon sea salt
1 (15 oz.) can pumpkin puree
1 cup granulated sugar
1/2 cup dark brown sugar, packed
2 large eggs
1/2 cup melted coconut oil, room temperature
1 tablespoon vanilla extract

Cheesecake filling:
8 oz. cream cheese
1/4 cup granulated sugar
1 large egg yolk
1 teaspoon vanilla extract

Preheat oven to 375° F (190° C).  Prepare mini muffin pans with 5 dozen mini cupcake liners.

In a small bowl, mix flour, cinnamon, baking soda, and salt with a whisk or fork.  In a large bowl, use a mixer or a fork to cream together pumpkin, granulated and brown sugar, eggs, oil, and vanilla.  Gradually incorporate the flour into the pumpkin mixture until batter is smooth.  Do not overmix.

Make the cheesecake filling by creaming together the cream cheese, sugar, egg yolk, and vanilla extract.

Fill each cupcake liner 3/4 full with pumpkin batter.  Top each with approximately a teaspoon of cheesecake filling.  Combine by gently swirling a toothpick through the batter.

Bake for 14 to 18 minutes, or until a toothpick inserted in the center comes out clean.  Let sit in pan for two minutes, then transfer to a rack to cool completely.

Store covered in the refrigerator.  Serve at room temperature.

[Note:  I use virgin coconut oil because it has wonderful taste and aroma of coconut that compliments the muffins, but you can substitute vegetable oil if you need to.]

Here is the free printable PDF:

Mini Pumpkin Cheesecake Muffins Recipe

Happy Baking!

Roaming Rosie Signature

Save

Graveyard Brownie Halloween Cupcakes

Graveyard Brownie Halloween Cupcakes

These Graveyard Brownie Cupcakes are SO MUCH FUN to make (and eat!) and very, very rich.

If you’re a chocolate lover, then you need to try these!

To make them a little less decadent, you could make regular cupcakes in place of the brownie base, and even try a milder flavor like yellow cake dyed orange.

But I was in need of some heavy-duty chocolate.  This hit the spot.

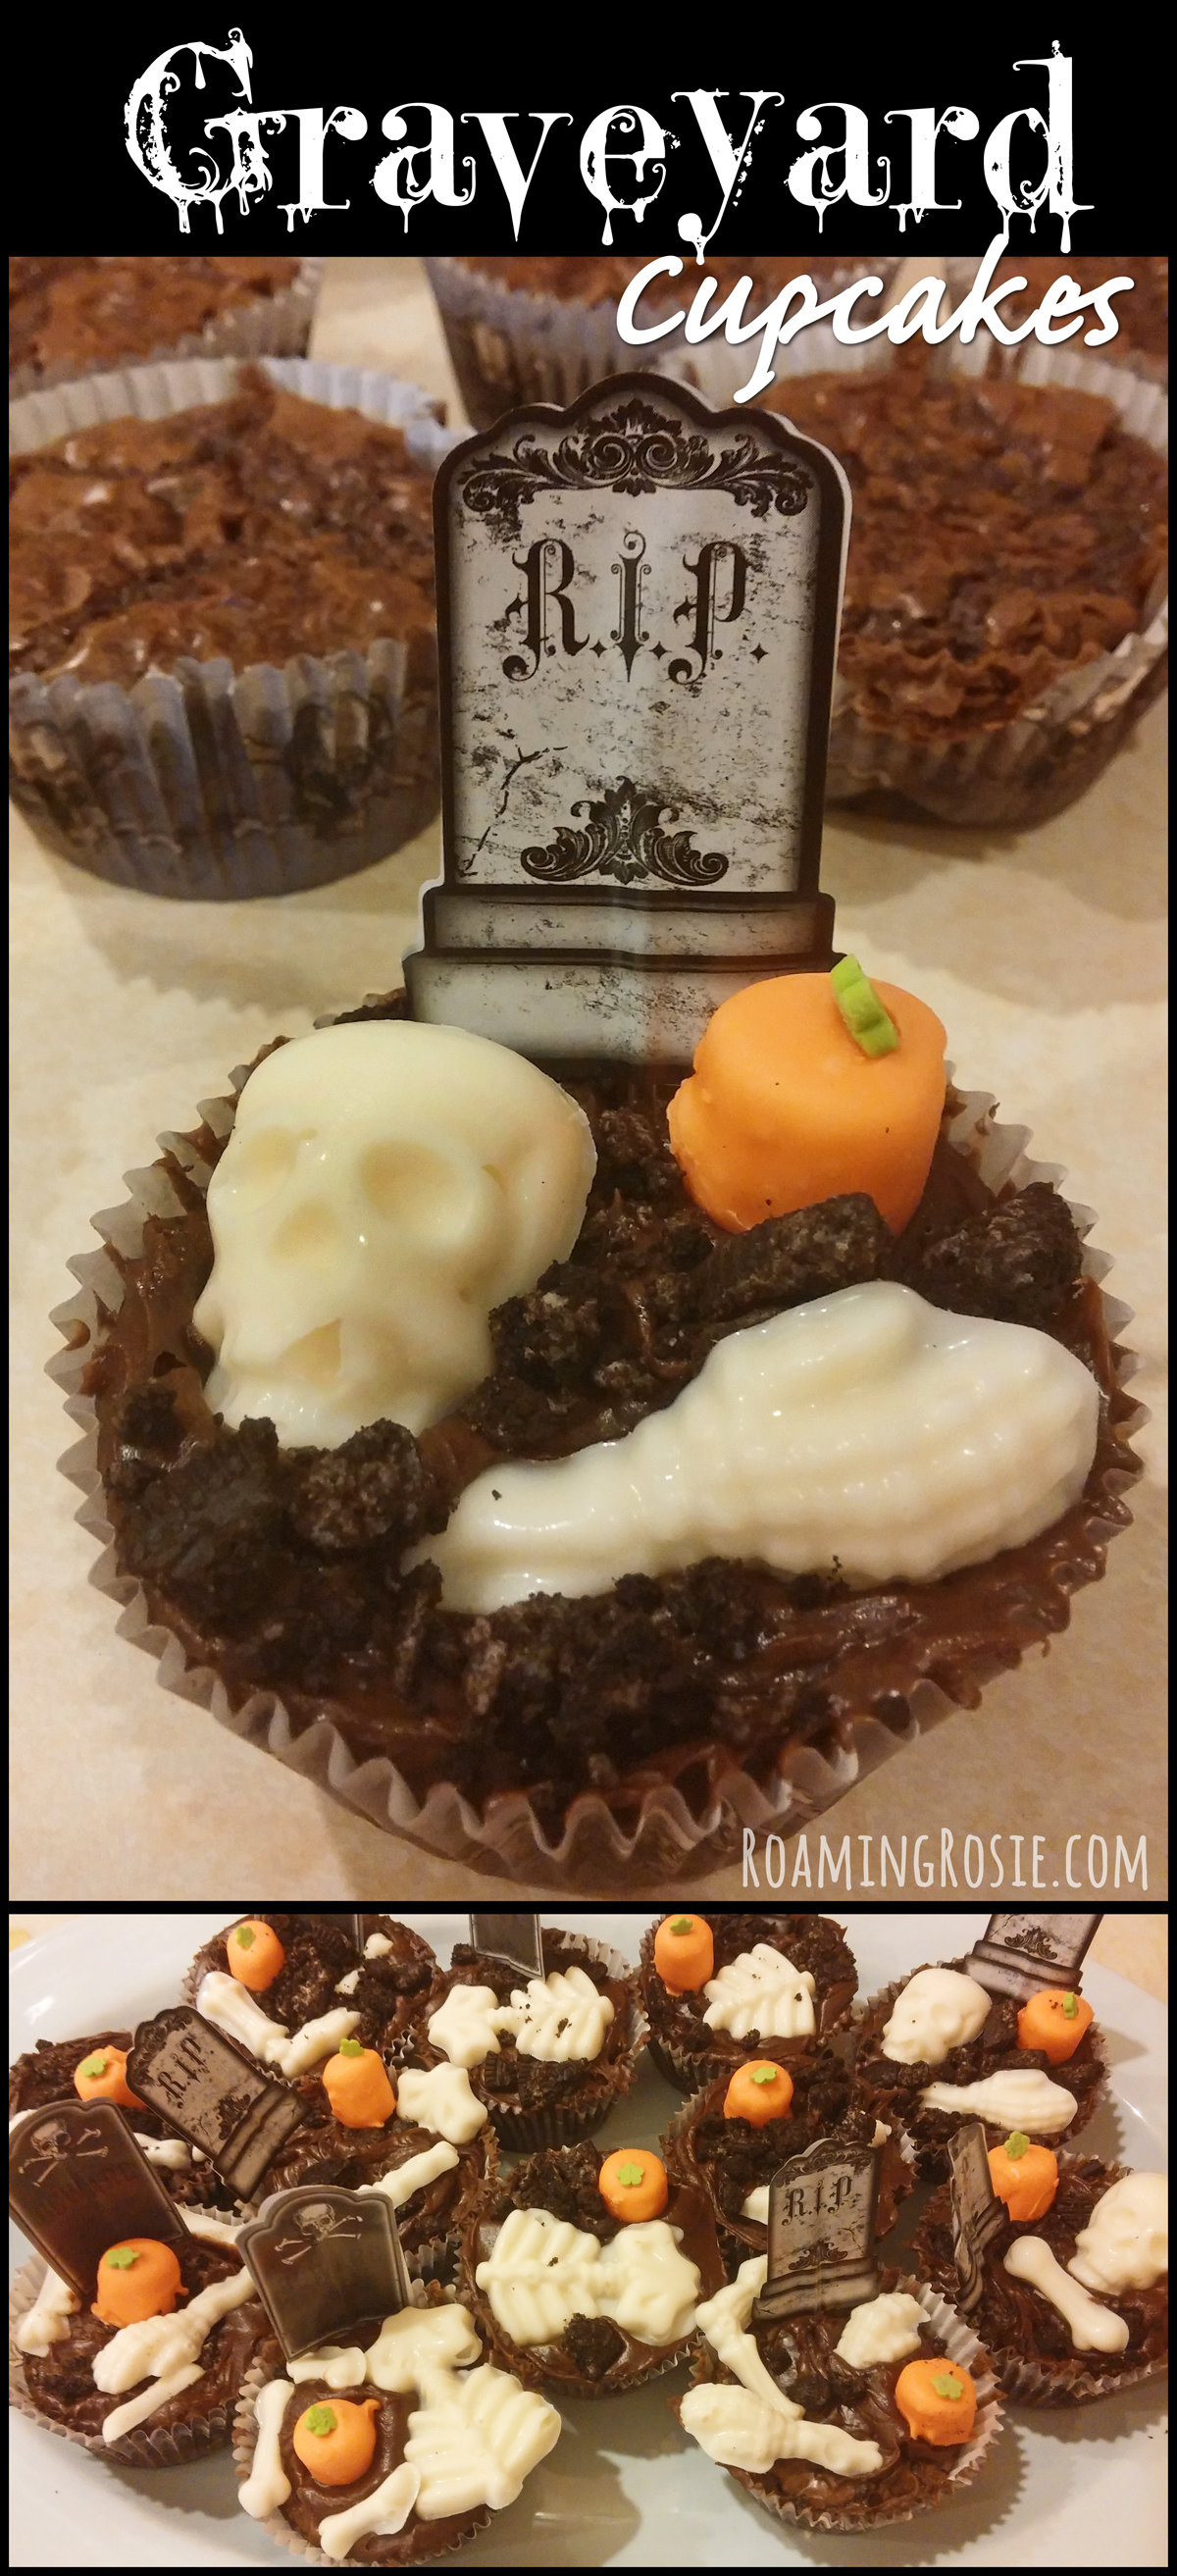
graveyard-brownie-halloween-cupcakes-2

The first thing I did was make some of my Chocolate Covered Marshmallow Pumpkins with my girls.  We made them the day before.

Then we melted some white candy melts to make the chocolate bones using this skeleton mold from Wilton.

We crushed up a handful of Oreo cookies in a plastic bag for our graveyard “dirt,” and we baked up some box brownies according to the package directions.

I’d thought about making the brownies in a big pan to construct a large graveyard scene, but then switched to the cupcake idea.

I was going to use regular cupcake lines and write RIP in icing on some Milano cookies for the gravestones, but then I found these cute graveyard cupcake liners that come with their own paper gravestones on toothpicks.  I happened upon them at Walmart, but there are similar products online and at other stores, too.

graveyard-brownie-halloween-cupcakes-3

We let the brownies cool completely, then iced them with chocolate icing.

We pressed in the graveyard picks and some pumpkins and bones into the icing, before sprinkling over a little of the Oreo dirt.  (If you sprinkle the cookie crumbs first, the chocolate pieces won’t stick into the icing.)

Then we savored the festively decedent chocolate culinary celebrations.

I recommend you share them, and not attempt to eat 18 thick piles of chocolate all by yourself.  Because:  wow.  ;)

Graveyard Brownie Halloween Cupcakes

Happy Halloween Baking!

Roaming Rosie Signature

Save

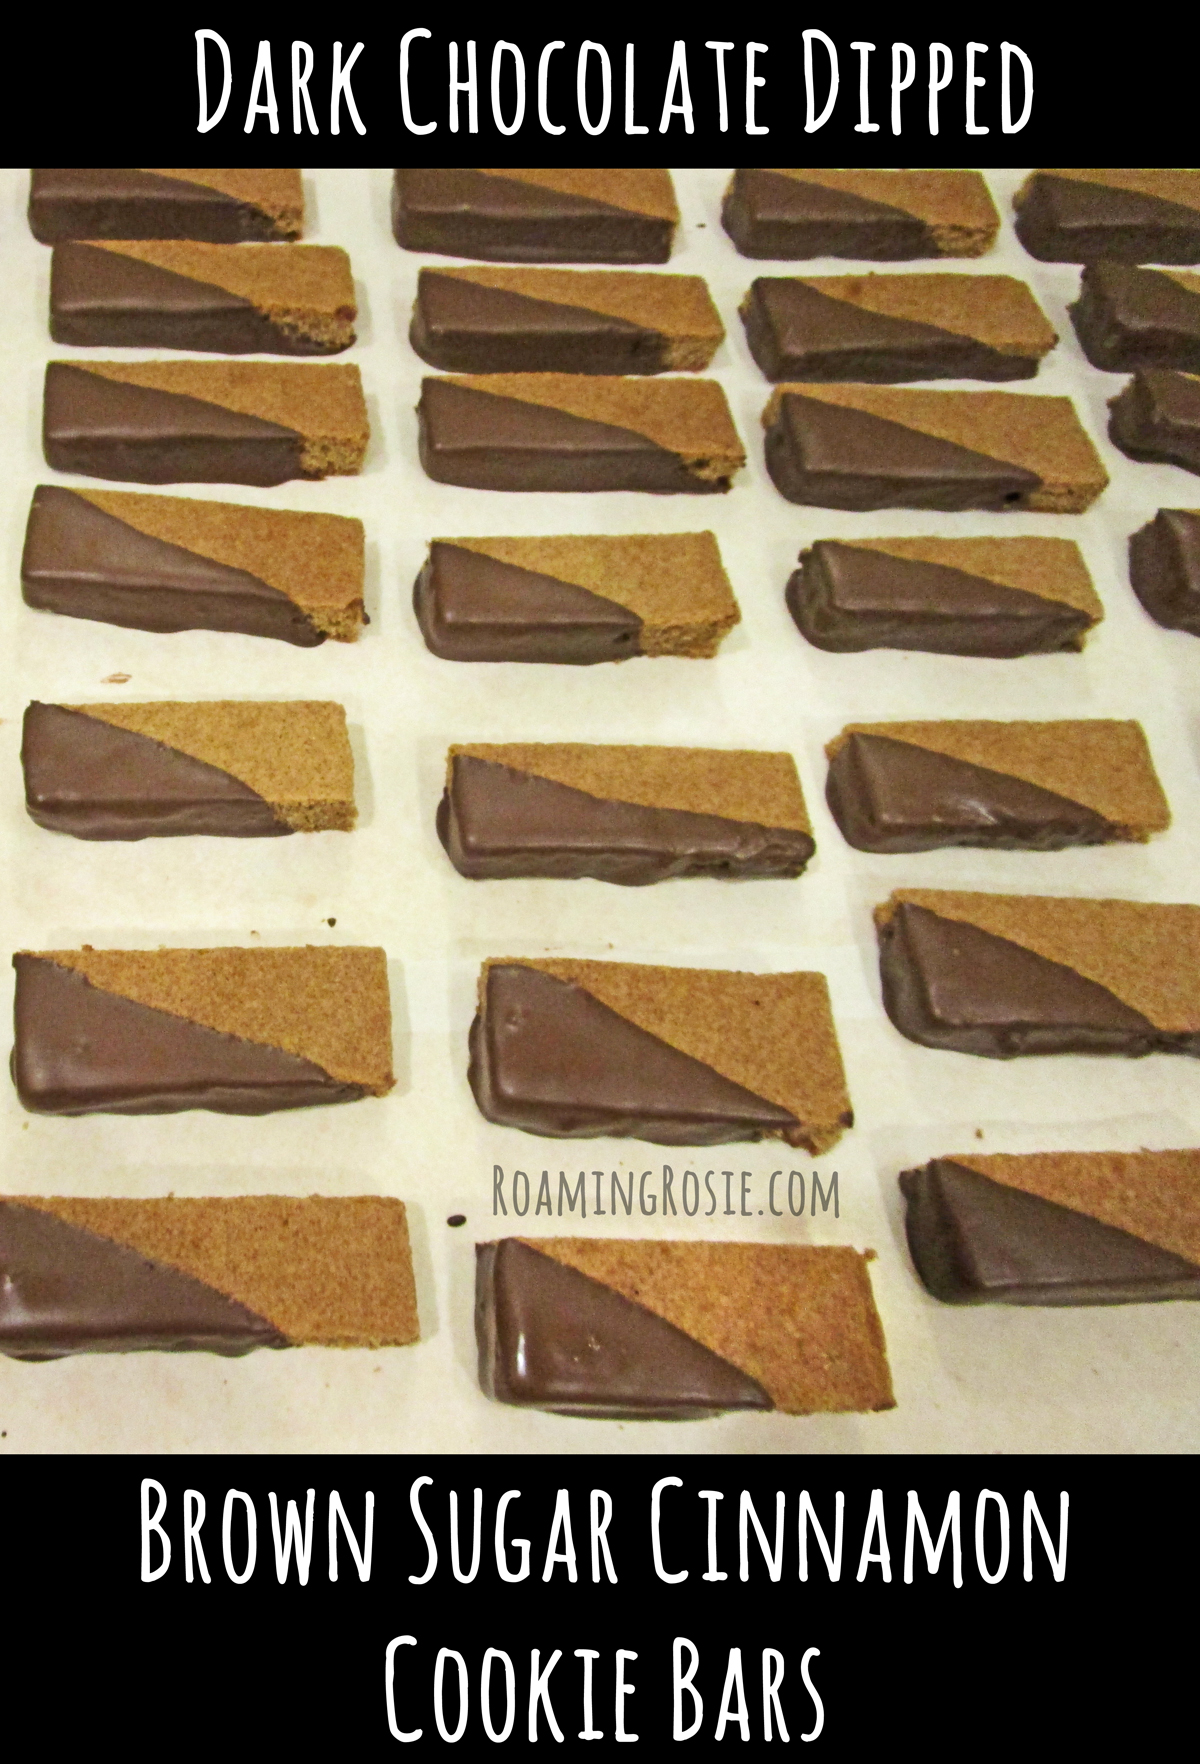
Dark Chocolate Dipped Brown Sugar Cinnamon Cookie Bars

Dark Chocolate Dipped Brown Sugar Cinnamon Cookie Bars

I’ve been wanting to make cinnamon cookies for awhile.  And, apparently, my new obsession is dipping things in chocolate.

This particular recipe is a thick, cake-like cookie with a strong hint of cinnamon and an emphasis on brown sugar.

And the chocolate just makes it incredibly amazing.

Plus – and this is my favorite part – that thick cookie soaks up warm coffee like it was born for it.  It’s like the perfect breakfast.  (And dessert.  And snack.)

Dark Chocolate Dipped Brown Sugar Cinnamon Cookie Bars

All the good stuff.

Theoretically you could use light brown sugar … but then you’d be missing out on the extra oomph of molasses.

Dark Chocolate Dipped Brown Sugar Cinnamon Cookie Bars 4

We’re getting there…

Dark Chocolate Dipped Brown Sugar Cinnamon Cookie Bars 5

Coming together…

(I’m getting excited.)

Dark Chocolate Dipped Brown Sugar Cinnamon Cookie Bars

Not that I promote eating raw cookie dough or anything but… ohmygosh this stuff is like a gooey pile of heaven.

But it’s a little sticky too, so use nonstick cooking spray to coat your hands before spreading it in the pan.

It will be thin, but that’s okay – it’s gonna rise.  Just make sure there are no holes allowing the pan to show through.

Dark Chocolate Dipped Brown Sugar Cinnamon Cookie Bars

Yum!  Good stuff right here.

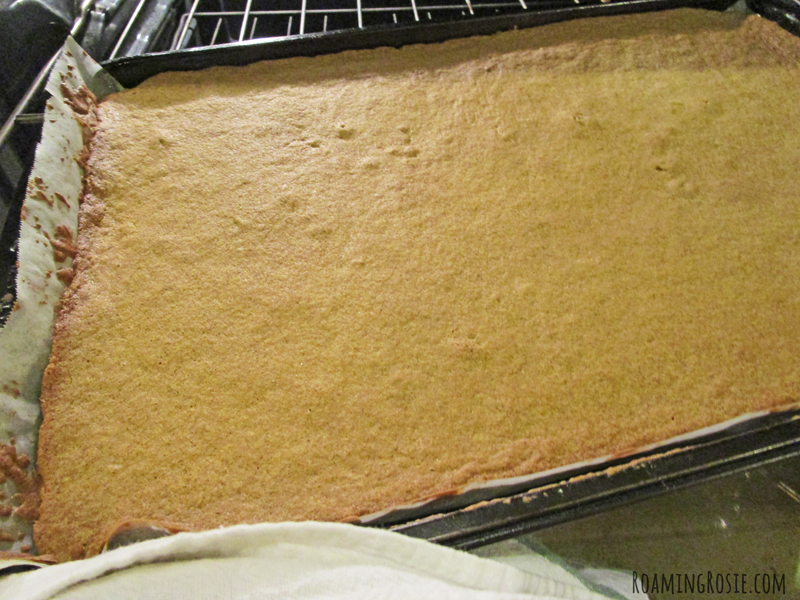
Don’t overbake it, though.  I probably could have cooked this one right here about a minute less, since it’s going to keep cooking just a little when you pull it out.  The cookie needs to cool completely in the pan.

Dark Chocolate Dipped Brown Sugar Cinnamon Cookie Bars

When you cut your cookies, they will present a nicer display if you trim off the crispy edges.

You can see my “edges” in the photo above.  They were a little larger than necessary, but, you know, those were the parts that didn’t make it to the pot luck.  ;)

Dark Chocolate Dipped Brown Sugar Cinnamon Cookie Bars 9

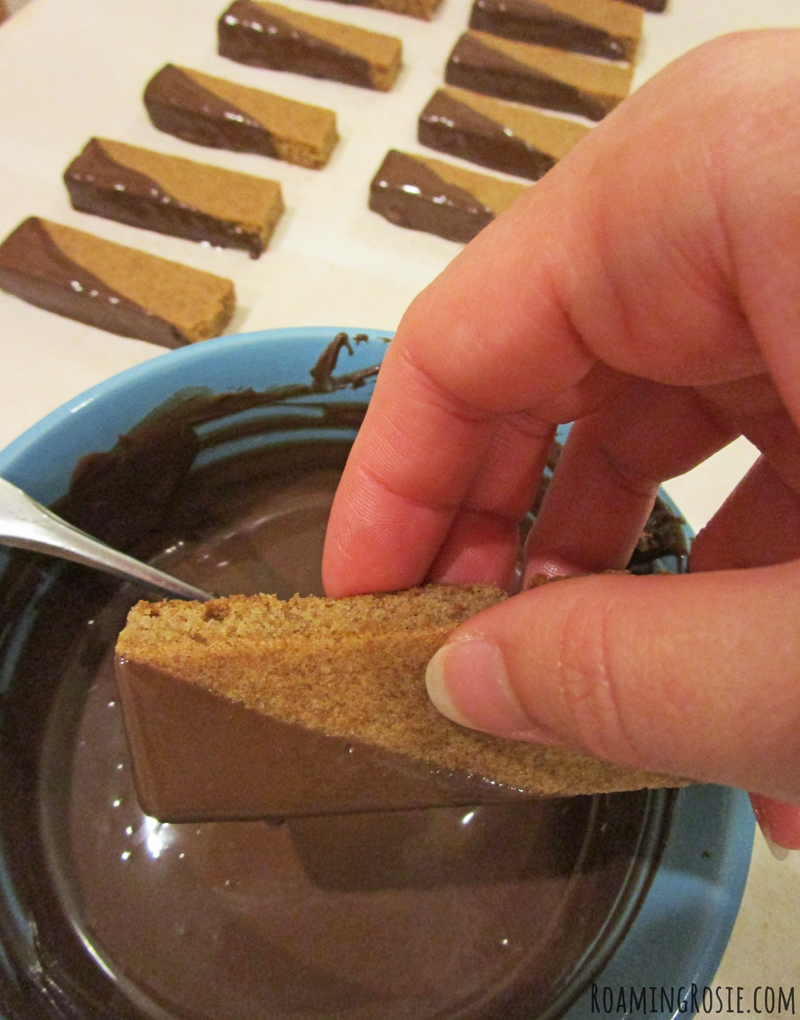
You could dip them into chocolate any way you want, but I certainly recommend using dark chocolate.  It has a nice deep flavor that complements the cookie.

I like the way it looks when you dip the corner, but technically you could dip just the bottoms or a full half of the cookie instead.

Dark Chocolate Dipped Brown Sugar Cinnamon Cookie Bars 10

Or drizzle the chocolate over it.

Were you still thinking about those “edges” I mentioned?  Here they are (above).  I drizzled the leftover chocolate over them.  For parties I think the dipped corners are gorgeous, but the drizzle does the job too.

Dark Chocolate Dipped Brown Sugar Cinnamon Cookie Bars 11

Did I mention these were amazing with coffee?

Did I only mention it once?  ‘Cause these are uh-mazing with coffee.

(Even if you accidentally put too much creamer in your coffee.  Still amazing.)

Dark Chocolate Dipped Brown Sugar Cinnamon Cookie Bars

Dark Chocolate Dipped Brown Sugar Cinnamon Cookie Bars

Ingredients:

2 cups flour
2 tablespoons ground cinnamon
1/2 teaspoons baking soda
1/4 teaspoons sea salt
1 cup (2 sticks) butter, softened
1/2 cup granulated sugar
1 cup dark brown sugar, packed
1 teaspoon vanilla extract
2 eggs
10 oz. dark chocolate (I used Ghirardelli Dark Chocolate Melting Wafers)

Preheat the oven to 350°F (180°C).  Line a 15 by 10-inch jelly roll pan, or baking sheet with sides, with parchment paper.

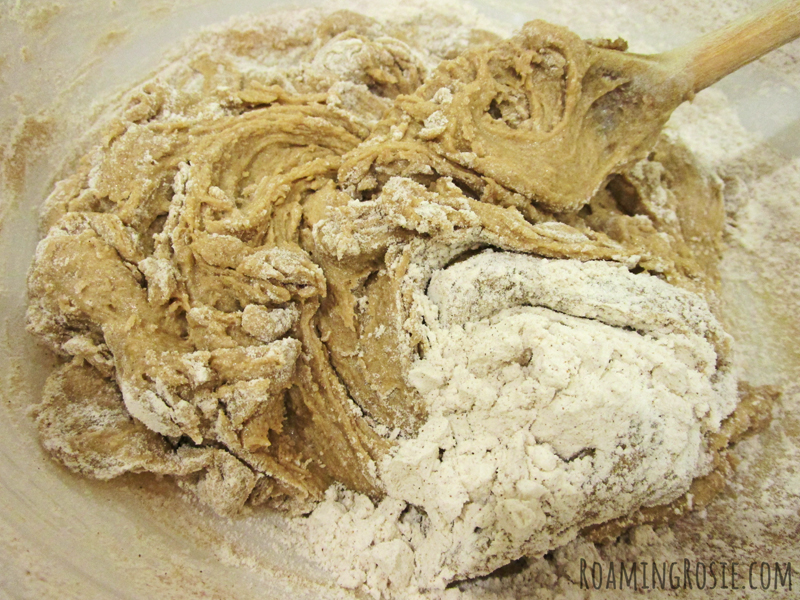
In a small bowl, combine the flour, cinnamon, baking soda, and salt.  In a large bowl, cream the butter and sugars.  Stir in the vanilla and the eggs, one at a time.  Add in the flour mixture, a little at a time, until fully combined.

Spread the dough onto the baking sheet.  It is easier to work with if you lightly coat the parchment paper and your hands (or spoon) with nonstick cooking spray.  The dough will be a little wet and it will be very thin in the pan.

Bake for 20 to 22 minutes.  Place pan on a cooling rack and allow cookies to cool fully in pan.

Slice the cookies into bars by first trimming off the crispy edges.  Cut three rows lengthwise, then slice those pieces about an inch thick.  You’ll have about 4 dozen cookies that measure about 1 by 3 inches.

Melt the chocolate according to the package directions.  Dip each cookie into the chocolate then place the cookie onto parchment or waxed paper to allow chocolate to set.  Store covered.

********

Click below for the free printable PDF recipe with photos:

Dark Chocolate Dipped Brown Sugar Cinnamon Cookie Bars

Happy Baking!

Roaming Rosie Signature

Save

Ginger Cookie Truffles

Ginger Cookie Truffles 1

So the other day I was sitting there thinking:  if people make Oreo Truffles all the time, can I make truffles out of other cookies too?

The answer is OH VERY YES.

And the more specific answer would be DUDE IF YOU LIKE SPICE COOKIES/CAKE AT ALL YOU TOTALLY HAVE TO TRY THESE RIGHT NOW.

I chose these ingredients because I’m a big fan of spice cakes and gingerbread cookies and things like that.  My mom can practically live off of ginger snaps.  And fall is on its way.  (Or maybe it’s already here.  I’m not sure:  I live in Florida.)

Ginger Cookie Truffles 2

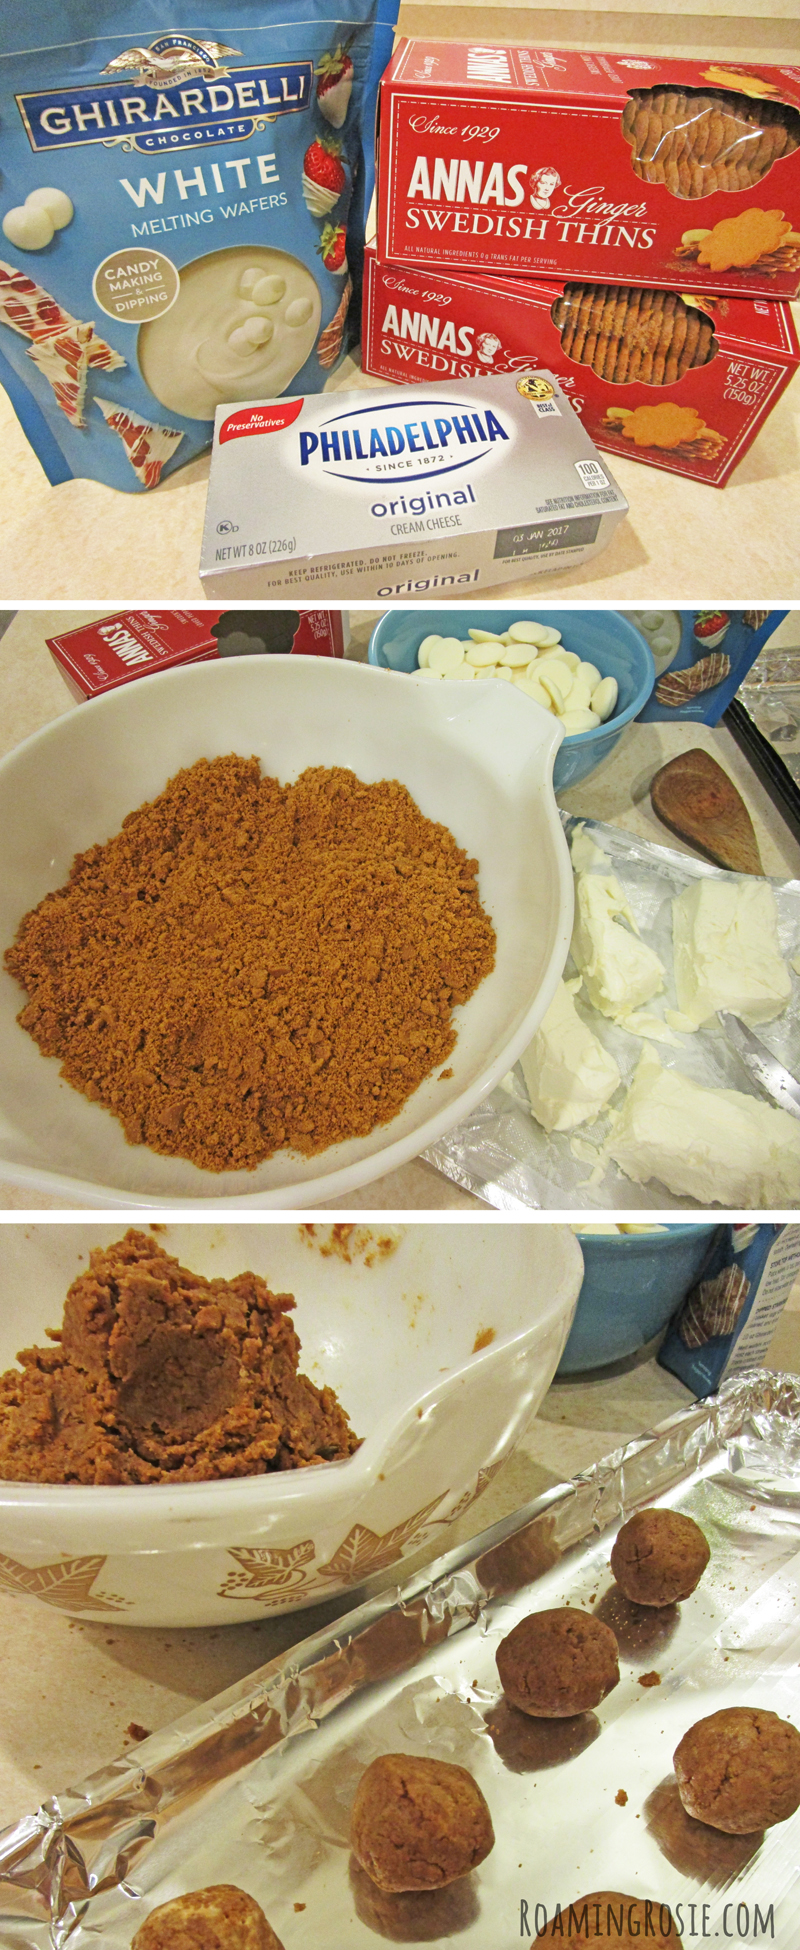
Anyway, these truffles are basically a combination of cookie crumbs and cream cheese smushed together and dipped into white chocolate.

Then, for a fun touch, drizzled with a little cinnamon chocolate.  Just ’cause.

Ginger Cookie Truffles 3

It took me a little bit of forever to crush up all the cookies because my food processor broke, but it wasn’t difficult.

I like these ginger thins because they’re pretty crispy, which made for great crumbs.

I’m sure you could substitute a different cookie, but you might have to adjust your amounts, and – you know – these ginger thin cookies are incredible so why would you??

Unless you come up with something better – then please let me know.  Food is my favorite type of experiment.  ;)

Oh, and if you’re wondering, I picked up all of my ingredients at Walmart.  But you can also get them online if you can’t find these things locally.  I totally swear by those Ghirardelli wafers.  They seriously rock both in the ease-of-use and taste categories.

Ginger Cookie Truffles 4

The end result?

A silky smooth creamy center exploding with spice and encased in a mildly sweet chocolate that’s decorated with just a hint of cinnamon.

They look good and taste even better.

Ginger Cookie Truffles 5

Ginger Cookie Truffles

Ingredients:

10.5 oz. (2 boxes) Anna’s Swedish Thins or other ginger cookies
8 oz. cream cheese, softened
10 oz. white chocolate (I used Ghirardelli White Melting Wafers)
1-2 teaspoons ground cinnamon (optional)

Crumble the ginger cookies in a food processor or by hand until finely ground.

Mix the cream cheese into the cookie crumbs until well combined and smooth.

Scoop out large teaspoonfuls of the cookie mix and shape into balls.  Place the balls on a tray lined with parchment paper or tin foil.  Freeze for 10 to 15 minutes.

Melt the white chocolate according to the package directions, stirring until smooth.  Take out the cookie balls and dip them into the chocolate using a fork, one at a time, until fully coated.  Shake the fork to allow excess chocolate to drip back into the bowl.  Set the truffles on a sheet of parchment or waxed paper until chocolate hardens, using the side of a second fork to push the truffle off the first fork.

When all the truffles are done, sprinkle a teaspoon or two of cinnamon into the remaining chocolate, depending on how much chocolate is left, and stir to combine. Then use a clean fork to drizzle the cinnamon chocolate over the truffles.

Allow to fully set, then store in the refrigerator.

Makes about 2 dozen.

********

Click here to print the free PDF of the recipe:

Ginger Cookie Truffles

Happy Eating!

Roaming Rosie Signature

Polka Dot Peanut Butter Bananas

polka dot peanut butter bananas

I gotta tell ya . . . ever since I was a kid, I could just never get into Ants on a Log.

You know those things where people spread peanut butter over pieces of celery and dot the peanut butter with raisins meant to resemble little bugs?

Yeah.  I can’t stand celery.

It’s one of those things that I do – very, very occasionally – cook with.  Like in soups.  BUT, I dice up the celery super small and use less than what’s called for.

In other words, if I don’t like the taste and texture of something, I’m not going to eat it as a “snack.”

So, especially considering that I’m not a huge raisin fan either, Ants on a Log was never a thing for me.

Until now.

See, bananas I like.  And combine them with peanut butter and chocolate chips, and BOOM:  super awesome.

Seriously.  The combo kind of tastes like cookies or cheesecake.  It’s like a dessert, but in a slightly healthy snack.  Well, it’s fruit anyway.  And you could use any type of nut or seed butter.

Best part?  The kids can make these treats themselves.

I went ahead and sliced the bananas in half and then in half again (to make four quarters out of one banana, which was easier for their little hands to hold), but then I gave them plastic knives to scoop and spread the peanut butter, and I put out a little dish of chocolate chips for them to stick in the peanut butter.
So it was interactive for them and they got to eat something they made.

Ridiculously simple and ridiculously good.

Happy Eating!

Roaming Rosie Signature